One of my more preferred textures.. I am simply calling this one Ice, since that's
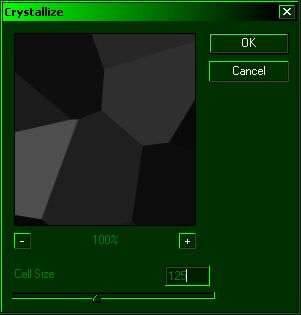
what the finished design resembles, somewhat. I am going to assume anyone reading this has skimmed over my previous tutorials, so I will skip the image of the Difference Clouds step this time. ( Ignore the green browser colors. I got bored with gray, so I switched my browser colors to green. Nyah. ) Ok, go to Filter > Render > Difference clouds. Repeat this step 2 or 3 times, until you get a cloud pattern you like. Now, go to Filter > Pixelate > Crystalize, then apply these settings, or close to them: |
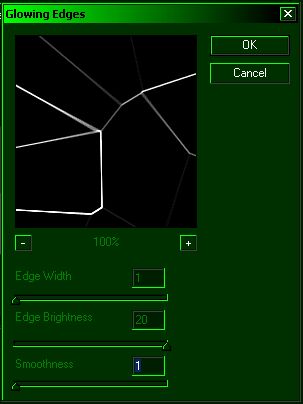
After that, go to Filter > Stylize > Glowing edges, using these settings. Edge width: All the way to the LEFT. Edge brightness: All the way to the RIGHT. Sharpness: All the way to the LEFT. Here's a screencap of the settings, and how your design should look so far. |
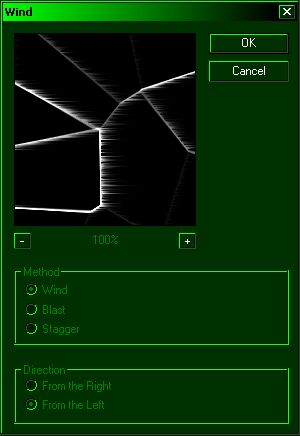
Afterwards, go to Filter > Stylize > Wind, then use these settings, pictured
below: |
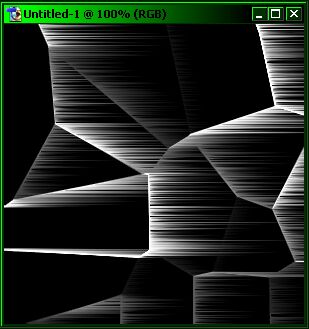
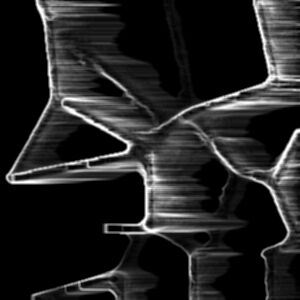
After that, click on Filter > Wind TWO times. NO MORE NO LESS. Doing so
correctly will give you the effect below: |
Alright. You're almost done. Now, go to Filter > Blur > Blur More. Do it more
than once, if you wish, or only do it once. Your choice. That's it. You're done! If you want to make it look somewhat like an ice-cicle effect, go to Image > Adjustments > Rotate, and flip them image as you please.. Here's the finished deal: |
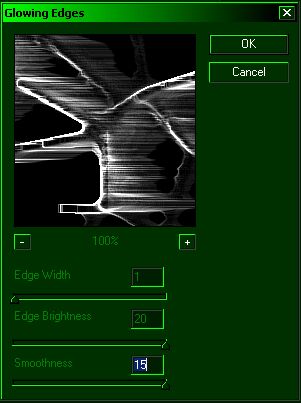
Getting close to being done. w00t! Alright, for your next step, go to Filter >
Stylize > Glowing edges (again). When the options prompt comes up, simply slide the smoothness all the way to the RIGHT. Here's a cap of what you should do, and the effect. |