Alright. In this short tutorial, I will show you how to create what I simplistically
call the “Static Ball” design.. (Corny name, eh?) Alright.. Start off with a blank 300 x 300 pixel image. - Color the background black in color. (The paint bucket took can be found by right-clicking on the 'Gradient' tool.) - Go to Filter > Render > Difference clouds. Do this two times. I have found that the randomly generated clouds appear better on the second one. Here is how your progress should be coming along, so far.. |

Alright. Moving on.. Go to Filter > Distort > Pinch, then apply this setting
in the pop-up prompt. (All you have to do is slide the bar to the right.). |

Now, here is a crucial step. Click on Filter > Pinch. You'll know this instantaniously
applies the Pinch filter, now. (This is because it was the last thing you used. If you had applied a Wave filter, for instance, 'Wave' would be available, instead of 'Pinch'.) Anyway.. Click Filter > Pinch close to 10-20 times. Afterwards, you'll have something along the lines of this result: |

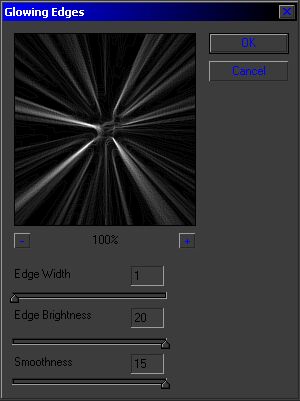
Now, for the final step in the design. Go to Filter > Stylize > Glowing Edges.
When the pop-up window appears, use these settings.. |
Click 'OK' after entering in those settings, and you are left with the finished result.
This! |

You don't have to stop there, though. You can create many cool modifications to it.
One of them is the Filter > Distort > Twirl filter. Try that one, for an interesting whirl-pool effect! |