Builder’s Notes & Comments
Back
to Airframe Log Index | Back
to Home Page
04 March
03
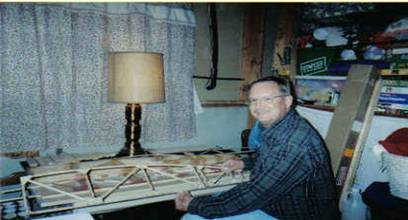
The main rib building is now complete and went
very well. I was able to use the laundry room in my basement for this process.
The temperature was very easy to keep at or above 70 F which everyone says is
the low end of the temp. range for proper drying for the T-88 glue. I have
found the 1/4’’ alum. needed to cut out the nose rib jig.
05 March 03
Went to the E.A.A. to use their metal bandsaw
and cut out the ¼” alum. Nose rib jig and filed it to shape. Also made a repair to one of the main ribs
today due to a sanding mishap. OOPS. Just like Tim the Tool Man Taylor, tried
to use a sander too big for the job. The repair will be fine.
Bringing Home the Steel
14 April
03
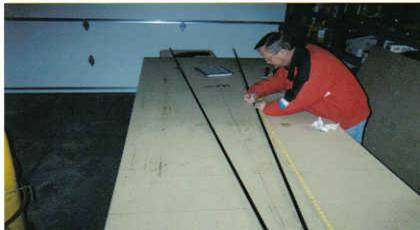
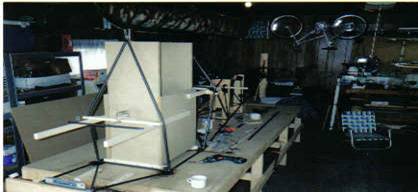
Started on the fuselage today by laying out
the pattern on the bench and cutting the lower longerons and fastening them to
the bench.
________________________________________________________________________
15 April 03
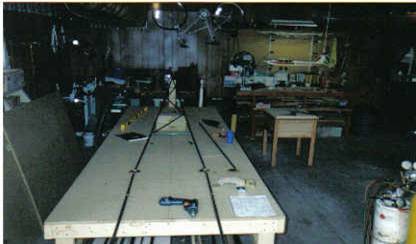
Cut stations # 4, # 5, # 6, # 7 and the
diagonal cross pieces for the aft lower section of the fuselage and tack welded
them all together.
20 April 03
Finally got the courage up to try and bend the
tail up to 17 1/4” above level. Heated station # 3 with the torch and had Steve
and Mike slowly add pressure by lifting while I heated both side
alternately. Went pretty smooth.
21 April 03
Made the jig to hold the tail post in place
while trimming the rear lower longerons to fit the tail-post. Tack welded post
in place.

22 April 03
Made two jigs to hold the top longeron from
station # 4 aft to the tail post. Cut the diagonals for stations 4 & 5, and
tack welded them in place.
27 April 03
Cut diagonals for stations 6 & 7 and tack
welded in place. I am finding out that cutting the diagonal at angles and
trying to fit two 1/2 “ tubes to one 5/8”tube is not easy to do.
Also spent a lot of time trying to figure out
how to go about bending in at station # 3.
28 April 03
Once again found the courage to heat and bend
station # 3 in at the proper angle for the seat area. Went pretty well, but had
to put out two small fires which is to be expected. Cut stations # 3 and # 2
and the diagonal piece and tacked welded in place.
___________________________________________________________
29 April 03
Made the jig to fit inside station # 3 to
support the wing attachment tube. I was assisted by my expert helper, Tracy my
favorite sister and my only one at that I might add. Just kidding.
Spent a lot of time trying to line the wing
attach tube up with a plumb - bob to the center line that was drawn on the
bench. Once I was happy with the alignment I secured the tube down with 3/4” copper straps. They fit
very well around 5/8” 4130 tubing.
04 May 03
Cut length and angles on all four tubes and
station # 3 and both rear wing attach supports and tack welded in place. It’s
starting to look like a fuselage now.
05 May 03
Cut to fit aft
longeron that goes from the wing tube to station # 4 as well as the curved seat
back and cabin diagonal support that go from the rear wing supports to station
# 2. And tack welded all in place. (Note)
Bauken Noack, Tracy’s husband who works at the E.A.A. did the bending of
the seat back, and must add that he did an exceptional job.
06 May 03
Made a table extension of approximately 2 1/2
FT so I can bend in and up at the proper angles at station # 2. and add lower
cross support at station # 1. Tacked station # 1 in place.
07 May 03
Cut and fit the uprights at station # 2 and
the forward wing attach tubes, tacked all in place and made jig for station #
1. Cut the top nose supports but did not tack in place.
Made temp. Jig to fit and tack weld the
remaining pieces for station # 1.
08 May 03
Cut both diagonal supports for nose section,
tack welded all of the remaining pieces of station # 1 in place at the lower
longeron # 1 area. Cut and tack welded both windshield tubes in place.
09 May 03
Cut and fit the
“V” bars for the engine mount on station # 1 and tack welded in place.
10 May 03
Took out the box structure in the cock-pit
area that held the wing attach tube in place and cut and fit the vertical and
horizontal tubes for the seat bottom and seat back and tack welded in place.
29 May 03
Went to the EAA restoration shop and used
their metal brake and shear to cut the strips for the seat cradle.
Back
to Airframe Log Index | Back
to Home Page