Builder’s Notes & Comments
Page 3
Back
to Airframe Log Index | Back
to Home Page
14 Sept. 03
Started
trimming up the ribs today. started by using a flush cutting router bit to trim
all of the excess gusset material, then used a scraper to scrape the excess
glue off, then sanded with my electric finish sander. Finished 12 of the ribs
today.
15 Sept. 03
Finished sanding
the last remaining 12 ribs. Jennifer
Johnson, one of my beautiful daughters helped guide each of the four spars
while I trimmed the excess “Flashing” off of the spars with my router which is
mounted up-side down on the building bench.
16 Sept. 03
I used the
alum. nose rib jig to mark all 16 on 1/4 ply and 8 on 1/4 plywood. Cut out the
patterns oversize so they can be routed to the proper shape. Also started to
make all the alum. root and spar fittings. 8 for the spars fittings & 8 for
the strut fittings. 2 for the aileron linkage.
17 Sept. 03
Cut out all 10
of the 1/4” nose ribs and 16 of the 1/8” nose ribs with the router. Marked and
cut out all of the spar strut attach doublers and glued them to the spars on
one side. Just need to drill the 1/2” holes with the forsner bit on the nose
ribs to have them all complete.
![]()
22 Sept. 03
Sanded all four
spars and filed the spar slots in all 24 Ribs.
23 Sept. 03
Trial fit all the
ribs on each of the wing spars. The ribs fit real well but the nose ribs need
to be trimmed a little on the bottom to fit tight. Re-shaped the alum. nose rib jig and
re-trimmed all 24 nose ribs . They fit nice and tight now with no over-hang on
the bottom.

24 Sept.03
Glued the spar
strut wing doublers on the other side of all four spars.
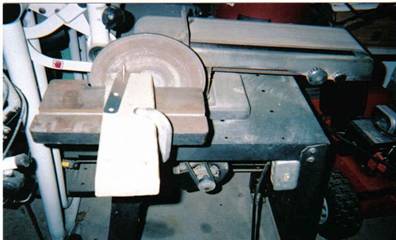
25 Sept. 03
Finished all of
the spar wing root and wing strut fittings by marking and drilling each of the
holes required. I made a tool to make the 1/2” radius on each fitting end by
using a 2x4 and drilling a 1/4” hole about a 1/2 inch from the end and sticking
a 1/4” bolt through the hole, then clamping the devise to my big sanding
machine and moving the fitting from side to side.
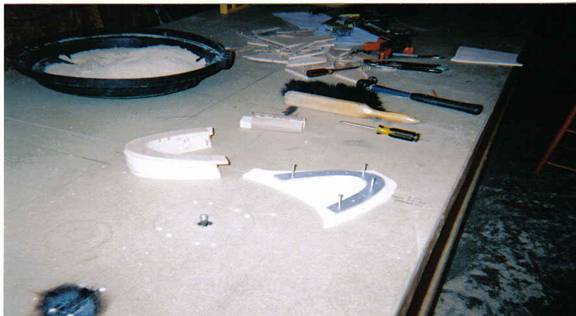
26 Sept. 03
Made an aileron
end rib jig out of scrap 1/4” plywood. Marked each of the four aileron end ribs
on a/c grade 1/4” plywood and rough cut them out. Re-mounted my router upside
down in the building bench and trimmed all of the aileron end ribs with the
flush bearing router bit.
Made all of the
1/4” aileron nose ribs by using a 3-5/8” hole saw and cutting four holes, using
the piece from inside the hole saw and cutting the hole in half. This makes all
required 8 nose aileron nose ribs. four for each aileron. Sanded to make them
all symmetrical.
Made all of the
wing root fittings for the front and rear spars. Glued the front spar wing root
fitting doublers in place.
02 Oct. 03
Measure and
marked where all of the root and strut fittings go on all four spars and used
my drill press to drill all the holes accurately. The front and rear root
fitting spar ends are now ready to have the two root ribs notched to fit for
each wing.
03 Oct. 03
Notched all four
root ribs, two for each wing. They needed to be notched for each front and rear
spar. It was time consuming but went real well.
04Oct. 03
Sanded and
painted all 16 of the root and strut fittings with epoxy paint. I did this after receiving an e-mail from
Steve Kiblinger saying that the 2024T3 alum. is strong but is susceptible to
oxidation from the moisture in the wood which is almost undetectable because it
starts on the back side of the fitting.
He suggests that after painting to make sure the fittings are set in a
good bed of epoxy T-188 and then bolted with the 1/4” AN bolts.
10 Oct. 03
Sanded and
filed the gussets off of the aileron ribs so that the aileron spar will fit in
the proper place. Also had to remove one of the rib uprights on each of the
aileron ribs. I did this with a hand saw and file. Started to measure and cut
the diagonal pieces for each wing.
11 Oct. 03
Finished
cutting all of the diagonal and compression ribs pieces for each wing.
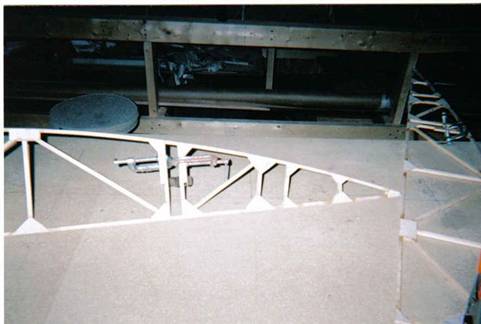
12 Oct. 03
Trial fit all the ribs on each wing front and
rear spar once again, and checked the fit of all compression rib pieces and
diagonal wing braces. They all fit nice and tight. Placed wax paper under all of the gluing surfaces
so the glue won’t stick to the work table. Glued and nailed all of the ribs to
the front and rear spar on both wings.
13 Oct. 03
Cleaned up all
the excess glue that seeped into the areas where the diagonals and compression
ribs go. I had to refit one of the diagonal pieces to get a tight fit, I’m not
sure why, the wing is still in alignment.
Glued all the
diagonal and compression part to the left wing. Took longer than I thought it
would.
18 Oct. 03
Sanded the left
wing glue joints on the diagonals in preparation for gluing additional fillets
to add extra strength. Glued the fillets in place.
Glued the
diagonal and compression rib pieces to the right wing.

Back
to Airframe Log Index | Back
to Home Page