Builder’s Notes & Comments
Page 6
Back
to Airframe Log Index | Back
to Home Page
02 Aug.04
Joined the aileron
spar halves together by cutting scarf joints and gluing gussets on both sides
with T-88 epoxy.
03 Aug. 04
Glue right
aileron spar to the aileron slots in the wing. Measure, cut and glue the top
outboard end-rib plywood. Glue both
aileron hinge blocks in place.
04 Aug. 04
Sand gussets
off of right wing where bigger gussets are required when the ailerons are cut
loose. Cut and fit, glue the bigger gussets on the top of the right wing. Glue
both aileron end ribs in place. They are spaced with a 1/4” gap for proper
alignment.

05 Aug. 04
Measure, cut
and glue the aileron spar 1/2” spar caps in place.
06 Aug. 04
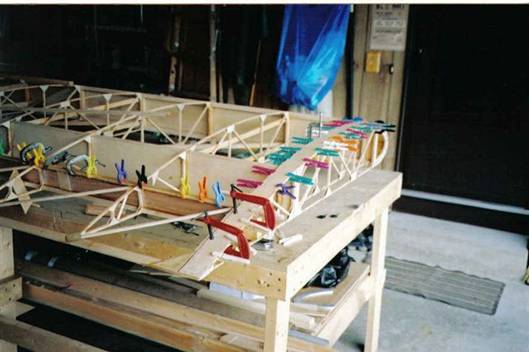
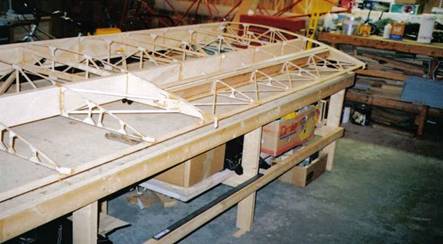
Cut and glue
the entire top cross “X” bracing for the right aileron.
11 Aug. 04
Measure, cut
and glue bottom aileron 1/2” spar cap, let dry then cut, fit and glue the
bottom cross “X” bracing for the right aileron.
12 Aug.04
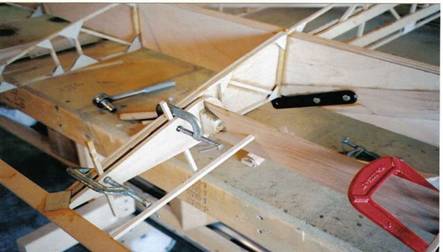
“BIG
13 Aug. 04
Worked on the
right aileron leading edge nose ply. Cut to fit each section and then soaked the
two pieces in very hot water for about 40 minutes in the bath tub, then fit on
the aileron and held in place with rubber bands and clamps to dry.
18 Aug. 04
Tape, sand and
varnish the right aileron nose plywood.
19 Aug. 04
Glue the right
aileron nose plywood to the aileron with T-88 epoxy glue, held in place with
staples and clamps while drying.
20 Aug. 04
Pulled all of
the staples from the right aileron and lightly sand with 220 grit wet/dry sand
paper.
26 Aug. 04
Glue and bolt the
rear jury struts in the right wing. Glue both aileron hinge blocks into the end
ribs. Glue the left aileron spar halves together by scarf joining and adding
plywood gussets for strength.
27 Aug. 04
Fit the left
aileron spar in place and then glue and clamp into the spar slots. Drill the
aileron hinge bolt holes in the hinge blocks. Glue the aileron end ribs in
place with a 1/4 “gap for proper spacing.
01 Sept. 04
Cut, fit and
glue the 1/4” X 1/2 “aileron cap strips for the left aileron. Sanded off some
of the gussets on the top of the left wing and added the big gussets for the
left aileron and inner wing.
01 Sept. 04
Cut, fit and
glue an extra nailing strip to the aileron cap strip. This will allow for extra
gluing surface which will add additional strength. Glue inboard and outboard
rib end plywood strips to the top of the left wing.
02 Sept. 04
Cut, fit and
glue the entire cross “X” bracing in the left aileron. Glue both the inboard
and outboard rib end plywood to the bottom of the left wing. Sand off some of
the small gussets and glue on the bigger gussets to the inner wing and aileron.
08 Sept.04
Another Big Day
Pulled staples from
the bottom inboard and outboard rib ends. Cut out the left aileron from the
wing.
09 Sept. 04
Cut and fit the
foam board for the aileron pocket and glue in place. Glue left aileron nose
ribs in place. I used a long string attached to the end ribs to help keep the
inner nose ribs at the proper height. Glue the 1-1/4” wing reinforcement
plywood to the top of the left wing.

09 Sept. 04
Pull staples
from wing reinforcement plywood from the top of the left wing. Measure, cut and
glue the extra nailing strip for the top aileron ply. Measure, cut, trial fit
of the left aileron nose plywood. Then soaked the plywood in the bath tub in
very hot water for about 40 minutes, then fit in place and clamped to dry to
help keep the proper shape after it dries.
15 Sept. 04
Sand, tape and
varnish the inside of the left aileron nose plywood and the inside of the
aileron it self.
16 Sept. 04
Glue the
aileron leading edge plywood to the left aileron.
17 Sept. 04
Pull staples
from the left aileron plywood. Sand the edges of the aileron and trimmed the
excess plywood from the inboard and outboard wing rib ends with my router then
sand with 220 grit sand paper.
22 Sept. 04
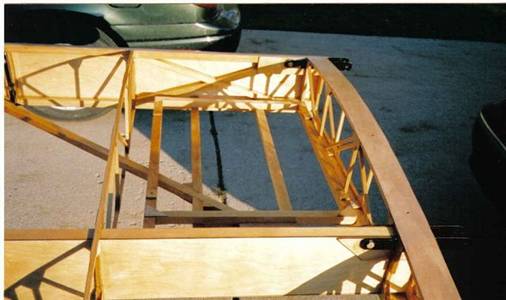
Made gussets for
the left wing where needed on the diagonal supports and glued in place. Also
cut plywood strips to hold the T-Nuts for the top and bottom of the left wing.
This is a little heavier that the original plans show, but will be stronger to
hold the droop wing tips that I am installing and also for the gap seals where
the two wing halves come together.
![]()

Back
to Airframe Log Index | Back
to Home Page