Builder’s Notes & Comments
Page 8
Back
to Airframe Log Index | Back
to Home Page
29 June 05
Cut out a
cardboard pattern to space the rib stitching evenly over the entire wing, top
and bottom. Marked the left wing with this pattern.
30 June 05
Applied the rib stitch reinforcement tape over
each rib on the left wing. Snapped a chalk line where the stitches will go.
Poked holes on either side of the rib reinforcement tape at the chalk lines.
Started to rib stitch the left wing.
03 July 05
Rib stitch the
left wing
04 July 05
Rib stitch the
left wing.
05 July 05
Marked the
right wing where the rib stitches will go with the cardboard pattern. Applied
the rib stitch reinforcement tape over each rib on the right wing. Snapped a
chalk line where the stitches will go. Poked holes on either side of the
reinforcement tape. Rib stitch the right
wing.
10 July 05
Completed the
rib stitching on the right wing. Cleaned off the blue chalk that the lines were
marked with in preparation of applying two coats of polybrush over the rib
stitch reinforcement tapes.
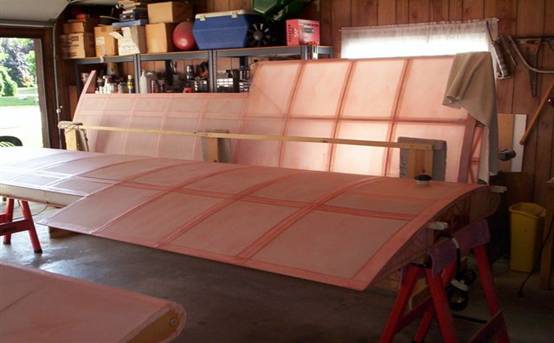
17 July 05
Applied two
coats of poly brush over the reinforcement tape and rib stitches on the bottom
of the right wing. Marked the bottom and top of the wing where the tapes will
go. Applied a pre-coat of poly brush to the ribs areas. Let dry then started
the taping sequence. First started with gluing down the inspection rings-
pre-coated with poly brush and applied the doilies over the inspection rings.
Put tapes on all of the gussets. Taped the bottom ribs and both the wing root
and tip. Applied the tapes over the rear spar area and the area where the ribs
meet the front spar. These are the span tapes. Looks great. Applied two coats
of poly brush over the reinforcement tape and rib stitches on the top of the
wing in preparation of taping the top of the right wing.
18 July 05
Pre coated all
of the ribs on the top of the right wing. Taped the ribs. Marked the forward
spar and rear spar areas that need to be taped and pre-coated these areas.
Taped the forward and rear spar areas on the top of the right wing. Marked and
pre-coated and then taped the leading edge with 3” tape. Pre-coated and taped
the aileron pocket on the top and bottom.
02 Aug. 05
Pre coated the
right wing leading edge and root tip inboard and outboard with poly brush.
Taped the leading edge, as well as the root tip and wing and outboard tip.
03 Aug. 05
Cleaned the
blue chalk lines off of the top of the left wing. Marked all of the ribs and
both front and rear spars for 2” tape. Pre-coated the rib lace tape with two coats
of poly-brush.
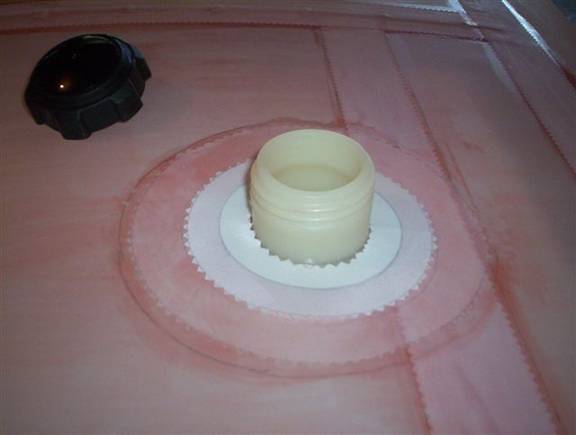
10 Aug. 05
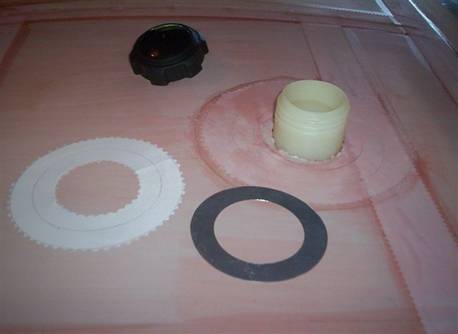
Pre-coated all
of the ribs and spars with polybrush. Taped the gas tank outlet and hold down
straps. Taped all of the ribs, spars and aileron pocket with 2” tape. Made an aluminum
ring out of 2024T3 alum, used a 4” hole saw to cut the outer perimeter and then
used a 2-1/4” hole saw for the inner hole. Filed all of the rough edges smooth,
glued this ring around the gas tank filler neck with polytack. Let dry then
Polybrushed a doily that was pre-shrunk around and over the alum. ring.
11 Aug. 05
Cleaned the
blue chalk lines off of the bottom of the left wing. Marked all of the ribs,
both spars and the leading edge and trailing edges to form nice straight lines
in preparation for taping. Pre-coated all of the same areas with one coat of
polybrush. Marked and glued 4 inspection rings to the bottom of the left wing.
One for the fuel tank, one for the aileron bolt, and the remaining two for the
spar wing attach fittings. Taped the bottom of the ribs with 2” tape.
12 Aug. 05
Taped the
length wise tapes (front & rear spars) on the bottom of the left wing as
well as taped the trailing edge around the aileron pocket. Taped the wing tip
and wing root on the left wing.
17 Aug. 05
Finished taping
the left wing leading edge nose rib tip and root. Completed taping the trailing
edge from the aileron inboard to the wing root.
18 Aug. 05
Put second of
polybrush on all of the tapes on the left wing. Made a cardboard pattern for
the cooling tins for the left and right cylinders for the engine. Will trace
and cut out of 2024T3 aluminum tomorrow.
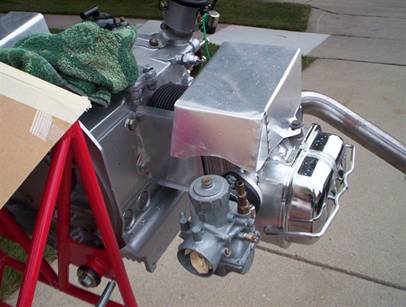
19 Aug. 05
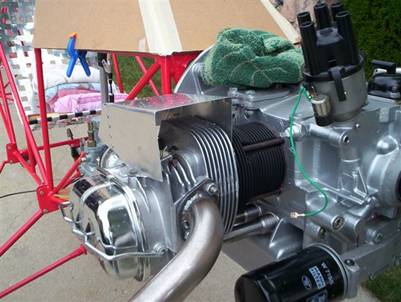
Traced the
cardboard patterns for the engine cooling tins out on 2024T3 .025 aluminum and
cut them out. Bent them to the proper
shape and riveted the cylinder tins to the head tins and trial fit them on the
engine. Looks pretty good.