Part Three: Let the Colouring begin!
Once you have your background and your
background copy layers, you can start working on the colouring.
To do so, make a new layer between these two by clicking on
either layer --> new --> layer
at the top of photoshop, or by clicking on the arrow next to Paths
and choosing "new layer"
I personally work with a layer per colour,
which makes things a lot easier when shadowing as the colours
don't get mixed up. So that would leave me with a layer per area,
more or less. Hair is the one I usually start with.
| All new layers should go under the background copy,
and none can go under the background itself (it is the
canvas after all, remember?). This way, you'll always
have the line work on top of the rest of the layers. See
them as layers of paint, the ones on top are the ones you
see the most, while the ones below are the ones that get
covered by the ones over them. As long as you keep the
background copy on top, then the lines will not get
covered and you'll be able to colour under them thanks to
the rest of the layer being transparent. |
 |
So you have your new layer under the background copy one. Now
go to the Tools (the long thingie with loads of buttons at your
left) and:
- choose the polygonal lasso
- choose a colour by clicking on the foreground colour. A
new window should appear, choose one, accept and go on.
- select the area you want to paint on with the polygonal
lasso. To do so, follow the line art. be sure to include
the line more or less when selecting the area.
- make sure the active layer is the one you want to paint
on (in this particular case, it would be the hair)
- choose the paint bucket
- fill the selected area with the paint bucket
- deselect
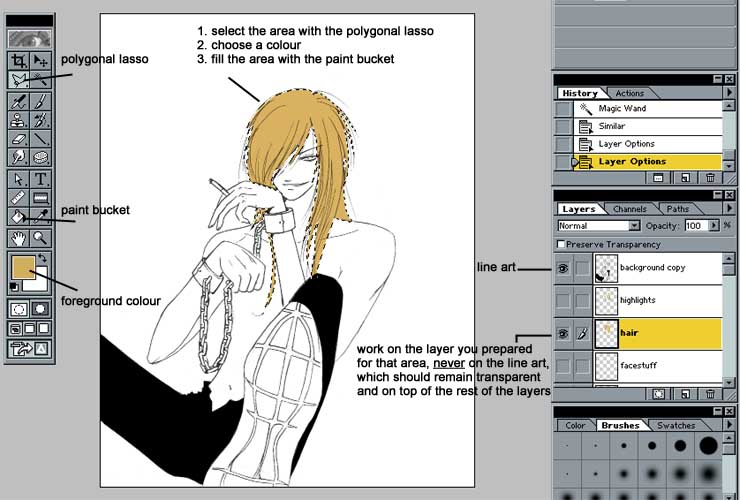
Follow the steps with each single area you want to colour,
making a new layer for each area, in descending order (meaning
each new layer should be under the last one you used)
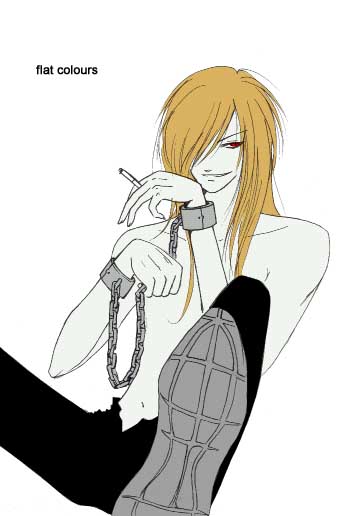
Which should leave you with the drawing with flat colours,
something like this:
Go
to Part Four
Ortygia is property of Derrewyn
Aensland, Mistress of this site. Questions, comments and
suggestions are welcomed at either derrewyn@hotmail.com or derrewyn@bolt.com
Saint Seiya is property of Masami
Kurumada/Shueisha; Toei Animation Co.; Ltd Shonen Jump
All articles, stories and drawings
posted here are property of their authors. Do not take
any material without asking the author for permission
first
Ortygia©2000-2003 Derrewyn Aensland
|