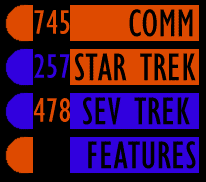
- Star Trek
[Basic]
 |
|
Specialised colours that you need:
Orange:
R - 214
G - 91
B - 0
Purple:
R - 64
G - 39
B - 255
You have to do this in little bits and then bung it all together
to make an html page. First the Header:

1) New Image: Background Black: 480x50
2) Click the selection Tool: Circle: Feather 1, make a small circle,
then with either purple or orange as your background colour tap delete
ONCE.
![]()
3) Go to the selection tool again, this time a rectangle and feather=0.
Select from the top of your circle to the bottom and accross a couple hundred
pixels and tap delete again.
![]()
4) On the end of this bar select some more (no higher) accross and tap delete with the background colour as the opposite of what you've been using.
5) Take 5-6 pixel chunks out of the bar, do several clustered together,
and one just after where the circle would have finished. Leave spaces big
enough for text.

6) With the foreground black, the font Gill Sans Condensed and the
CAPS LOCK ON, type the heading for your page on the left hand section of
your bar. On the right hand side tap in a couple of numbers just to make
it authentic.

The Header is complete.
Now the direction bar.
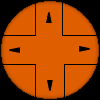
1) New Image: Background Black.
2) Selection Tool: Circle: Feather 1, draw a circle on your new image, tap delete with either purple or orange as your background colour.
3) Select the black area around the circle, go Selections: Invert: Image: Crop to Selection. Your circle will be right in the center of the image which is what you need.
4) Selection Tool: Square: Feather=0 Drag from point 0, 0 to roughly
1/3 of the circle.

5) Use this as a guide. With black as the foreground, click the paint
brush: Paper Texture-none: Size-1: Opacity-100: Hardness-100: Step-1: Density-100
Draw a line down through the circle and then across where the selection
line is (It helps if the magnification is about 3:1) Repeat this for all
the corners and you will end up with this.
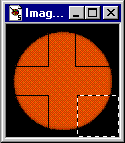
6) Text tool: Foreground Black. Type in a small capitol A and place
it in the top section of the direction bar.
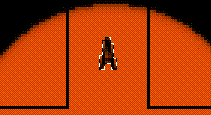
7) Colour in the A so it now looks like an arrow head.
8) With the coloured in A still selected copy it and then paste it as a new selection. With it still selected rotate it 90 degrees in either direction and move it into the appropriate slot.
9) Repeat step 8) but rotate the arrow head the opposite direction.
10) Go Edit: Paste as new Selection. And then Image: Flip. That will give you the down arrow. And thats finished.

Finally the menu panel.

1) Start off just like the Header Bar. Select a Circle: Feather1 and tap delete with one of the Trek colours.
2) Then with the Selection tool set at Rectangle and feather0, select
from the top-bottom of the circle and across about 100-150 pixels.

3) Cut a 30-35 pixel chunk out of the bar just past where the circle
would have finished and tap delete with the background black.

4) Make several copies of this image. With each one colour them in different colours. Put some numbers in the cutout chunk, so you have a variety of bars.
5) Type in (in black) what you want each bar to say (eg. e mail,
home, star trek, about me...) And you should end up with something like
this when you come to put each of them on your web page...
