Creating Animated Gifs

This is an example of an animated gif file. If you follow this
little tutorial, you will be able to create an animated gif like
this one. Remeber, creating animated GIFs is easy, as long as you
remember to follow all the steps.
- Use paintbrush to create your master file. Use the text
tool to type your first name.
- Be sure to adjust the font and colour.
- Use the select tool to crop your image. Select the entire
image, and some of its surroundings.
- Click Edit | Copy to on the menu.
- Use your first name as the name for your file. Make sure
to save the file as a 256 colour bitmap. Do not attempt
to change the file extension.
- Now, open the file you created.
- It should look like this example, with very little white
space.
- Save the file as your name plus the number of letters in
your name (e.g. Phil4, Stu3, Harry5, etc.).
- Remove a letter using the eraser tool. save the file as
your name plus the number of letters in your name minus 1
(e.g. Phil3, Stu2, Harry4, etc.). Continue editing and
saving in this manner. The last file should be blank, and
should be called your name plus 0 (e.g. Phil0, Stu0,
Harry0, etc.).
- Start the Gif Construction Set. Create a new File. Save
it as your name (e.g. Phil, Stu, Harry, etc.). Insert a
loop, then a control, and then your blank image (e.g.
Phil0, Stu0, Harry0, etc.).
- When you insert an image, specify default option as the
palette.
- Adjust the timing delay on the controls to your
preference.
- Your should look like my example. Save the file. Then
insert it into a Web page.
Things to remember:
- Make your picture relatively small- Don't make it the
size of the computer screen, or it will take too long to
load, and it will flicker.
- Only include the picture itself and its immediate
background-- CROP IT!
- Make sure that your bitmaps are saved as 256 colour

Use paintbrush to create your master file. Use the text
tool to type your first name.
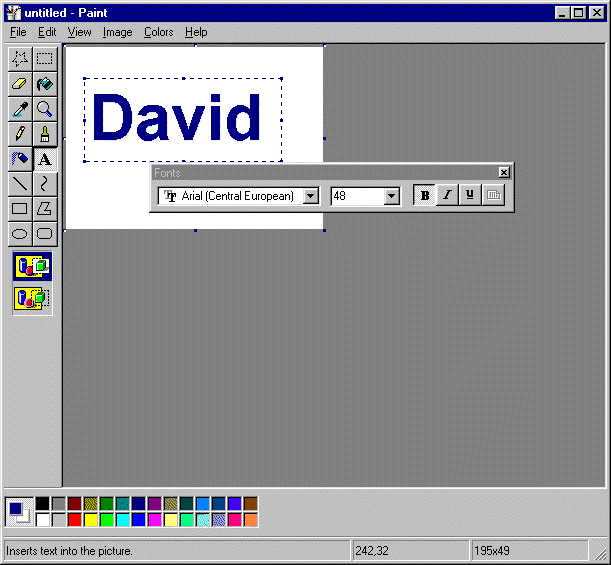
Be sure to adjust the font and colour.
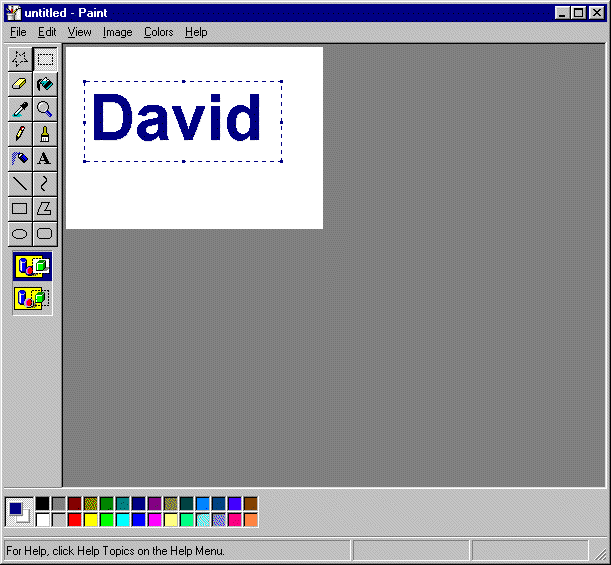
Use the select tool to crop your image. Select the entire
image, and some of its surroundings.
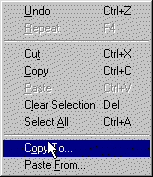
Click Edit | Copy to on
the menu.
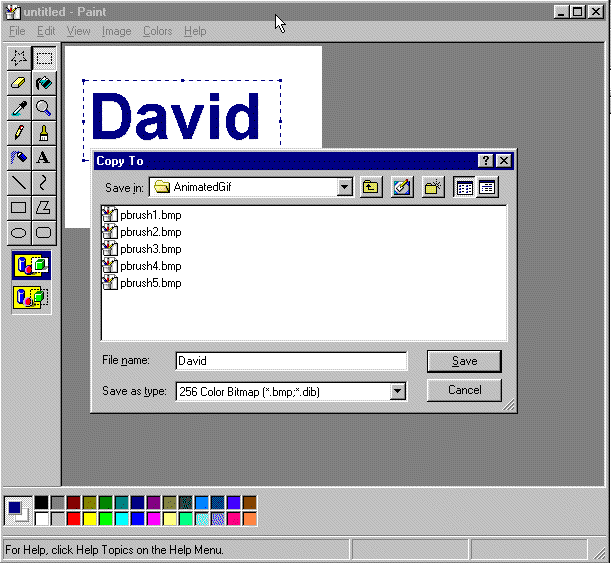
Use your first name as the name for your file. Make sure
to save the file as a 256 colour bitmap. Do not attempt to change
the file extension.
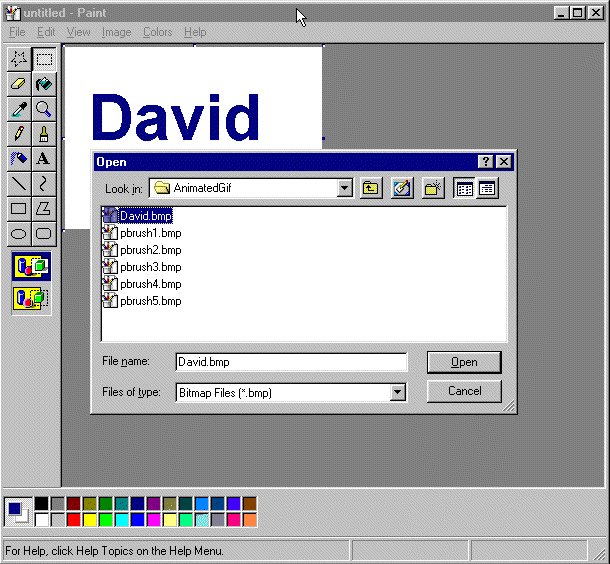
Now, open the file you created.
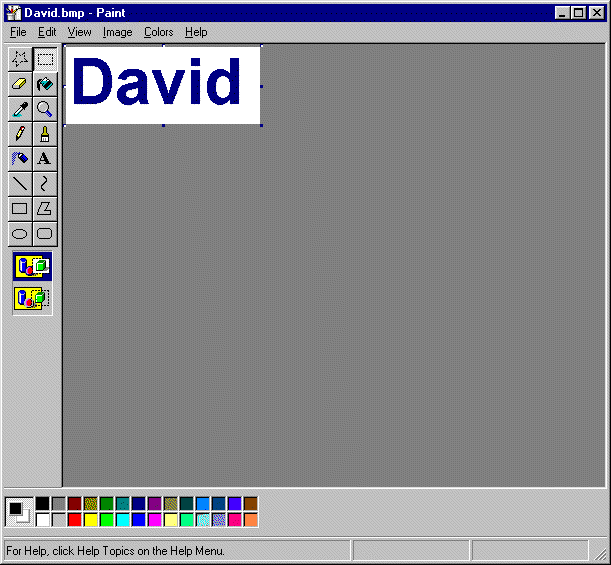
It should look like this example, with very little white
space.
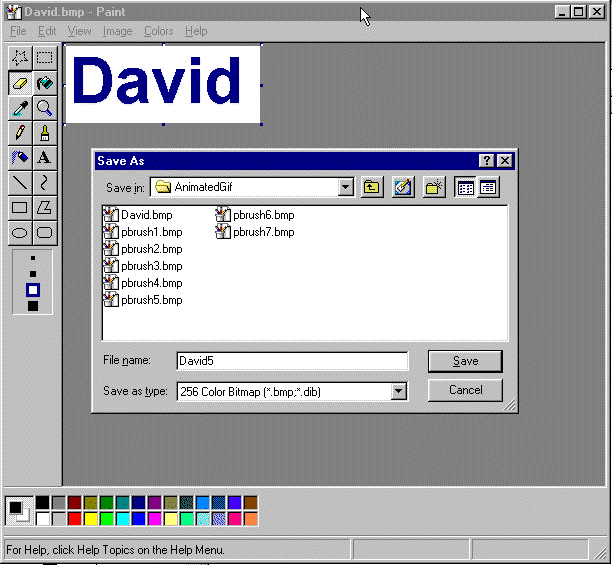
Save the file as your name plus the number of letters in
your name (e.g. Phil4, Stu3, Harry5, etc.).
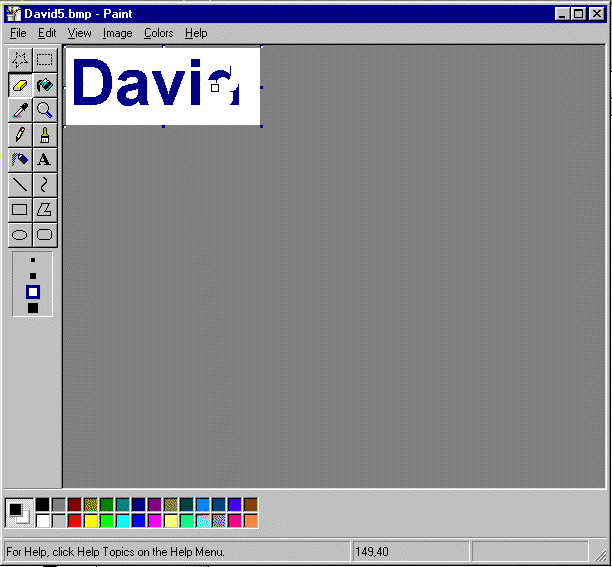
Remove a letter using the eraser tool. save the file as
your name plus the number of letters in your name minus 1 (e.g.
Phil3, Stu2, Harry4, etc.). Continue editing and saving in this
manner. The last file should be blank, and should be called your
name plus 0 (e.g. Phil0, Stu0, Harry0, etc.).
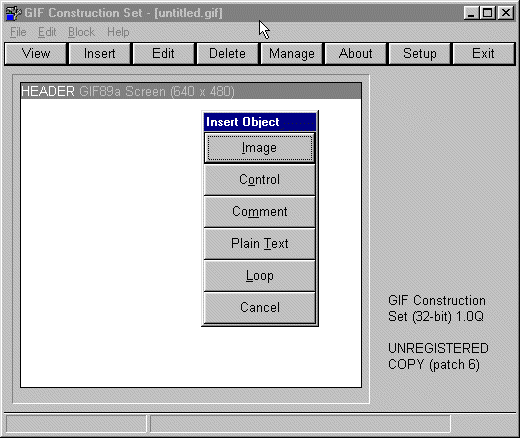
Start the Gif Construction Set. Create a new File. Save it
as your name (e.g. Phil, Stu, Harry, etc.). Insert a loop, then a
control, and then your blank image (e.g. Phil0, Stu0, Harry0, etc.).
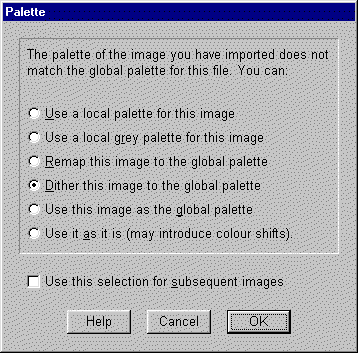
When you insert an image, specify default option as the
palette.
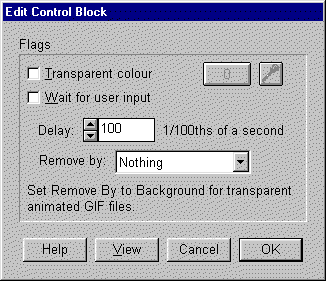
Adjust the timing delay on the controls to your preference.
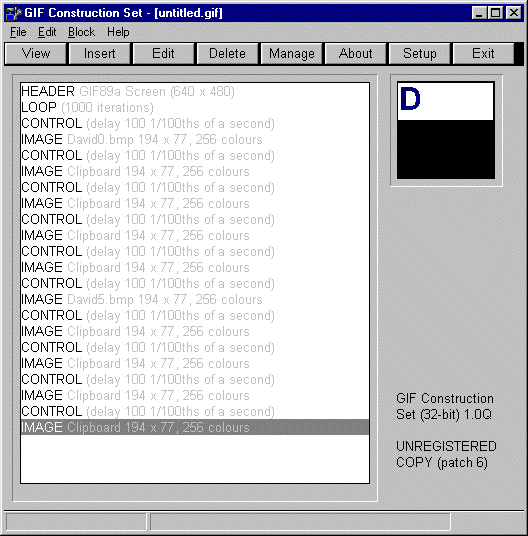
Your should look like my example. Save the file. Then
insert it into a Web page.


