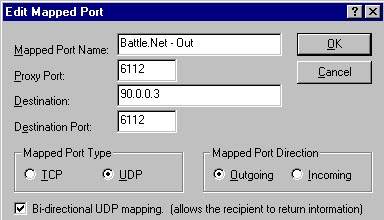
To connect to Battle.Net, create two mapped ports in WinProxy
:
Go to File -> Advanced Properties -> Mapped Ports
Create two mapped ports, one incoming and the other outgoing. In proxy port and destination port enter 6112. The destination for both ports is the IP address of the client computer with the game.
Select UDP for mapped port type. Set one port us as outgoing and the other incoming.
Enable Bi-Directional UDP Mapping. You will only be able to
connect one client machine at
a time. Also you may not be able to join any games, only create a
new game and invite others to join.
Refer to the pictures below . . .

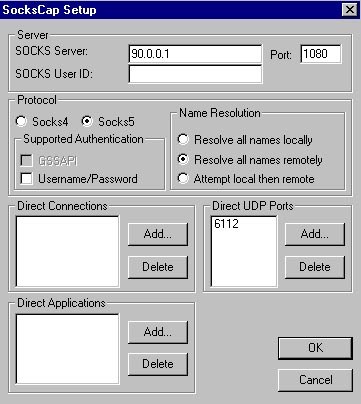
Install SocksCap 5 on
your client computer. In SocksCap : click on File -> Setup to
reach
the Setup screen.
In the first section enter the IP address of the Winproxy
computer and port that the SOCKS
protocol is using.
Select Socks5 under Protocol and "Resolve all names
remotely" under Name Resolution.
Add 6112 to Direct UDP Ports.
Click OK to save your changes.
Use the picture below to check your proceedings . . .