
The Aprilia service manual calls for changing the engine coolant in the Falco every two years. It is an easy, if not messy job.
Less than one gallon of mixed 50% water and 50% ethylene glycol antifreeze solution is required. When purchasing the coolant, look for a brand that does not include silicates (such as silicone-silicate) as a corrosion inhibitor. These materials have been known to cause premature water pump failure in some motorcycles and are worth avoiding. I've found that many "extended-life" brands of coolants such as Prestone Extended Life do not contain silicates. The original coolant in the Falco was a beautiful cobalt blue color. You can mix any color of ethylene glycol coolant in as a replacement, as the color is only cosmetic. There are other additives and coolant types that make their way into motorcycles. I have tried "Water Wetter" on the track where ethylene glycol is forbidden. I don't know if it worked, but it seemed to do no harm. There are other formulations of coolant that others have used besides ethylene glycol. I have not had a need to try these. I personally would not use any "flush", sealer, cleaner or anti-rust additives as these are likely to contain silicates to scour the system.
|
In order to access the engine drain bolt, removal of the lower cowl and middle-right (brake lever side) cowl is necessary. Take care in detaching the connector for the turn signal. It is a good idea to store the shoulder bolts in their original locations while you work as they are not all the same size. The drain bolt is behind the coolant overflow reservoir, which is held by one bolt then lifted out of place. The relief tube snakes around the bracket, but can be easily fished out and the reservoir will then hang out of the way. Click on image to view zoom of drain plugs. |
Draining steps
| To fill, a narrow-necked funnel is required to fit in the filler neck beside the gas tank. Fill the system close to the top, then "burp" it by squeezing the hoses at the bottom of the radiators. Top it off and close the cap down. Fill the reservoir until the coolant in the sight tube is at the max level. This system does not need to be bled, but after the first heat and cool cycle the level in the reservoir will need to be reset. Replace the bodywork, then wash the bike! | 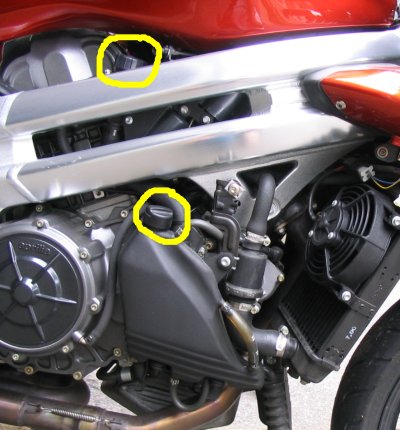 |
Go back to the Falco home page.