
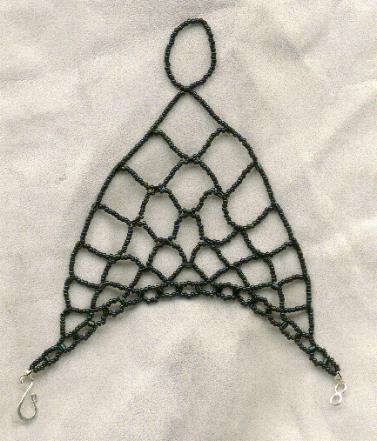
This is a very simple graph, I am afraid that this is my first attempt to draw a bead diagram and I still need alot of practice!!!
This was my first attempt at making this bracelet, so I used left over size 11 beads and some basic accents., size 6 I believe. I bet this will look beautiful with some crystals or stone beads. I am sure it will affect the size, so this is just a guideline.
To construct the bracelet, I began by attaching a bead tip to 2 strands of thread. I wanted to add the clasps right away so I could see how it fit as I was working.
To make the band that goes around the wrist, you will need to make a ladder... this was the worse part as I hate working with 2 needles!
With one needle, pick up 5 beads and then your accent bead, with the other needle pick up 5 beads and then go through the accent bead, crossing the threads. Continue doing this until you reach the desired lenght for your wrist. I made a ladder using 18 accents. Then I attached the clasp.
Now you will need to begin a new thread, I ran mine through the bead tip and wove my way down to the 3rd bead on my 3rd loop of ladder beads, this is where I began my netting. For my first row of netting I picked up 6 beads, an accent and then 6 more beads. Skip one section of loops and go through the next 3rd bead. Continue until you reach the other end. Now, you will need to waeve your thread back up through the top part and turn so your needle will be coming back out of the last accent bead you added.. in the reverse direction.
For the second and continuing rows of netting I added on another bead to my initail 6. From the third row on I kept trying on the bracelet to see how the netting was taking shape. Continue with the netting until you get to the point where you are at your final loop. here is where I ended the thread, I ran it though several rows of beading and make tiny knots along the way for added security.
To make the ring part, I used the double needle techinique again. I put the bracelet on and ran the thread through the accent bead, then I began to add beads evenly on both sides until I reached the desired size for my hand. I took care to flex my hand to make sure I gave myself enough room for movement.
I then tied these 2 threads together and then ran those threads back up through the beads.
Finished!!!!!!
© Silver Wolf Creations