
Week One
To introduce this lesson to my students, we looked at a history
of comics, focusing primarily on the role of women cartoonists. Students
were able to look at a number of books about cartooning, and looked at
different styles. Some good reference materials include:
Websites:
The Funny Pages--Women Cartoonists and Illustrators
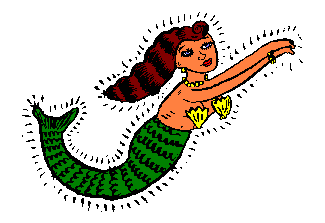
Trina Robbins Homepage
The Lynda Barry Page
A Great Lynda Barry site
Books:
"My Perfect Life" by Lynda Barry
"Big Ideas" by Lynda Barry
"Down the Street" by Lynda Barry
"Girls and Boys" by Lynda Barry
"A Century of Women Cartoonists" by Trina Robbins
Finally, we looked at one contemporary cartoonist in particular,
Lynda Barry. Ms. Barry has a highly decorative style using pattern
and a simple drawing that didn't intimidate the students. She uses
stories of childhood and adolescence, blending humor and nostalgia.
That led us naturally to discussing childhood stories about ourselves and
our siblings. Students had a great time telling stories, then they
had to choose one story to illustrate in comic form.
After deciding upon the story they were going to tell, students
made a list of pictures they would need to tell the story. They found
these pictures in a variety of places, from magazines, clip art collections,
family photographs, the internet, etc. Any pictures they could not
find they needed to draw. They assembled these pictures together
and pasted them on 2 sheets of paper -- these formed their own private
clip art collections.
Next, students drew a variety of frames for their comic strip,
thinking about what type of patterns or objects would coordinate with the
theme of their story. These were all drawn on one sheet of paper,
this formed their frame collection.
Students scanned their frame sheet and their picture sheets,
and saved them on a disk with their name. They titled the frame sheet
"frames" and the clip art collections with their names, such as "Abby1"
and Abby2". These were good to keep as backups in case they lost
all the work through error.
Weeks Two & Three
Students were now prepared to enter the computer lab to work on
their projects. On the first day, we worked as a group learning basic
commands....how to start new pages, how to change the size of an image,
how to add text. They used the sample files that I provided for them.
Sample graphics file
Sample Frame File
To begin with, they were instructed to open both files on the
Photo Shop desktop. They chose one of the frames in the file, and
using the tool bar, they enclosed the frame in a dashed rectangle, or by
using the lasso tool. They went to Edit, and chose Copy. Then
they went to File, chose New. This gave them a new box that was exactly
the same size as the frame they had chosen. They titled this "Frame1"
and used Edit, Paste to paste the frame into the new box. They then
went to the picture sample frame and chose a picture to put in their new
frame in the same manner. We practiced changing the size of the picture
by going to Image, choosing Effects, then choosing Scale. This gave
them a box around the object that had handles to enlarge/reduce the size
of the picture.
Some of the pictures were in color and some were in black and
white. We were going to color our finished comic strips by hand,
so we converted everything to grayscale. To convert a file to grayscale,
go to Mode, then choose grayscale.
After a day or so practicing with the sample files, the students
were ready to begin their projects. We spent a total of 8 class periods
in the computer lab, students had a total of 5 frames to make. Their
goal was to build a frame a day, with a couple of days for 'tune-ups.'
Problems and Solutions
Size: We needed all the frames to be about the same size, so when students began a new frame, they adjusted the image size so that they were consistent. To do this, Choose Image, then Image size. We were printing these out on paper, so we edited the print size. Students were to make them approximately 4" x 6", although there was some leeway because the frames were boxes of various proportions.
"I can't get the picture to change size!" Usually the student doesn't have the mode correct, sometimes it is saved as a bitmap and photographs look grainy. Change the mode so that it is grayscale, or to another compatible mode type. They may need to experiment with the mode. Sometimes, the image is on a different layer....
Layers: Everytime you paste a new image onto the frame, you are adding a 'layer'. To change the image size, often they had to find the correct layer.... to do that, go to Window, choose Palettes, then Show Layers. This will bring up a box that lists the layers and the images on them. Choose the layer that has the image they need to resize.This makes removing things a little complicated, so every time my students added a couple of images, I had them 'flatten' the whole package.
Week Four
After we printed out the comic frames, we had them copied onto
transparency film using a photocopier. We colored our frames from
the back, using acrylic paints. Note: if you print the pages
directly onto transparencies, water from the paints may make the ink run.
This is why we used the photocopier instead.
Coloring our frames this way gave them the look of 'cels' that
are used in motion picture animation. Finishing up our project this
way gave a finished look to the project and brought us to a discussion
of how far comic images have come.
