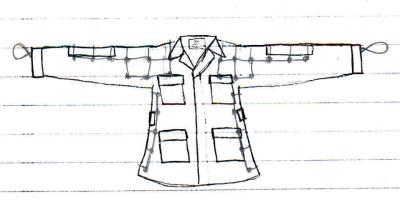
Step 3: (part 1) Cutting the netting to match the
jacket
What we need to do now is cut off the netting
so that it covers the back, the sides, the shoulders and the arms. Weather
or not to cover all of the arm or simply cut it off a little bit before
the end of it is up to you, but personally, I would cut it off a little
bit before the ends of the arms so I have room to attach a pocket to that
area. Also, the reason we want to have a little bit extra on the shoulder
region is so that it will lap over on the tops of the shoulder (don’t worry,
if you did this correctly it shouldn’t bother you when you are lying down).
Be sure to leave about an inch worth of space between the end of the cut
and the actually knot, then burn the ends of the nylon piece so that it
doesn’t unravel. Remember, though, that just because the picture is what
mine looked like, yours may be different depending on the netting and or
size of jacket that you used. Use my picture as a guideline to what it
may actually look like, however it doesn’t have to look exactly like it.
Make all the necessary cuts like the ones in the picture, however if you
are uncertain about how much netting to cut off, remember that you can
always cut it off later if it doesn’t work; you can’t really cut on the
part you cut off. Also, note the cut around the armpit area in the picture
below. This is so that the netting does not restrict the range of movement
that the garment provides. You might have also noticed that there are loops
on the sleaves of the arms. These are thumb loops, loops that you
put your thumbs in when you crawl. We will get into those later.
Important!
Depending on where you put (or plan to put) the canvas on your elbows, the netting placement may be different, and you may not wan to put a lot of netting on the shoulder area (becuase the hat will probably cover that area).


