Chrono cross Walkthrough
By Jeremy Parish
(Thanks!!!)
Chrono Cross opens with the hero Serge (or whatever you choose to name him - anything except Crono/Chrono, who was the hero of the previous game!) in the midst of a dungeon with a girl named Kid and a randomly selected third character. Kid is an aggressive young woman who speaks with a rough accent and seems bent on seeking revenge against someone named Lynx; it's Kid who will propel the story here. The third person is mainly there to fill out the battle roster.This opening section offers practically no challenge or danger. Serge and his party are significantly more powerful than the few enemies they face. Take this opportunity to become acquainted with the battle system and the way the element grid works. You won't have too much time here, as there are only a few battles to be fought and almost all can be avoided by dodging enemies on the dungeon screen.
 Once you've activated the switch in the back room, the central platform is your goal. |
Return to the central room and take the stairs at the far right up. Then, follow the spoke-like catwalk to the central area where the hub is glowing. Once in the center, press the action button, and your party will be transferred to another place.
Above the dungeon, lead Serge to the door, and he'll have a frightening vision and black out.
Waking from his inky unconsciousness, Serge will be greeted by a voice
calling his name. He stirs to find himself in his home, where his mother Marge
chastises him for sleeping in late and leaving his "friend" Leena in
the lurch. Since Serge is already on Leena's bad list for his tardiness, there's
no harm in exploring the village of Arni before meeting her at the docks.
Serge has two items in his room: 200 G beneath his bed and a Tablet-consumable
element in the shelves at the left of the room. There are several items to be
found in the cafe at the west side of town - the back room contains both a
Heckran Bone beneath the bed and an ivory helmet behind the curtain. The owner
of the house next to the cafe will give you a Shark's Tooth amulet if you speak
to him in his basement. You can buy or forge equipment from the shopkeeper in
the middle of town and search her bins for a shellfish window frame. The house
at the rear east area of town also hides a PhotonRay element.
 Speak to everyone - and search everywhere - in Arni to discover helpful items to use in your quest. |
Once you've satisfactorily looted the village, head to the docks at the rear of town to speak with Leena, who is very insistent that you make up for your lateness by helping her make a Komodo Scale necklace. You can offer her the scale the fisherman gave you if you still have it, but she demands that you acquire three scales on your own. And so, it's off to Lizard Rock for Serge.
On the world map, Serge will have several possible locations to explore.
However, both Fossil Valley and Hydra Marsh are off-limits for now. Cape Howl
can be entered and explored - at the summit is a carved proclamation of Serge
and Leena's undying love. But your real goal is Lizard Rock at the southwest tip
of the island.
Upon entering the grotto, you must push a large boulder out of the way. This
area is divided into three sections that house one lizard apiece. There's a
trick to trapping the komodo lizards, though, and a few battles must be fought
for the sake of item collection.
The lizard in the entry section darts back and forth beneath a stone arch. If
you approach through the arch, it will run off-screen, and you must leave the
area to reset its position. Instead, walk around the arch to the boulder at the
lower left and press the action button to roll the stone, then walk back around
to the top to trap the lizard in the closed archway.
 Time your leap carefully to catch the scurrying lizard. |
Once you trap a lizard, you must fight it to acquire a scale from it. Upon defeating the third lizard, its very angry mother plunges into the fray.
Battle: MamaKomodo (Innate: Blue)
This should be an exceptionally easy battle if you have Poshul along. Even fighting solo it shouldn't be too difficult. But be warned: This fight begins without a breather after the final komodo lizard encounter, so you may begin in a weakened state. If possible, have Tablets equipped in an level 1 slot and a FireBall element equipped in an level 2 slot. Because the MamaKomodo is a blue-innate creature, the FireBall element will hit her with extra force. This basic principle of elemental opposites is critical to effective combat, so become acquainted with its nature here. The biggest threat in this battle is MamaKomodo's ColdBreath attack, which strikes your entire party for a significant amount of damage. Be sure to use a Tablet to heal after a ColdBreath attack; the Cure spell is not recommended, as it will tilt the field effect meter toward blue in MamaKomodo's favor.
Once you've beaten the MamaKomodo and cleared Lizard Rock of its treasures, move along to Opassa Beach to meet Leena. If you answer her questions with flattery (tell her you remember your promise and that you'll never forget this day), you can acquire her best tech skill much later in the game.
When Serge awakens from the strange event on the beach, a villager will treat
him like a stranger. Head back through Lizard Rock, where the creatures have
changed, and new treasures await. The music in the overworld has changed, as has
the music in Arni. More importantly, no one in Arni recognizes Serge - and if
you speak to Leena at the docks, you can find out why Serge seems like such a
stranger. Once you receive this discouraging news, go to Serge's home and meet
the man living there, who claims to have been a resident in that house for five
years.
 Though it might seem rude, refusing Kid's invitation will encourage Leena to join up in her stead. |
At the peak of Cape Howl, Serge will stoop to examine the carvings on the stone. As he does so, he is approached by a trio of soldiers who insist that Serge come with them. If Poshul is along, she'll be shoved unceremoniously out of the way. But just as Serge finds himself trapped, a mysterious - and rather lovely - stranger will come to his aid. With the assistance of this temperamental young lady, you must battle the three Acacian dragoons.
Battle: Karsh (Innate: Green), Peppor (Innate: Yellow), Solt: (Innate: Yellow)
This is the most difficult battle to date, but it still isn't particularly difficult. The Shaker brothers, Peppor and Solt, have a damaging CrossCut dual tech they can use, but knocking either one of them out of commission will put a stop to that. Peppor (the short, stocky one) is the more powerful fighter and has fewer hit points, so focus your attacks on him. If you have managed to uncover any green elements such as BushWhacker, they'll be a great help. Be sure to pay attention to the dialogue; it serves as a free game tutorial on elements. Since none of the enemies bothered to equip effective elements, they'll use physical strikes exclusively. Blunt their attacks by defending whenever possible. Once the Shaker brothers are down, attack Karsh with strong attacks and yellow elements like ElectroBolt and Uplift. Always try to keep both fighters' hit point higher than 20 to prevent being knocked out of the fight.
After the battle, the girl will offer to join your team. If you accept, you can name her and receive the TelePorter key item (that lets you change party members on the world map and at the Records of Fate). If you refuse her three times, she'll storm off without giving you the TelePorter, but Leena will join your team (this is the only way to recruit Leena, but the girl in red will return eventually). Either way, you end up in Arni, and Termina is your goal.
From Arni, head north through Fossil Valley. At this point, you may want to
give the Shark's Tooth amulet you received from Kiki's father at home to this
world's version of Kiki's father. Although he refuses it, your conversation will
cause his idol, Mojo, to come to life and join your party. Mojo is the first
black-innate character in the game, and while he's not as physically powerful as
Poshul, he's a better companion through Fossil Valley than she is.
The soldiers in Fossil Valley will let you through on the condition you don't
bother the crew atop the plateau. But rules were meant to be broken. You can
simply head left along the lower path to leave the place, or you can explore the
area above by telling the soldier you're the expert who has been hired to
investigate. Near the dragon skull, you'll meet a talking human skull named
Skelly; if you choose to help him find his body parts, he will eventually become
a recruitable character. At the top of the cliff, you can pick a Bellflower, and
if you climb down the ladder (ignore the soldier's warnings), you can acquire
the Big Egg key item from the Dodo's nest.
The enemies here are more challenging than past enemies, and most have quirks to
be aware of. The Dodos will retaliate with powerful, deadly magic if you use
elements to attack them. The BubbaDingos will attack one another if left alone,
but when a MamaDingo is around, they'll behave and focus on you. If you kill a
BubbaDingo while fighting a MamaDingo, the mother will become angry and use
strengthen to boost her attack power, so be careful.
Once you've explored the valley, take the lower path to the exit, where you'll
be greeted by the timid-but-determined Shaker brothers, this time without Karsh.
Battle: Peppor (Innate: Yellow), Solt (Innate:
Yellow)
This is not a battle to be concerned about. Instead, pay attention to their
bumbling tutorial on the TurnColor elements before putting them down for the
count. Remember to defend, especially once Peppor powers up with the strengthen
spell. Focus your attacks on a single enemy and hit hard; weapons are more
effective than elements. The real merit of this fight is that upon completing
it, your growth level will be sufficient that your characters will have access
to their level 3 tech skills, such as Serge's Dash&Slash and Kid's Pilfer
(an extremely useful skill at this juncture, as it will greatly increase your
stock of elements and forge components).
Beyond Fossil Valley is Termina. You cannot access Viper Manor or Shadow Woods
at the moment, so head into town. If you previously refused Kid, the girl in
red, she'll greet you here and give Leena a rather jealous reaction. You can do
a lot here, but be warned that viewing the statue of Viper at the north end of
the main square will trigger an event that will shape your next few events and
determine your party members. Before that, here are some things to do.
 Examine the statue of Viper to initiate events in Termina. |
Once you approach Viper's statue, Kid will either reappear or speak to you - she's interested in sneaking into Viper Manor and tries to convince Serge that the keys to the strange events that have recently surrounded him lie within the mansion. You can again refuse to let her join, at which point she'll storm off and leave the TelePorter with you, or you can accept her into your party. In either case, you must find a companion with whom to infiltrate Viper Manor, and the next step you take will determine who that is.
There are three possible guides who will travel to Viper Manor with you. Most
gamers will want to choose Guile their first time through, as he's the most
powerful of the three. Nikki is also a decent choice, and those seeking a
challenge should track down Pierre. The character you select will also affect
the rest of your party composition.
From here, you should find the section that details the path you choose.
Guile's Path
Guile's path is arguably the most difficult, but the result of taking him along
is that you'll have a powerful mage in your party for the rest of the game. To
recruit Guile, simply accept his request to help him complete his bet with the
fortune teller. As a black-innate character, his presence will make Mojo
effectively useless; you're better served to take along Leena (as a healer) or
Kid (for pilfering).
Once Guile joins you, return to the shrines at the east edge of the city and
walk behind the shack to persuade Korcha to give you a ride to the manor. From
there, he will take you to the cliffs of insanity, Viper Bluffs. You can catch a
return trip to Termina from here at any time by talking to Korcha.
Your goal at Viper Bluffs is to make it to the top and sneak into the manor
through the rear entrance. Unfortunately, the cliffs are patrolled by monsters
and humans alike, and natural hazards will impede your progress. You can
double-back from time to time using the water geysers, some of which will blast
you to otherwise inaccessible areas, such as the platform at the lower left
(where you will find a PhotonRay element). You must time your climbing to let
the party leader miss the geyser blasts if you want to make progress. Several
monsters will ambush you as you climb, but nothing here is overly difficult.
There are three parallel paths to the top that fork and often dead-end. You'll
begin at the bottom of the middle pathway. To reach the manor, you should travel
straight up to the second screen until you reach the top of the middle path,
then travel right and up. Take the middle path to the third screen. Move to the
right-most path, climb up two levels, and let the geyser knock you down to the
ledge to the left. Walk beneath the overhanging path to the left, then climb
until you reach the top, where you will be accosted by double battles.
Battle: Acacia Privates (Innate: Yellow)
These soldiers shouldn't be too tough to take down; they use fairly basic
attacks and offer no new surprises. Use a conservative battle strategy and
defend frequently, and you should weather the fight with little trouble. Heal up
immediately afterward because there's a second battle to fight.
Battle: KingMoaman (Innate: Black), BlueMoaman
(Innate: Blue), RedMaoman (Innate: Red)
You now face a truly challenging battle, the first set of enemies in the game
that actually stands a chance of annihilating your party. Serge will be
especially vulnerable to KingMoaman's attacks, as they are black in nature and
will do extra damage to him. Though your first impulse might be to take out the
weaker red or blue foes who cast constant status-effect magic, the king is your
top priority. Fighting alone causes him to use more powerful attacks, and his
frequent use of the GravityBlow and Gravitonne elements can inflict major pain
on your party. Once he's out of the way, take out the character who stands to
inflict the most damage to your party - for instance, if you have Kid, get rid
of BlueMoaman. Cleaning up the final enemy should be simple, as the threat here
comes in the form of numbers.
Once these two battles are out of the way, the party sneaks into the manor to
wait until nightfall.
If you're up for an extra challenge, though, skip the great warrior that is Guile and go for the wimp that is Pierre. A foppish weakling given to delusions of heroism, Pierre offers almost nothing whatsoever to your party. If you travel with him, you'll want to take Kid along to provide a good balance of innate affinities. This path is quite short, but it requires a terribly unbalanced fight and leaves you to force your way through Viper Manor with a nearly useless character.
 The young man in the yard behind Zappa's smithy has Pierre's badge. |
Battle: Acacia Sargeants (Innate: Yellow)
This team of sergeants is much stronger than the privates you'd have met on Guile's path, and Pierre is much less capable of handling them. Defend like there's no tomorrow to minimize the damage you suffer and take out the guards one at a time. You can win without excessive difficulty, after which, you should prep yourself for the next battle.
Battle: Peppor (Innate: Yellow), Solt (Innate: Yellow), Ketchop (Innate: Yellow)
Peppor and Solt, as usual, are incompetent wimps. Ketchop, on the other hand, starts the battle by clobbering a party member for several hundred more hit points than that person actually has. Solt is kind (or stupid) enough to revive your fallen comrade immediately. Nevertheless, it's a tough fight. As with previous Peppor and Solt battles, it's a purely physical conflict, so defend yourself whenever possible. Elements are rather ineffectual, so stick to your weapons and use your elements to heal. After a while, Ketchop will grab hold of one of his comrades and use the hapless dragoon as a weapon, knocking both Peppor and Solt out of the battle. Unfortunately, this will likely knock one of your characters out of the battle as well, so be prepared to take down Ketchop with just two characters standing.
If you manage to overcome Ketchop's strength and Pierre's lack thereof, your party will hide until nightfall.
Nikki's Path
If you choose to follow Miki's advice and go to Shadow Woods, you'll find the
large knight and his cohorts are absent, leaving you free to enter the forest.
There are a number of green-innate monsters here who rely on magic, so it's
often a good idea to retaliate in kind. There are also a number of harmless land
octopi living in the forest minding their own business (which usually involves
butterflies). Most importantly, though, is Nikki, the pouty rock star who has
fallen into a dour mood and keeps running deeper into the woods on his own.
After following him for a while, you'll come upon Nikki trapped in an ambush by
a party of Cassowaries. Join the fray to help him out.
Battle: Cassowaries (Innate: Yellow)
The Cassowaries have teamed up against Nikki, and alone, he'd be overwhelmed.
However, he has three other warriors on his side, so you can make fairly short
work of the enemies, especially if you have a multiple-effect spell like
MagmaBomb.
Once Nikki is saved, he'll run away again, this time heading straight into a
dead end. Speak to him here, and he'll join the party, informing you how to get
rid of the large creature blocking the west end of the woods. Check beneath the
waterfall to receive the angry scapula, a part of Skelly's disassembled body,
and the Aroma Pouch, which is the key to moving along in the woods. The Aroma
Pouch attracts spores from the colored bushes in the woods, which in turn
attract the land octopi, which will in turn feed and pacify the quaffid blocking
your progress. If you lead the red octopus to him (the one located at the east
entrance to the woods), he'll simply shrink, giving you the SkullDuggery window
frame set and apologizing for the trouble. If you bring a different octopus, you
must fight the creature.
The next section seems innocuous until you reach the foot of the large tree, at
which point the large knight who was blocking the entrance to the woods earlier,
Zoah, will leap to attack you, accompanied by Peppor and Solt.
Battle: Zoah (Innate: Yellow), Peppor (Innate:
Yellow), Solt (Innate: Yellow)
All the enemies here are physical fighters, and all are yellow-innate. Be
certain to pay attention to Solt's attempt to use a summon skill - his failure
provides important information you'll need later to use the summon skill
yourself. As usual, defend whenever you can. You should have collected several
green attack elements in the woods, so be sure to equip them and use them when
possible. Zoah has more hit points than Peppor and Solt combined, so target one
of the Shaker brothers first. Be especially careful of Zoah's DragonRider tech
skill, which is the most damaging attack here - even when blunted by defending,
it hits hard.
Once you win, the soldiers will retreat, and you'll be free to explore the root
cave that leads to Viper Manor. The enemies here are mostly blue-innate and
often drop useful healing skills (which can also be stolen). Gloops are the most
significant enemies here, as they tend to ambush your party from above and will
only attack if they're the only creatures in a party. Therefore, it's a good
idea to take them out first.
Your progress will be impeded by a line of running insects here. To staunch the
flow, climb the slope to the left and roll the rock in front of the opening in
the wall. You must fight a Wraith first, a powerful black-innate undead
creature; be careful of its physical attacks and pound it with your best white
elements. Once that's taken care of, head for the back of the cave, where you
can climb to the yard of the manor and wait until nightfall.
At this point, all goals and strategies will be largely the same for every party roster. Pierre's party will be fighting at a disadvantage, while Guile's party will be fighting with extra-powerful attacks. Use your allies' strengths to your advantage and try to minimize their weaknesses. The best parties for this mission are:
- Serge, Guile, Leena/Kid
- Serge, Nikki, Kid
- Serge, Pierre, Kid
Note that you can change party member as soon as you find a Record of Fate by using the TelePorter. Also, even if Kid isn't in your active party - or not in your party at all - she'll still show up, making the most of the swath you've cut through the enemy ranks and playing a vital story role.
The yard of Viper Manor is patrolled by sentries - if you stick to the shadows and avoid them, you can sneak through with little fighting. If you come to close to the guards, step into the spotlight in the back, or walk along the sidewalk, you'll be spotted and pursued (though it's possible to give a running guard the slip). Each different party enters through a different point, but the common goal is the front door, which is guarded by more sentries. It's also locked, so a key is needed to get inside.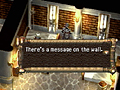
Search the wall behind Glenn's bed to uncover the code for the main doors.
You can find a key in the stables in the back yard. Dodge the searchlights and slip into the bard, where the dragon tender offers you the key to the manor if you help him feed his livestock. You'll also receive a reward based on your performance:
- 10 - Kneepad
- 20 - Bronze Helmet
- 30 - Bronze Mail
- 40 - RecoverAll
- 100 - Iron vest
This minigame is quite simple; use the action button to pick up hay from the pile on the left; you can hold three bales at once. Deposit them in front of a hungry dragon when it calls out. If you take too long to feed a hungry dragon, it will become angry and turn a shade of red. If any dragon is neglected too many times and becomes bright red, you will lose the minigame.
Once you have the key, head to the front door and fight the guards. The Acacia sargeants here are no harder than in your previous battles with them, so you can enter the mansion easily. Inside, you'll find your options limited - the door to the left is blocked, and the door to the right is a trap. If you try operating the snake-emblazoned device by the rear doors, you'll be plunged into a trap where several guards will taunt you. If Kid is in your party, she'll taunt back until one of the guards becomes angry and opens the door; otherwise, she'll spot your dilemma and knock out a guard while you distract him. Once freed, your characters will don enemy uniforms (except Mojo or Poshul, for whom the uniforms obviously don't fit) to make sneaking a bit easier.
From the trap room, there's nothing really to be found downstairs (make a note of the soldier who places the parlor key in the bucket; you can return later to pick it up). To the left, however, are the Acacian quarters and mess. The young knight Glenn will mention something about a code number and wander off to his quarters; follow him, and you can learn the randomly set code to the snake trap upstairs (it's written on the wall). Be sure to check all the chests here - you'll get your very first revive element, one of the very few life-restoration spells in the game. All throughout the manor and the manor grounds are turn spells that you'll want to collect as well.Occasionally in the mansion, you'll come across boxer boys, living treasure chests who challenge you to select the correct chest or fight. Either way, you'll win a prize, but the prize for a correct selection is usually better. If you make an incorrect choice, simply run away and try the battle again.
Another feature of the mansion is the guarded doorways. Certain doors are protected by large roving eyeballs that transform into powerful PortalGheists when touched by your party. It's possible to sneak past them by opening a door while the eye is closed, but it takes excellent timing. These creatures are really not worth fighting; they can demolish an unprepared party with their ElectroJolt spell and can summon creatures to fight alongside them. The prizes for these battles rarely outweigh the risks, and several doors are locked anyway. The large Roborg machines, however, are a better bet. While powerful, defeating them gives you more freedom to move about the mansion.
When you visit the treasure room on the lower floor of the east wing (give the password "silence" by choosing no reply), you can become trapped by taking the silver pendant from the east wall. If this happens, you will become a "guest" of Luccia, the resident mad scientist. She will free you, but only on the condition that you battle her Neo-N-Bulbs. The Neo-N-Bulbs (Innate: Green) are similar to the bulbs found in the Shadow Woods, but much more powerful. Be prepared for a challenging battle; use lots of yellow elements and be careful not to let the field effect meter become completely green, as that will boost the bulbs' power. When you win, Luccia will take notes and ask you to leave - before you go, though, be sure to open the latch on the cage at the back of the room to set the adorable little fuzzball named Pip free.
There are more rooms to explore in the manor before you use the code given by Glenn, although few of them have any major significance. You can meet both Zoah and Karsh in their ground-level rooms as well as a strange jester who admonishes you to be quiet. If you repeatedly try to open Karsh's treasure chest, he'll eventually give in and let you take the item inside. Zoah is not so kind, however. There are also some clever traps to be sprung - enter the armory and place the decor shield on the bare statue; you must fight a group of powerful Man-O-Wars. If you win, you can push the snake statue into its niche and open a secret door in the wall. However, the chest there is guarded by poisonous gas and cannot be acquired at the moment.
Once you're ready, head to the main passage and use Glenn's access code on the snake device to open the center doors. This will take you to the main chamber of the mansion, where implacable guards (and an equally implacable Roborg) stand guard. Take the left door and cross the bridge to explore the library. The librarian introduces himself as the Prophet of Time and explains a bit of Serge's predicament and the nature of alternate realities. Once he's finished, though, the young girl in the room challenges Serge to a fight.Battle: Marcy (Innate: Blue)
Heed the words of the prophet: This young lady looks harmless, but she's the singlemost dangerous enemy you've faced to date. She has reasonably high hit points and defense, but her magic is overpowering. She uses numerous blue-based elements that can wreak havoc on Kid. Be especially careful of the IceBlast element; she uses it twice in a row when low on hit points, and it possesses the ability to temporarily stop a party member in his tracks. You may end up finishing off the fight with only one active character. Be aware that if all active characters are frozen, it's game over, so it might be good to have Medicine along to remedy blue status conditions. Also, try to avoid using the Cure element to heal, as it will boost the field effect power of blue characters and skills - use Capsules or Tablets instead or RecoverAll if you have it. Turnred will also come in handy if you have Pierre or Nikki in your party, as it lets them inflict high damage on Marcy with blue skills.
Once you manage to defeat Marcy, she'll run away, and the prophet will tell you the key to accessing the mansion's private areas - go to the main chamber and press a hidden switch on the back of the second-to-leftmost column. It's a touchy hotspot, so it may take a little fumbling to activate. Once you do, you'll be attacked by the guards who were nearly squashed by the lowering platform. With them out of the way, it's a simple enough matter to use the platform to rise to the upper areas and explore.
Be sure to save at the Record of Fate to the left before exploring any rooms - you're in for a tough battle. In the center room is a strange artifact, which seems to momentarily excite Kid. However, her interest fades just as the lord of the manor, General Viper, enters the room with a strange cat-like being named Lynx. Lynx has a strong interest in Serge, but Kid presses the attack.
Counter Lynx's AntiWhite spell by giving everyone in your party a wide assortment of elements.
Battle: Lynx (Innate: Black)
This is another challenging fight, mainly because Lynx's innate elemental affinity gives him extra strength against Serge. Furthermore, he can use AntiWhite, a spell that seals the target's ability to use any white element for a short time. To add to the danger, he uses instant-kill spells and can also dish out impressive physical punishment on top of his deadly elemental skills. Be sure to defend and don't rely too much on white elements. But don't let him get the upper hand by making the field effect all black, either. Try to keep one character with a charged-up element meter at all times in case you need immediate healing. Don't count on RecoverAll saving your bacon - it's likely that AntiWhite will make it impossible to use. Be cautiously aggressive, pressing the attack but not getting carried away, and you should have success.
Of course, Lynx wouldn't be much of a villain if such an early battle put him down for the count. He rather quickly turns the tables on Serge's party, but quick, ruthless thinking on Kid's behalf lets the group make its escape. Or almost - Lynx manages to put a damper on Kid's escapades, and the party plunges to the sea.
Guldove: Where Ripples Become Waves
Help Kid
Serge wakes up in an unfamiliar place - Guldove, a sort of shanty town on the water. But no sooner is he up and about than Kid is down for the count; whether or not she's a member of the party yet, she ended up here, and her wounds are sufficient to place her in a terrible poisoned condition.
At this point in the game, the story again splits. You can choose to find help for Kid, or you can concede your inability to Cure her poison. Helping her adds emotional impact to the story and lets your characters power up a bit more quickly. Abandoning her will let you recruit one of the most powerful characters in the game. The choice is yours.
Whichever branch of the story you choose to pursue, there are a few common things you can do. Be sure to shop for new elements and forge better equipment at the shops. Acquire Skelly's pelvic bone from the element trader. Eavesdrop on Doc and Orhla at the pub. Visit Deria and Steena to learn more about the world of Chrono Cross. Acquire the Green Tinkler from the dwarf in the pub. Recruit Greco in Termina in the shack behind the shrines. He's a powerful character and can be of use later.
Recruit NeoFio by using the Green Tinkler in Hydra Marsh to pass the mutant plants and travel to the back of the swamp. In the small watery cove, fight a SnibGoblin and a SnobGoblin to acquire the Life Sparkle key item, which you can then take to the balcony of Viper Mansion. Touch the Life Sparkle to the plant in the pool and let NeoFio join your party. After recruiting NeoFio, visit Luccia's lab and recruit her as well. Don't miss the silver earring on her desk. Shop for new elements in Termina. If Guile is in your party, speak to the fortune teller in Termina to claim his prize for a successful wager: a Brass Rod.
Now, follow the branch of your preference.
Do Not Help Kid
If you decide not to help Kid, Korcha will take the Astral Amulet that Kid gave you and storm off. Macha will help sail you around the archipelago, and Doc will join the party as well. When you reach Termina, you will speak to Glenn briefly at the entrance; he wishes to follow General Viper to Fort Dragonia. Return to the docks and let Glenn join the party. You will now have free run of the island chain. Fort Dragonia is beyond a foggy shroud upon the ocean. Once you clear that, you may return to Guldove to find that an unknown stranger has provided the Hydra humour Kid needed, and she has returned to health.
If you choose to help Kid, you will take the Astral Amulet given to you by Kid. Korcha will temporarily join your party to help out and sail with you to Termina. At this point, his boat is only available for moving back and forth between Termina and Guldove.
Since the Hydra humour you need cannot be found on El Nido in this world, you must go to a different world to find it. Take the Astral Amulet to the point where angels lose their way, Opassa Beach, and use it where the light portal appears. This will return Serge to his home world, where the Hydra still rules the Hydra Marsh.
If you have the Green Tinkler you can simply head straight back through the marsh to find the Hydra. But if you follow the faerie apparition, you can recruit a new character. This option requires a few extra battles, but the effort is worthwhile.
Travel to the left of the marsh and up the large branch structure, the same route you took in Another World to acquire the Safety Gear. Halfway up, you will be accosted by a strange creature called a Beeba. On its own, the Beeba is no threat - however, this Beeba summons four friends to fight along with it, which makes for a long, drawn-out battle (an enemy moves for almost every action you take). Multihit elements are good for starters - use MagmaBomb a few times to soften the group, then focus on taking it down, one Beeba at a time. Have plenty of healing elements available; Tablets probably won't be sufficient, so make use of Capsules or nonconsumable elements like Cure or CurePlus.
Save the faerie from the Pentapus before fighting the Hydra, or you'll never see her again.
When you defeat the Beeba, it will give you a key item called the Beeba flute. Move along up the branches. Be sure to save at the Record of Fate. You may choose to fight the Beeba in front of the chest, but it's not required (choose the "Mr. Puny-verse" answer to decline the challenge). To the upper right is an open platform - if you use the Beeba flute here, a WingaPede will appear and attack.
Battle: WingaPede (Innate: Green)
The WingaPede is a tough foe, with multihit skills and the ability to launch multiple consecutive physical attacks. Any green-affinity characters will be at a definite disadvantage here; your best bets are Guile, Greco, or Leena. Yellow-based attacks will be a big help, but physical attacks are useful as well.
When the WingaPede falls, it weakens the platform. Stand on the platform to fall through into a hidden cave, where a large squid-like creature lives. In its cave is a small cage where a faerie has been trapped for some dire fate; if you free the faerie, Madam Pentapus revives and attacks. However, you can leave the cave without saving the faerie if you're that sort of person, but be aware that you'll never see her again.Battle: Pentapus (Innate: Blue)
The Pentapus has a few strong physical skills, but nothing that will catch you off-guard. A fairly basic strategy will be sufficient - defend frequently and mix physical attacks with red-based elements. Greco will again be of use, as his hardy constitution will protect him from the pentapus' opposite-natured attacks.
When Pentapus is defeated, the faerie Razzly will join your party. Her magic skills will be a big help for the upcoming battles, but be sure to give her the best defensive equipment in your party to help compensate for her poor constitution.
Climb up and out of the Pentapus' cave, then leap from the tree branch to the back section of the marsh. Follow the swamp path around and save at the Record of Fate before advancing. As you travel to find the Hydra, you will be confronted by dwarves who resent your intrusion into their home.
Battle: Hi-Ho Dwarves (Innate: Yellow)
Dwarves on their own are not much threat, but collectively, they're extremely dangerous. They'll begin the battle with an attack called Hi-HoChorus, which strikes your entire party and deals huge damage. This skill is amplified by the number of active dwarves, so thinning the ranks cuts down on the power of the attacks. First use RecoverAll to restore your party's blasted hit points, then aim for the tall DaggyDwarves first, as they have slightly fewer hit points and can be more easily defeated. The dwarves will continue to use Hi-HoChorus, but the more of them you knock out of commission, the weaker it will be. Once you've triumphed, you should probably return to the Record of Fate to save before advancing to the back of the swamp to fight the Hydra.
Battle: Hydra (Innate: Yellow)
Like the WingaPede, the Hydra has strong consecutive physical attacks and even stronger elements, such as the multiple-hit breath attack. Do not use yellow elements on this creature, as yellow will heal it. Instead, keep Razzly loaded with green elements and make sure her hit points stay high; use her as your main bruiser, as her Raz-Star skill can slam the Hydra for major damage. You might want to bring along Poshul to use curative and revival skills, as she has high resistance to the Hydra's attacks. On the other hand, both Leena and Greco can hold their own: Leena as a healer and Greco as a powerhouse. Try to avoid using Capsules to heal, as they will affect the field effect meter in the Hydra's favor.
When the Hydra is vanquished, the dwarves curse humans for their destructive ways and abandon the swamp. If Razzly is with you, she'll notice the Hydra isn't extinct after all (setting in motion a small scene later when you acquire the Hydra humour).
Once you have the medicine you need, return to Guldove to see Kid. As Kid recovers, Korcha's sister Mel runs off with her element grid. Track Mel down and reclaim it, and she will join the party at a later time.Hermit's Hideaway: A Meeting With the "Other" Swordsman
Battle: Fargo (Innate: Blue)
At this point, you will either have Kid in your party, and Korcha will sail you around the archipelago, or Kid will still be ill in Guldove, and Macha will be your key to transportation. In both cases, the following events are identical, although using Kid lets you steal some useful items (most notably @Iron components for weapon upgrades). You can move about the islands freely, so you're welcome to explore. However, most islands are only partly accessible; a combination of unmovable objects and dangerous enemies makes exploration a risky prospect. Your next destination is Hermit's Hideaway, a small island to the northeast of the main El Nido island, where the former dragoon Radius lives a quiet existence.
Once you reach the hideaway, you will discover that Lynx has anticipated your moves and sent his jester Harle to prevent Radius from helping the party by burning the hermitage to the ground. Despite Harle's stated desire not to hurt Serge, she will nevertheless fight him to impede his ability to pursue Lynx and Viper.
Battle: Harle (Innate: Black)
There's really not much to this battle; Harle is exceptionally simple to defeat. If you're lucky, Kid can pilfer MoonShades from her, a rare item that can greatly increase a character's defensive capabilities. Serge will be the vanguard for this fight, as his physical attacks alone should defeat Harle. When she loses, Harle retreats, and you can freely discuss matters with Radius, who hid in a bolt hole as his home burned.
X. From Pirate Ship to Ghost Ship: A Mariner's Worst Nightmare
Your mission now is to find Lynx and Viper and put a stop to their plan at Fort Dragonia. Fort Dragonia is located in a valley off the east coast of El Nido, but the shoreline is blocked by a foggy shroud that makes ocean-going treacherous. If you choose to enter the fog bank, you will soon encounter what seems to be a ghost ship. However, it is in fact a pirate ship, and the pirates aren't terribly excited to see you aboard their galleon of terror. You will be forced to engage in a series of battles against the pirates' lackeys - whether you win or lose or retreat, you'll end up a captive, but there's no reason not to give it your best effort.
Battle: Men at Arms (Innate: Black)
If you fought the Man-O-War battle line in the armory of Viper Manor, this should be simple as the same strategies apply. Soften up the group with multiple-effect skills like MagmaBomb, then take out the men one at a time.
Battle: Polly (Innate: Red)
Once you put down the Men-At-Arms party, you'll be forced to battle a giant bird named Polly. Far from being the sharp-tongue parrot his name would suggest, Polly is in fact a red-innate creature whose attacks include FirePillar (a spell that causes the target to become afflicted with berzerk status). Defending won't prevent the berzerk effect, but it will minimize the damage you suffer from physical attacks. The IceBlast element will be handy here.
If you manage to defeat Polly, you must still contend with the captain himself. Fargo relies primarily on physical attacks and is fairly weak to red elements. If Glenn is in your party, his X-Strike dual tech with Serge is a great asset against Fargo.
Once you've made your way through the battles, you'll end up in the brig - a grim situation, but the sudden appearance of a true ghost ship makes the situation even grimmer. You'll be free to leave the brig, but the ship is full of locked doors and monsters.
You exit the brig on the lowest deck. The door at the end of the hall leads to the top deck, but it's locked, and the key is unaccounted for. Explore the ship and rescue pirates from their undead aggressors (white elements are best here), and they'll begin directing you toward the key you need. Go to the upper interior deck and enter the door next to the burning barrels. Inside is a galley with a duct leading to the mess; search the rear right corner of the ship to move to the next room, thereby detouring around the burning barrels in the hall. Speak to the pirate in the hall outside the mess, then return to the lower deck (the route to the upper deck is blocked off). Enter the now-unlocked room and help the sailor inside to receive the key to the door at the end of the hall.
Beyond the door is the ship's cargo hold. Surprisingly, you'll find Pip, the little creature from Luccia's lab, scurrying about the area. If you chase him down, you can eventually recruit him. At the moment, however, you may want to hold off on adding him to your active party, as he's fairly weak and his white-innate nature puts him at a disadvantage against the undead foes here.
Exit the cargo bay through the open cannon port and follow the railings around and up to the top deck. On the main deck, the pirates are waging a desperate holding action against the ghost ship's denizens, but the humans are rapidly tiring. Do as Captain Fargo asks and take the helm, where you'll fight the leader of the ghost infestation.
Battle: DeadHead (Innate: Black)
The fight doesn't seem too threatening at first, but the small creatures will fuse into a massive undead beast called the DeadHead. This monster makes for a frustrating battle, as it has an unusually high EVD% rating, meaning it will frequently dodge your attacks. Of course, if you don't hit it, you neither inflict damage nor build your element meter. Even worse, it has the ability to inflict blindness on characters with its elemental attacks, which will make successful strikes even harder to come by. If Glenn is in your party, the X-Strike attack will be extremely useful, but other skills such as Meteorite and photonbeam are also effective. Do not use black elements to attack, as they will heal DeadHead.
Once the ghostly fog has cleared, Fargo gives you his blessing to track down and defeat Viper. Now, you are free to approach the east coast of El Nido. But to reach Fort Dragonia, you must brave the fiery cauldron of Mt. Pyre. It's possible to push your way through the deadly volcano by healing yourself after walking through the magma, but it's much safer (and cheaper) to receive help at Water Dragon Isle.
If you have it, the Numble element will make it easier to strike the evasive DeadHead.. On to the Water Isle: In Search of the Dragon Blue
Another World's Water Dragon Isle is a dried ruin. You can find Skelly's sturdy ribs to add to your collection of his bits and pieces, but aside from that, there's nothing to be accomplished here - the entrance to the cave is sealed solid with unbreachable ice.
Instead, you must travel to Water Dragon Isle in Serge's home dimension. Since you don't have a boat in Home World, you must barter with someone who does. Speak to the sleeping fisherman at the docks in Home Arni and pay him 100G to travel to the island.
When you arrive at Water Dragon Isle, it's a scene of slaughter. The dwarves, who abandoned Hydra Marsh after the Hydra died, have chosen to overrun this island at the expense of the peaceful faeries who made it their home. Events here will turn out somewhat differently depending on whether or not Razzly is in your party - bringing her along makes the faeries see your party as heroes, but if you come without Razzly, you'll be despised for driving the dwarves from the marsh in the first place. Even if you chose not to help Kid, the dwarves will still be rampaging here, thanks to the fact that an exploration team killed the Hydra instead.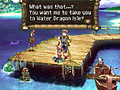
Speak to the sleeping fisherman at the Arni docks to embark on a quest for the ice breath.
The enemies here are all dwarves, so if you fought your way through Hydra Marsh you should be familiar with their skills. In addition to the weaker Daggy and Daffy dwarves, you'll also face the more powerful (despite their plain name) Dwarves. Once you enter the cave, you'll face another group of Hi-HoDwarves, which has a slightly stronger group attack than those before, but should still be dealt with in the same manner as the hi-ho dwarves in Hydra Marsh. Fight your way through the dwarves - you're not required to defeat them all, though it certainly doesn't hurt to take this opportunity to load yourself with the @Iron components that can be stolen from the dwarves - and travel down into the cave. Don't miss the Scaley Dress behind the waterfall, which can be equipped to boost a female's magic defense rating. At the bottom of the cave, you'll face off against the dwarves' ultimate weapon, a powerful machine called the Hi-Ho Tank.
Battle: Hi-Ho Tank (Innate: Yellow), Dwarves (Innate: Yellow)
This fight can truly be challenging. The tank hits for a great deal of damage with its element cannon attack (a powerful blast of a random elemental color; if it happens to strike a character with a blast opposite to their innate nature, it can easily put him down in a single blow). It also possesses a few actions that can hurt individuals or the group. But before tackling the tank itself, you must put the kibosh on the two dwarves who fight alongside it, one at a time. Each dwarf can heal the tank for 55 hit points apiece, which can infinitely prolong the battle. Knock them out of the fight before disassembling the machine, and the battle will be much quicker. Defend yourself whenever possible and, if you have Razzly along, be sure to keep her healed up, as the yellow-innate skills of the tank and its footmen will hit her especially hard.
With the dwarves gone, the island is at peace again. If Razzly is with you, she'll see her sister has been critically wounded and will leave to attend Rosetta. Speak to the water dragon in the cave at the heart of the island to receive both the Ice Breath and the *FrogPrince summon. This summon spell will be immensely helpful in the upcoming missions, so it's a welcome gift. Additionally, if Razzly is not in your party, you'll frequently see a brief interlude by firelight in which Kid tell Serge a little about herself. It's an optional scene, but gives insight into what motivates Kid to fight.
Before heading to Mt. Pyre, you can take the Ice Breath to Hermit's Hideaway to use it on the hot patch of land in front of the husk of the tree. Once the ground has cooled, Poshul can dig up Turnip, a new party member of questionable merit.
Fort Dragonia: Ancient Dragons' Dream in Ruins
Heading into Mt. Pyre, it's easy to see why the Ice Breath was needed - magma flows freely and saps your hit points with every step. Touching the magma also results in a burn status, which causes your characters to suffer damage more easily. Stand before the lava and use the Ice Breath to freeze it solid, but be aware that you cannot access treasure chests embedded in solid magma. Additionally, there is a ramp further into the mountain which can only be climbed by slogging through burning magma. Bring lots of Ointments and be sure to protect any blue-innate characters well.
In the second area of the volcano, you'll again encounter Peppor and Solt.
Battle: Peppor (Innate: Yellow), Solt (Innate: Yellow)
These guys aren't much more powerful than they were before, so no new strategy is required. However, they do give you a free lesson on trapping elements with element traps. Traps are the only way to acquire many of the high-level spells and the level 7 summons (except *FrogPrince, which you may already have). If you didn't undertake the Ice Breath quest, you will win a star after this fight.
You'll want to save at the Record of Fate here before heading into the east passageway, as you're about to face two major battles. You can also explore the volcano a bit more thoroughly, though there's nothing particularly valuable contained within. In the room with the giant lizard, you'll be confronted by a small dragon with a polearm who challenges you to combat.
Battle: FireDragon (Innate: Red)
First of all, a warning: FireDragon absorbs red elements, so if you try to attack him with a red skill, he'll be healed instead. This is not good. Second, he has an extremely powerful multiple-hit skill called FieryBreath that can make short work of a weakened party. Blue-innate characters with low MDEF ratings are at a massive disadvantage here, so keep everyone's hit points higher than 125 at all times to prevent unfortunate disasters. Although your first instinct may be to use *FrogPrince against the dragon, it's practically impossible, so your efforts are better spent by using Diminish to reduce the power of the dragon's element attacks. His hit points are high, so expect a long, difficult battle.
With FireDragon out of the way, you should backtrack and save before advancing. Near the exit is another major battle: the three Devas of Viper Manor, determined to stop you from reaching Fort Dragonia. While this fight will be easier to overcome than the battle with FireDragon's battle, it's still far from a cakewalk.
Battle: Zoah (Innate: Yellow), Karsh (Innate: Green), Marcy (Innate: Blue)
Though you've fought these three individually, they're slightly more powerful here than before, and they attack in tandem with a fearsome onslaught of skills. Marcy and Karsh can damage all characters, whereas Zoah tends to hit individuals with impressive strength. If Leena or another blue character is in your party (Leena is best, thanks to her high MAG rating), you can take advantage of blue skills Marcy uses to help switch the field effect to all-blue and use the *FrogPrince summon; although it won't be at full power, it should help soften all of them up. If you don't want to risk using *FrogPrince, be sure to focus on Marcy first, as she can freeze characters with IceBlast and has multiple-hit skills. Then, take down Zoah. Save Karsh for last and dispatch him quickly with ElectroJolt and Upheaval, though he shouldn't be much threat on his own.
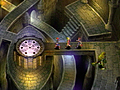
You're now at Fort Dragonia, a massive collection of puzzles and tough battles. Prepare yourself for the fight ahead and don't let Harle's warning discourage you - there's no turning back now. You should recognize the fort by now as the dungeon from the beginning of the game, though to reach the area you saw in Serge's dream, you must jump through some serious hoops.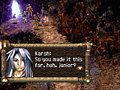
Surviving the triple-elemental threat of the three Devas requires a carefully balanced attack strategy.
This point of the game should bring everyone's growth level to about 15, and most characters will automatically learn their innate level 5 tech skills. If you missed the Ice Breath quest, you'll earn that final star here.Optional Battle: Dragoon (Innate: Red), Acacia PVT (Innate: Yellow)
If you skipped the Ice Breath quest, you'll be forced to fight a guard at the entrance of the tower. This is actually a good thing, as it lets you acquire the second star you missed as well as opening up your level 5 skills and earning *FrogPrince. The dragoon has a few tough attacks, but after the gauntlet you survived in Mt. Pyre - and the upcoming challenges you'll soon be facing - he should be nothing to worry about.
Inside the fort is a large empty room with a radiant, circular pattern inscribed on the floor. There are four doors here, each must be explored before you can proceed. The pattern on the floor is a circuit of sorts; when six crystals are deactivated, the circuit opens, and you'll find your goal. There is no set order for the first four doors, so the descriptions here will start from the far right and move counterclockwise.
East Door
Beyond the long bridge, you'll come to a statue with an inscription reading, "The Watchkeeper faces north, as we defend the fort." The Watchkeeper in question is the small dragon statue, which faces a random direction every time you enter the room. The direction it faces is always "north" for the rest of the room, so all directions are relative to the statue. Thus, if the statue is facing the left side of the screen, "south" would be toward the right side of the screen. Beneath the inscription is printed a set of four cardinal directions; the direction you choose will rotate the platform on which you stand to a position relative to the dragon's "north" and drop you to the lower areas. Because "north" is assigned randomly, you must deduce how to get where you're going. Each section of the lower area, listed by its location on the screen, is described in the following section.
Every compass direction in this room is based on the statue's rotating "north."- Left: Nothing here.
- Top: A few Cybots stand guard here.
- Right: Leads to the first crystal; examine it to activate the red
circuit.
- Bottom: Treasure chests - Trap Volcano, a Flame Charm, FirePillar,
and MagmaBurst.
Northeast Door
This section is a complex maze of enemies, but you can acquire a number of worthy elements by exploring. The shortest path to this area's switch can be found by taking the entrance path and turning at the first left branch. Turn right, move down the stairs; then, turn right again and exit the first room through the exit to the right. In the second room, follow the path to the back of the room and pass through the door into a third screen. Head up the stairs near the doorway and follow the path around the perimeter of the room until you find the crystal, which is being protected by a powerful guardian.
Battle: Taurusoid (Innate: Green)
The Taurusoid has some impressive physical attacks, but the real danger is his Tornado element, a powerful attack that can rip through your entire party. However, Tornado doesn't need to be a threat. If you found a Trap Tornado element prior to this fight, you can negate his spell and capture it for your own use. He's still quite dangerous, though, as his attacks will inflict serious hurting on a single target, especially a yellow-innate character. Once you get him out of the way, you can throw the switch to open the green circuit. - Northwest Door
This room is filled with a series of chests that, when opened and closed, control rotating platforms. Moving through the area requires little timing, merely a good head for puzzle-solving. The positions of the rotating platform on the left side lead to:
- Upper position: Switch-chests on the right side of the room.
- Middle position: A room guarded by an Acacian dragoon.
- Lower position: Entryway.
And the platform on the right side of the room leads to:
- Upper position: Switch-chests on left side of the room.
- Middle position: Sea Charm.
- Lower position: Switch to activate the blue circuit.
Use the chests on the left side to move the left platform to the lower position. Cross to the right side and use the chests there to move the right platform to the bottom position. Now, take the path along the top perimeter of the room to the chests at the upper-left of the room. Bring the left platform to the upper position and take the path it creates into the room at the right center area of the room, where the switch to the blue circuit and another boss await.
Move the left platform to the top and the right platform to the bottom to advance.
Battle: GiantGloop (Innate: Blue)
GiantGloop isn't especially powerful, but it's very hard to strike. It also has access to the powerful Iceburg spell, which can be very dangerous if you don't trap it. If you find yourself frustrated with constantly missing GiantGloop, try using EagleEye to boost your HIT% rating for a few rounds. Red elements such as Kid's RedPin are excellent for inflicting damage.
West Door
This section can be confusing, but with a bit of practice, it's perfectly sensible. The order of your party is key here to moving sections of the room about to gain access to various items and objects. Speak to the device in the west room to assign the members of your party as "body parts," which determine the position of the room's objects. The leader of your party will be the head, the second person is the body, and the third character is the tail. Using the select key, and the glowing footprints outside the left room will change the order of your characters, and the sequence of "body parts" when you examine the device will cause elements of the room to shift.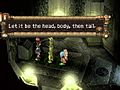
Each character is assigned a position - switching your party order is the key to success.
The following sequences will net you items; other permutations are useless.
- Head, body, tail: Access to the blue switch that lowers the
stairs.
- Tail, body, head: Access to the switch that lowers the crystal
platform.
- Body, tail, head: Access to the chest containing an Earth Charm.
- Tail, head, body: Access to the chest containing an ElectroBolt
element.
Once you've activated the final circuit, a column descends in the central room. Be sure to save before opening the door within the column, because a tremendously powerful enemy waits inside.Battle: SunOfAGun (Innate: White)
SunOfAGun only has 365 hit points, but reducing those few points to zero is more easily said than done. All your attacks do about the same amount of damage, so even a three-stamina-point strong attack will hit with hardly any more power than a weak attack. SunOfAGun uses a lot of effect spells, particularly WeakMinded, to soften the party before casting powerful attacks like MeteorShower. Though Serge will be naturally resilient to these attacks, he also inflicts poor damage with his white-innate attacks. The changing expression on SunOfAGun determines the ferocity with which it attacks - defend yourself when it becomes angry. Any black-affinity attacks will be valuable here, as they're fairly strong against SunOfAGun, and they prevent the field effect from becoming all white.
When dusk has come for SunOfAGun, you're free to take the elevator to the upper floors of the tower, which should look familiar. This time, there are different enemies as well as numerous items to be uncovered. Explore until you've uncovered everything, then head to the crystal room where another powerful foe awaits.
Battle: Bunyip (Innate: Red), Bunyip (Innate: Black)
This harmless-looking creature seems innocuous enough, though it has its share of powerful attacks. Be certain to set down a Trap Inferno element as quickly as possible, as Bunyip has a tendency to hit your party hard with that spell in the early stages of the battle. Pound on the creature for about 400 hit points worth of damage, then prepare yourself for its transformation; Bunyip becomes an undead zombie that transports you to a sea of darkness and tries to put you in a world of hurt. Use a Trap FreeFall element immediately to negate its most powerful attack; even then it's rough going. Leena and the *FrogPrince summon are very valuable assets here - summon the frog during a lull in Bunyip's element use to soften it up, or else you're in for a long and difficult battle. Defending probably won't do much good here, but Diminish will be helpful in reducing Bunyip's elemental power. Once you destroy this creature, you're free to move along to the upper area via the central TelePorter.
This time, beyond the doors lies not another dream but instead an encounter with two of the most dangerous foes you've faced: Viper and Lynx.
Battle: Viper (Innate: Yellow)
Viper uses physical attacks and tech skills exclusively. His AirForce skill can hit the entire party and dish out a decent amount of damage. But his weakness is his predictability: He usually follows up elemental attacks with physical blows, so it's easy to tip the field effect meter in your favor and again summon *FrogPrince, which will remove about two thirds of Viper's total hitponts. After that, it's little trouble to finish him off and heal up for the next fight...
Battle: Lynx (Innate: Black)
Now, you face a much more difficult opponent. Lynx here is more powerful than the shadow you fought in Viper Manor. He uses a wider variety of elements (including the ability to use elements from Serge's grid - you're likely to find your own Meteorite or Uplift turned against you) and will also attack with his level 5 group attack tech, FeralCats. If you can time your attacks, it's possible to use *FrogPrince once more, which will shave more than half his hit points away and abbreviate the battle to a more comfortable length. If you bring Leena along, you'll have a major advantage even if *FrogPrince doesn't work. She can use her level 5 tech to recharge many of her spent elements, which means you can restore used healing skills and stay in the fight longer. Use every trick in the book, and you'll come out ahead.
Unfortunately, the vision that has plagued Serge since the beginning of the game comes to pass, even if you try to keep Kid out of the party. And soon you'll find yourself unexpectedly in control of Lynx, facing down a bloodthirsty Serge and his allies.
Battle: Serge (Innate: White), Kid (Innate: Red), Other (Innate: Varies)
This is a doomed battle; Lynx simply cannot win this fight. Kudos if you manage to last more than two rounds before succumbing to the inevitable.Temporal Vortex: Where Lost Souls Wander
When Lynx - that is, Serge - comes to, he's in a bizarre, surreal environment that most closely resembles an impressionistic painting. This is the dimensional vortex, a place that draws in lost souls. The first order of business is to push rocks out of the way to acquire the rare and valuable revive element on the left ledge above the hut - pass through the cave behind the waterfall to reach it. Now, walk out onto the tree at the right side of the screen. Serge's weight will cause an apple to drop, and a strange creature will dart from its home to acquire it. While it's distracted, run over to its home and enter through the door. Sprigg, the goblin-like creature who lives in the hut, is a bit nonplussed to have her home invaded. Nevertheless, she insists on coming along with Serge and lending her talent for shape-shifting to his cause.
It's important to note that Serge's innate nature is now black, not white. This will have important ramifications for your battle strategies for as long as Serge looks like Lynx.
Don't miss the valuable revive element on the platform above the hut!
Once you've recruited Sprigg, climb to the top of the cliffs and enter the tower at the peak. Inside, you will be confronted by Harle, who grills you about your identity - are you truly Serge or actually Lynx? When she transforms into a likeness of Serge, mimic her actions by walking into the same door as she does. Eventually, you will come to a new area - more Escher than Monet - and Harle will join your party. Allocate elements and equipment and use the switch near the main junction to change the direction in which you can explore. While you're here, be sure to have Sprigg deliver a killing blow to several TotalChaos creatures to ensure she learns how to mimic it with her Doppelgang skill; they're powerful monsters who can definitely aid the party.
Jump into the portal in the lower portion of this area to warp back to the real world - you'll come out in Home Hydra Swamp, but the portal through which you travel will fizzle and fade once you appear. Further, if you travel to Opassa Beach, you can't use the Astral Amulet to teleport to Another World. Your next goal is to determine what has happened and how you can return to Another World to find Lynx and get Serge's real body back.
Back from the Darkness: And on with a New Journey
Once you've been to Opassa Beach, return to Arni. The residents of Serge's hometown obviously don't recognize him in his new form and treat the party of demi-humans with contempt. When Serge goes home, he shares his story with Marge, who is shocked, but believes in her son. Once she's told her tale, speak to chief Radius, for whom the cat-man is a bitter "Lynx" to the past.
Battle: Radius (Innate: Green)
The fight with Radius is an easy one; although he has a few good attacks and decent physical and elemental power, he's not significantly stronger than the members of the party and is no match for three of them at once. Once he's defeated, he'll join the party and recommend traveling to Termina to find help resolving the situation.
XV. Termina: Knight or Day?
To get to Termina, you must make a short trip through Fossil Valley. Beware the dodos, which, as usual, respond to elemental attacks with vicious counterstrikes - they'll also use trap elemental spells that can suck away your valuable elements. Beat them down with physical strikes and collect all the loot in the area, then head along to Termina.
Home Termina has been occupied by the Porre army under the command of Norris, the leader of Porre's Black Wind brigade. The city is far more militarized than its alternate-reality counterpart, and Viper Manor is a crumbling ruin. Norris is the key to the events here, so track him down. But first, visit Zappa's forge to recruit the powerful blacksmith into your party. He brings with him the Spirit Smith, a magical object that will let Serge forge, disassemble, and sell new equipment at any Record of Fate or on the World Map. You can also recruit Van, who lives in poverty in this world and struggles to help his father make ends meet.
You'll find Norris in the ruins of Viper Manor, but due to the current state of the building, you must reach him through the back route. You may either descend into the well or travel through Shadow Woods to reach the underground passage into the mansion dungeon, which is located immediately to the left of the empty well on the small ledge. If you take the route through the woods, you'll meet Lisa's father beneath the small waterfall where Nikki was recruited. If you present to him the mushroom found in the cave beneath the tree, he'll transform into a walking mushroom himself and force his way into your party until he can find a cure for his condition.
The mansion can only be reached through this drainage tunnel.
Once inside the waterway, you must knock a few barrels into place to get where you want to go. Climb the ladder at the rear of the underground spillway, and you'll find yourself in the basement of Viper Manor, where Norris will greet you. After some discussion, he'll join the party as well. At this point, you now have access to a boat and can travel freely about Home World.. Marbule: Village of the Demi-Humans
This is a good opportunity to explore the region and pick up things you had missed before. There are items to be found in most areas, and a secret place called the Bend of Time. The Bend of Time is reminiscent of a location in Chrono Trigger called the End of Time; but while that extra-dimensional location was a gateway to places throughout time, this is simply a place to fight extra battles. Portals of light will be revealed as you make further progress into the game, and you can bring Sprigg here to learn new Doppelgang skills. There's also a locked door that cannot yet be opened...
Another new location to visit is the El Nido triangle. Unlike the location in Another World, this one can be explored. At the center, you will find a key item (which doubles as an accessory) called the star fragment. Take this item to Sky Dragon Isle (the crescent-shaped island to the west), and you'll be attacked by an enormous alien.
Battle: MegaStarky (Innate: White)
This alien has a white-innate nature, so its attacks may give Serge some trouble. It doesn't have any particularly powerful skills, though, so a conservative strategy will be adequate to defeat it. Once it's beaten, it will shrink to regular ol' Starky size and join your party (if you can catch it). Starky's abilities can come in handy at times, so it's good to have him in the party. Don't forget to grab the cool Our Favorite Martian frame from the man on the steps.
Another character can also be recruited at this time if you want to go a bit out of your way. Travel through Mt. Pyre (since you've never been through Home Mt. Pyre, you must fight through the mountain again; there are new items to acquire, and the Ice Breath still works) to Fort Dragonia. The fort itself is much like its alternate-reality counterpart but without all the dangerous monsters. There are a number of powerful elements and items to collect here as well. You must activate the circuits, but it should be easy with the relative absence of creatures (though you will encounter a few powerful foes, there are no deadly boss battles as before). Once the first four circuits are open take the elevator to the basement and place the Big Egg on the glowing recess in the center. Out will hatch Draggy, a cute, infantile and surprisingly strong baby Dragonian - the last of his kind. His natural imprinting instinct will cause him to latch onto Serge as his parent. At this point, you have no need to activate the final switches in the tower, as there's nothing to be accomplished yet in the room at the pinnacle.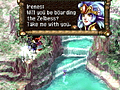
Speak to Irenes at the entrance of Marbule once you spend the night in the deserted hut.
When you travel to Marbule, you'll find it deserted except for strange ghosts and the great explorer Toma XIV and his friend Ash. If you spend the night in the small building near the entrance, you will be given the option to explore the town during the middle of the night. Walk around the village and speak to Toma and Ash on the bridge. When you return to bed, an eavesdropping mermaid will take interest in your conversation. The next morning, she will call to you as you leave town and ask to meet on the S.S. Zelbess.The Zelbess is the Home Fargo's ship (called Invincible in Another World). Rather than prowling the seas as a predatory pirate, Fargo here is a scheming cruise ship captain who profits from the misfortune of Marbule's former residents. If you visit Fargo in his cabin, you'll see the tail end of a conversation between him and Irenes, the mermaid from the night before. Your goal here is to find the Sage of Marbule to learn more about the Sea of Eden, but that will take some doing. The sage is, like all the other demi-humans aboard, a menial worker in Fargo's thrall. To get access to him, you must defeat Fargo in a game of roulette. This task is far more easily said than done, as Fargo has an impressive lack of ethics and is more than happy to rig the game to make sure you don't win.
You can visit the casino at other times to wager on the roulette wheel. If your luck holds - or if you hit pause and cheat before making a selection - you can win an @Rainbow Shell component for forging the first time you reach 10,000 points. Future victories will only yield @Denadorite, which is still useful but not as difficult to acquire as the @Rainbow Shell items.
Face off against Fargo until you're satisfied you cannot win, then explore the ship some more. If you visit the inn rather than Casino Vegas after challenging Fargo, you'll notice the innkeeper is mysteriously missing. This, and the innkeeper's admonition to his cat when it tries to climb the ladder behind the counter, is your tip on how to stop Fargo's cheating ways.
Visit the magic show and let the magician, Sneff, transform your party into a group of cats. Before he can change you back, leave the stage room and make the most of the run of the ship. If you visit the mess on the upper interior deck, you can get a monster mouth frame set from the cat within as well as a Frypan AG47. If you'd like, you can even travel over to Nikki's ship as a cat by walking across the wire between vessels. Now, visit the inn and run beneath the desk to the ladder. Climb it and examine the small machine where the innkeeper was standing to remove the handle from the magnetic device. Return to Sneff's dressing room (next to the stage) to be transformed back into humans and once again challenge Fargo. He'll lose the wager and grant you access to the Grand Slam door.
Sneak into the room above the inn and steal the handle to foil Fargo's scam.
Inside the room full of cannon ports, you'll see the sage, but you must chase him for a while before he'll speak to you. Threaten him to get the information he seems reluctant to share, and you'll have another battle on your hands.Battle: SageOfMarbule (Innate: White)
The sage is a powerful enemy who uses much more devious tactics than anyone you've faced before. His most notable ability is that of using consecutive elements. He can cast a TurnColor spell and follow it immediately with a spell that capitalizes on the added elemental weakness added by the TurnColor spell. As always, when fighting a powerful magic user, Diminish will greatly increase your chance of survival. Harle is a good character to have, as her level 5 skill will impart helpful protection to the party for several rounds.
When the sage is defeated, he'll reluctantly hand over the Fiddler Crab item to the party and speak to Nikki. From here, you can head toward the sea of Eden, or you can round up a few odds and ends on the Zelbess. Most significantly, you can try and recruit Janice, the champion of the Grand Slam tournament - but to accomplish that, you must defeate her super-powered monsters in three consecutive rounds of combat.
Event: Grand Slam
The Grand Slam is a three-round tournament in which you control a party of creatures against Janice's army of monsters. The list of monsters you can direct is based on Sprigg's Doppelgang list, so before tackling the Grand Slam, you may wish to travel to the Bend of Time and beef up her skill set. However, it is possible to win with the default set of creatures if you're very persistent and very lucky.
Janice controls the following monsters:
Round one: Gloop, Taurminator, Beeba
Round two: SpearFisher, Cybot, Gobbledegook
Round three: Cuscus, Cassowary, AirFrame
The key to winning is to remove the most dangerous monster from each round first (Taurminator, Cybot, and AirFrame, respectively), ideally by using instant kill attacks. Of your default monsters, the Wraith and CrossBones can use instant-kill attacks. Also, be sure to use the powerful Lagoonate in the second round to remove Cybot from the action as quickly as possible. An important key to success is that you can run away at any time without forfeiture, so if the tide of the fight turns away from your favor, don't be afraid to turn tail. Once you defeat Janice, she makes an impressive addition to the party. As a bonus, you also receive special prizes for each round you win. If you find the battle overwhelming now, there's no shame in coming back later with better Doppelgang skills.
Janice's monsters have you at a disadvantage - learn more Doppelgang skills for a fighting chance.
Before you leave Zelbess, be sure to recruit Sneff in his dressing room. This is the only opportunity you'll have to add him to the roster, so don't miss him. Also be sure to head over to Nikki's ship, where Irenes will join your party once Nikki and his band head to rehearsal.The Masamune: The Blood-stained Sword of Evil
Now that you have the Fiddler Crab, sail to the southeast portion of the map and use the crab at the foggy bank where the Sea of Eden is located. The clouds will disappear and reveal a cave.
Inside the cave, your progress will be impeded by the legendary sword Masamune. If you've played Chrono Trigger, you'll recall the Masamune was a powerful sword that could annihilate evil, but now it's a dark weapon whose evil intent threatens to overwhelm the party. Radius has personal experience with the weapon and recommends finding the only artifact that can overpower the Masamune, the holy sword Einlanzer.
Meet Radius at Hermit's Hideaway, where he will give you a small commemorative token of his fallen comrade Garai, whose death was tragically linked to the Masamune's current state of existence. The fact that this token is a mirror should clue you in to where you should be heading: the only other place you've seen mirrors, the Island of the Damned. And while you're at the hideaway, be sure to grab the energizer suit, which may be a big help in the scenes ahead.
There are several mirrors in the cave of the Island of the Damned, but the proper route to progress through the cave can be found by passing beneath the large ribs to the exit in the lower center portion of the left screen. Use the Garai memento at the mirror at the end of the path you are traveling (on the upper left of the screen), and you will pass through the mirror into a secret cavern. Wind your way to the left, then head down to the portal past the suit of armor. You'll encounter a tombstone engraved with the names of Serge's party and find yourself locked in a terrible battle, so be sure to prepare yourself in advance for a knock-down drag-out fight.
Battle: Garai (Innate: White)
Garai has powerful physical attacks, but those pale next to his WillBreaker and TripleCut techs. It's entirely possible he can put black-innate Serge down for the count with a single action, so be sure to enter the battle with someone else in the lead. Your best party here will be Serge, Zappa, and Funguy, as they all have high attack power and high defense. This is largely a physical battle, so boost your characters' defense with HiRes and try to hit Garai with weaken. His MDEF rating is high, so elements may have little effect (though Serge's GlideHook and FeralCats techs are respectable, and other black elements like FreeFall can be useful when placed in higher slots). Avoid using RecoverAll except in desperation, as it will boost the white nature of the field effect meter and give Garai an even bigger advantage than before. Don't be surprised to lose this fight once or twice until you devise a good strategy. It's mad-hard.
When Garai is down for the count, return to the cave leading to the Sea of Eden and shatter the Masamune with the Einlanzer. You are now free to pass into Eden...The Dead Sea: A Place Forsaken by the Gods
The entrance to Geddon is a large, tiered mall-like area with ruined walkways and erratically operable elevators. There's a door upstairs and to the right that leads to the station portion of Geddon Station; speak to the shade there a few times, and it will depart for its routine. Search the ground where it vanishes to acquire its station pass, which will let you pass the turnstiles and explore the back area of the station. There's a HolyLight element that you should equip immediately on a secondary character such as Starky. Left of here is a door to a library balcony where you can acquire the medical book key item, which will be useful if you've recruited Doc.
When you reach the Sea of Eden, you'll quickly see why it's sometimes called the Dead Sea - it most closely resembles a city besieged by a massive storm and frozen in time. The enemies that patrol the area are either dreary shades of the living or rogue machines.
The Dead Sea is a self-contained mini-world map in itself. Progress here is linear, but be certain to acquire the useful AntiColor elements located about the map - this is the only place you'll find them, and they can be exceptionally helpful.
Inside the first sub-area, you'll find what appears to be a massive chunk of a modern highway ripped from the earth and slammed into this frozen whirlpool. The shades here are not particularly aggressive and won't really go out of their way to pursue you (though some will guard their treasures). However, moving about can be tricky as the highway ruins are prone to crumbling. The path to the next section of the sea is upward, then right and back, but the route is blocked by a large, dangerous robot called the Highwayman.
Battle: Highwayman (Innate: Black)
While a fight with a black-innate enemy might seem a relief after the tough battles with the Sage and Garai, the Highwayman is determined not to make this fight a pushover. He doesn't have especially powerful attacks, but he does have the ability to blind characters, lowering their attack success rates by 50 percent. Because of this, the fight will be difficult. You can take steps to remedy the blinding effects of his ExhaustGas attack, such as using BlackOut elements, but nothing will actually prevent being temporarily blinded. Therefore this fight will inevitably be drawn out. Starky's techs are useful, and Janice or Zappa are also effective here.
Once you've sent the Highwayman down the road to nowhere, you can move along to the next section of the Dead Sea, the ruins of what appear to be a residential area. There are several excellent accessories in the doorways here, such as the EVD%-increasing Kung Fu Shoes, so search carefully. The doorway in the tower at the upper left of the area contains a computer room that Norris can operate (even if he's not in your party at the time, he'll enter the room and activate it). The machine is short on power, but before dying out, it displays information on something called "Lavos" - to fans of Chrono Trigger, that name means trouble. In Chrono Cross' predecessor, Lavos was a space-borne creature who crashed to earth and incubated for millions of years. In 1999, it rose from beneath the earth to annihilate mankind. Supposedly history was changed, and Lavos was defeated before it could wipe out the human race, but the appearance of the creature on this screen in A.D. 2400 suggests otherwise.
Move along to the center of the frozen vortex now, and you'll come to a building known as Geddon Station. There's a lot to find here, including the final piece of Pierre's legendary hero gear and the extremely powerful HolyLight element. There's also a dangerous battle ahead, so prepare yourself by forging the best weapons and armor you can equip (@silver or @Mythril at this point; even if you have collected @Denadorite pieces, you don't have access to that level of equipment yet).
Return to the mall section and head left through the doors. You will find yourself in the remnants of a theater, and Serge will briefly suffer a strange hallucination of a young girl in white. Beware the creatures that roam this area, the Tragediennes - each one has a special skill that it can use to attack (or, rarely, heal) the party. The Tragediennes announce their skills, which should give you fair warning; there's a chance one will use BlackHole or Volcano, which you should definitely trap. Otherwise, try to pick off the ones with powerful spells first, then take out the weaker ones at your leisure. Be sure to grab the Prop Sword here as well.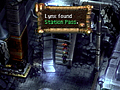
Search the ground where the shade disappears to find the station pass.
In the next room (to the left), Serge will see a vision of another child before climbing the debris and taking the exit in the upper right section. Follow the young boy with the spiky hair into the spinning vortex once you reach the library. Now, you will find yourself in Nadia Square - the beginning and ending point of Chrono Trigger - now reduced to a ruined, decrepit state. You can restore your hit points in the enertron machine, but it won't ease your hunger pains (another Chrono Trigger flashback). At last, you'll come face to face with the children who appeared to Serge, and they seem to hate him. A new character will enter the fray - a character who had been mentioned in the past, Leena's father Miguel. Miguel explains the nature of the time crash here and why Geddon station seems frozen in time. He then challenges Serge to a duel.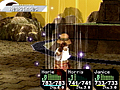
Miguel's WeakMinded attack softens you up for his devastating tech skills. The StrongMinded and Imbecile spells can help protect you.
Battle: Miguel (Innate: White)
Despite his ordinary appearance, Miguel has attacks that make Garai's skills look like gentle love taps. He uses physical, elemental, and tech attacks with gusto, so no single strategy will suffice to counteract his moves. Be especially wary when he uses WeakMinded, as he will quickly follow it up with the devastating HolyDrgSwd attack. Counteract his statistical advantages with skills like HiRes and Strengthen, and once Serge has used FeralCats and GlideHook, cast Diminish to reduce Miguel's power level. Don't forget to use Trap HolyLight to get another HolyLight element. Also, it's more important than ever to be careful of the field effect meter; the more white it displays, the more powerful Miguel's attacks. If he hits a character with HolyDrgSwd in an all-white field effect, he will easily blow that character out of the action with a single hit. You may lose this battle a few times before latching onto an effective strategy, but persevere, and victory will eventually be yours.A Portal Reopened: And the Planet Began to Shake
With Miguel defeated, the portal at Opassa Beach reopens, as does the portal in Hydra Marsh. After a last-minute rescue from the unraveling of the time crash, Serge and his party speak to the sky dragon and should head to Another World. In the alternate dimension, Lynx is ruining Serge's reputation by terrorizing the people of El Nido, and the citizens of Arni are hiding in fear. Return to Termina by way of Fossil Valley. Of note here are the ShadowCats, which will use the *MotherShip summon if you let the field effect become all black. You may wish to trap this rare element, or you can simply pass on through.
Once in Termina, you'll discover the city has been occupied by the Porre army, just as it was in Home World. While Porre double-agent Lynx is perfectly safe walking around, the army is actively hunting for former Acacian dragoons. If you visit the bar, you'll find two of them hiding in the backroom: Karsh and Zoah. They intend to rescue Lady Riddel, who was still at Viper Manor when Porre arrived, and is now a captive in the mansion's dungeons. Choose one of these two warriors to join your party (Karsh is a stronger fighter, though Zoah has better defensive stats) and embark on a quest to save the lady of the manor.
Search the left wall to find a hidden door, where the Devas await your assistance.
XX. Back to Viper Manor: A Captive Audience Awaits
The front gate to the mansion is open to "Sir Lynx," so you're free to walk in, even with a Deva in tow. You will witness Riddel being taken to the dungeon, but being outnumbered is hardly the way to pull off a rescue attempt. Instead, duck left into the mansion parlor and speak to Norris, who will give Serge a key to the dungeon.
Head to the basement of the mansion and search the floor grating outside the kitchen to access the sewers. You've been in the sewers of Home Viper Manor, but not from this direction; to move about, you must control the flow of water and shift valves to open pathways. Walking across the water flow here will wash you down to the lower area, so you must make the rushing liquid a bit more manageable. Your first order of business is to knock the two free-standing barrels on the lower-level platforms into the water, which will settle into place and create a small bridge. Climb the now-accessible left staircase and turn the valve in the area above you to slow the water flow. You might want to take a moment here to exit the sewers into the cave to Shadow Woods. There's a grate blocking your path into the cave, but if you rattle the bars, you'll spook the insect sleeping on the treasure chest. Startled, the bug will leap away and knock the chest down to the lower area for you to claim later - inside is a Deluge element, a rare and useful blue attack skill.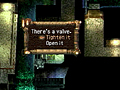
Use the valve handles to move the floodgates and open a path into the manor.
Now, if you return to the basement of the manor, you can climb down to the sewers and cross the more slowly running water with no trouble. Once across the stream, move up and around to the next screen and adjust the valve you find. Move the wall so that the lower path is unobstructed, then return the way you came. Find another valve along the center pathway and turn it so you can move freely along the lower area. Head right past the lower floodgate and climb the ladder that leads to the second valve. Turn it one last time to unblock the upper pathway and wade around to the right and above, toward the ladders. Before you can enter the manor, though, you have one last battle to contend with.Battle: Roachster (Innate: Blue)
The Roachster is not much of a fighter itself, but its larvae are reason enough to be cautious. The larvae can swarm an individual or the entire party and in all cases does substantial damage. This is a good fight in which to have Janice - her red-innate attacks are damaging to the big bug - but her defense is sufficient that its attacks won't totally demolish her, especially if you cast HiRes on her.
There are three ladders here leading to prison cells; the left cell will hold Glenn if you haven't recruited him, the center cell contains some guy who freaks out when you rattle the grate, and the far right ladder leads to the cell where captain Fargo of the S.S. Invincible is being held. Once you break into his cell, he coordinates a prison break and lets you continue your search for Riddel.
After saving at the Record of Fate, you'll find Riddel behind the door to the far right, where she is about to be fiercely interrogated by an evil shade that resembles chef Orcha. Obviously, you can't let this happen to the noble lady, so another fight begins.
Battle: Hell'sCook (Innate: Red)
Don't expect Hell'sCook to put up much of a fight. None of his attacks hits Serge's party for any significant amount of damage, and his only special tech, SpiceOfLife, restores a meager amount of hit points to himself. He should go down in almost no time.
The agony of defeat brings Orcha back to his senses, and he offers his assistance as penitence for the evil he nearly perpetrated. Accept him into your party and assist Lady Riddel's escape by distracting the guards long enough for her to make a break for it. Head further into the mansion as she runs and battle the soldiers who accost you; eventually you'll come up against Porre's mercenary specialist, Grobyc.
Battle: Grobyc (Innate: Black)
Grobyc is strong, but Serge and party are far stronger, especially if you start tossing around your level 7 techs for characters who have them. The biggest threat posed by Grobyc is the special element he holds called Vigora that lets him attack without stamina depletion for several consecutive rounds - he could very likely wipe out a character with a single flurry of punches, so keep your guard up by defending all inactive party members. Also be careful of his goofy-but-damaging HairCutter attack, which strikes the entire party. Upon defeating Grobyc, you'll win a Defender accessory, which will greatly enhance the defensive skills of whomever equips it.
Upon Grobyc's defeat, a Porre soldier will activate the machine standing guard by the east doors.
Battle: Guillot (Innate: Yellow)
Don't spend too much time using elements on this machine unless you have Karsh, whose green-innate skills can put a serious hurt on it. Your physical attacks will be much more effective, so boost your two strongest fighters (most likely Serge and Karsh/Zoah) with EagleEye or NinetyNine and have them begin attacking as soon as their stamina reaches 7. The mech should go down without too much fuss, although it won't stay down - like the spider mech in Final Fantasy VIII, it takes a moment to self-repair before chasing your party across the bridge to the library. You must fight the machine inside once again, so use the same tactics as before. It still won't go down and corners you atop the balcony once you press the secret switch near the ladder, leaving you with no option but to leap through the stained glass window as Grobyc has a change of heart and distracts it.
In the chaos that ensues, Grobyc will join your party. Although he's fairly redundant right now as a second black-innate character, he's a powerful fighter and will be exceptionally useful in the later sections of the game.Surprise Attack!: Pursuers with Heavy Hearts
There's a note in Viper Manor in the room to the right of the throne room (formerly the door was blocked by an unmovable Cybot or by Guillot). If you open the chest from the back side, you'll find a message from Peppor and Solt inside. Take Karsh to the Island of the Damned in Another World and follow the same path you used to find Garai. He'll be confronted by spectres of the past in the form of Peppor and Solt. Angered at their commander's perceived treachery, the Shaker brothers will challenge him to a fight. As always, they're no real threat and, upon being defeated, will realize Karsh's innocence and give him his level 7 skill, axiomatic. You'll also receive the Memento Pendant, which will be needed for another subquest.
Now, you should follow Riddel to Hermit's Hideaway, where she and the rest of the Viper Manor residents have taken up residence in hiding. Viper and his followers ally themselves with Serge here, but their discussion is interrupted by the arrival of "Serge" and Kid and a fleet of terrorists. Despite Riddel's warnings, Serge runs out to meet them. Kid seems to be unaware of the truth of the mind-transfer between Lynx and Serge and threatens the real Serge to fight as the real Lynx smirks. A grim situation is avoided when Fargo swoops in on his pet bird Polly and plucks the party over to the Invincible.
Serge is saddened by Kid's actions and attitude, but there's little time to mope as Viper and Fargo choose to put aside their differences for now and join Serge's party along with Riddel, Marcy, and whichever of the Karsh/Zoah duo you didn't recruit in Termina. Each new addition is a great asset to the party: Viper has brawn, Fargo can steal, Riddel is an excellent mage who can rival Leena's abilities, and Marcy has formidable physical and magical skills.
If you travel to the Pearly Gates, Another World's entry port to the Sea of Eden, you'll discover that the way is blocked. Harle will ask to you to choose between her and the world, but your response makes no difference. Once you return from the cave, she will realize it's time to leave the party and will be permanently gone from this point. If Starky is in your party, there will be a brief, touching scene that sheds a little light into Harle's conflicted feelings and regrets.
XXII. To the Sea of Eden: Through the Hidden Holes of Time
At this point, your goal is to follow Lynx to the Sea of Eden, but getting there is more easily said than done. If you return to Home World where the Dead Sea once was, you will see three dark points on the water, but when you sail over them, nothing will happen. The dragon who lives on Sky Dragon Isle in Another World will offer to help you if you can earn the favor of the other five dragon gods who live throughout the archipelago.
However, before you begin your dragon quest, you should take some time to find skills and items for your characters.
Begin in Another Guldove, where you will arrive to see Porre soldiers threatening the bartender Orlha (who, it should be noted, is holding her own quite well). Thinking you're Porre reinforcements, Orlha will attack you, putting up quite a fight.
Battle: Orlha (Innate: Blue)
Don't be fooled by the cute pigtails; Orlha is a formidable fighter. Her skills are almost entirely physical, so elements like Weaken, BatEye, and HiRes will be a great asset to your party. Though her arsenal has nothing truly devastating, she can still catch you off-guard. Defend frequently and pound her with physical strikes and red elements. Once you've defeated her, she'll give you a memento to be presented to her as proof of your identity; once Serge is himself again, bring this brooch back to Orlha, and she'll join up.
While you're in Guldove, present the Tear of Hate you received from Karsh and Zoah in Termina to Direa, who will give you the dragon emblem. If you take the emblem to Steena at the Guldove shrine in Home World, she'll ask you to bring her the dragon relics.
If you travel to Another Hydra Marsh, you can earn an ancient fruit key item from a Beeba by saving it from the goblins who threaten it. This will be an important item later in the game. Explore a little further into the marsh and drop down into the hole in the top platform, as you did when you discovered Razzly in Home Hydra Marsh. There's no Pentapus to break your fall here, so use Brace elements to heal everyone's sprain status. Inside the tree-cave, you'll be confronted by the ghost of a Hydra who curses the greed of the human race.
Battle: DeHydrate (Innate: Black)
Unlike the living Hydra, this creature should be almost no danger at all at this point. A few powerful attacks should put it down for the count before it ever has a chance to do much damage to the party. Defeating it will net you the HydraShadow element, which will serve as Steena's level 5 tech skill once you recruit her.
If you take Riddel to the Forbidden Island (the tiny island with a smoking hut, located in a cove on the northeast portion of the main island) in Home World, she will encounter her lost love, Dario. Though Dario died in Another World under the influence of the Masamune, here he lives, but is similarly under the control of the evil sword. Riddel will try to awaken his mind with the memento pendant, but the sword will control him. This fight may be too difficult to tackle now, but at some point in the game you'll want to stop here as it clears up some of the story surrounding Riddel, Karsh, and Dario, earns Riddel's level 7 tech, and nets Serge an excellent weapon. If you're prepared for one of the most difficult battles in the game, get ready to fight Dario and the Masamune.
The Forbidden Island is an unmarked destination a in small cove and offers a terrible battle.
Battle: Dario (Innate: Black)
You're almost guaranteed to lose if you fight Dario now, but it's possible to win. First realize a few things about him. First, he attacks with a set pattern (attack, HardHit, attack, SonicSword, repeat) of moves that can be used to your advantage. Second, he counterattacks viciously whenever you use any kind of element on him. Do not use a white element against him, as he retorts with a skill that is practically guaranteed to kill even Grobyc or Serge.
The easiest way to face him is to give Serge the black plate armor (which can be stolen from the black dragon). Whenever Dario uses a black tech skill, the attack will heal Serge, meaning that every other move Dario makes will work to Serge's benefit, even if the rest of the party dies. This approach takes a while, but is guaranteed to work.
A second strategy is to wait until Serge returns to his original body and use the *Saints summon against Dario, which will reduce his hit points by more than half. It's a somewhat risky gamble, but fairly effective.
If you don't wish to wait for such a long time to tackle Dario, though, you can try to wear him down with elements. Using red and blue elements against him will cause him to counter with effect-inducing elements. Countering also exhausts his stamina, making him incapable of launching his regular attacks. Between Riddel's elemental power and Serge's physical strength, this should keep Dario in a state of perpetual exhaustion and therefore incapable of attacking. However, it's not a fully reliable method, so be cautious.
When you defeat Dario, Serge will receive the Mastermune swallow, an advanced form of the Masamune sword, and Dario will return to Home Viper Manor to help oversee its reconstruction. The Mastermune has lower stats than the Spectral Swallow you can forge later in the game, but it has an extremely high critical hit rate. This makes it the most powerful weapon in the game, in practice if not statistics.
Another possible battle can be found on Another Earth Dragon Isle, deep within the cave. A creature called the CrioSphinx will ask you riddles that must be answered with elements.Battle: CrioSphinx (Innate: Yellow)
If you answer these questions correctly, it gives you an important clue for later in the game - pay attention to the order in which the colors are used (yellow, red, green, blue, black, white). However, if you can somehow defeat him - and he has more than 10,000 hit points, so it won't be easy - you'll be rewarded with a special item called the Sunglasses, which greatly improve your attacking power. The problem is that you must defeat him in less than six rounds, and every time you attack with a color besides that which solves the question at hand, he counterattacks with massively powerful yellow skills. If you equip the yellow plate on your characters, they can survive the onslaught, but you must still reduce his hit points by more than 2,000 per round to defeat him. Good luck!
There are plenty of other secrets to uncover. Put Janice in the lead of the party, travel to the Bend of Time, and speak to the land octopus there to receive her level 7 tech skill, What'sUpDoc. Take Zoah to Viper Manor as the party leader and open the chest in his room to receive his level 7 tech, Toss&Spike. While in Viper Manor, check the bookshelf behind the librarian's desk to see a familiar-looking machine. Speak to the beach bum to receive a Porre's Furnace window frame.
Another task in Viper Manor is to visit the armory and place the snake statue into its nook. Now, deactivate the trap in the hidden room by pressing the secret switch against the left wall next to where the soldier formerly stood. You will receive an @Rainbow Shell and the sword Viper's Venom.
Take Draggy to the dragon skull in Another Fossil Valley to receive his level 7 tech, BigBreath. Take Orcha to speak to his brother Belcha in Home Arni to learn Orcha's level 7 tech, DinnerGuest. In Another Guldove, give Doc the medical book from Geddon Station's library to receive his level 7 tech, HangTen. Take Norris to speak to his Another World self to receive his level 7 tech, TopShot.
Take Funguy to the cave where he became a mushroom and choose not the eat the new mushrooms to learn his level 7 tech, Myconoids. Take Van to meet his counterpart's father in Another World to receive a bigger piggy bank for his PiggyBoink attack. In Another World, give Pierre the prop sword found in Geddon Station to learn his level 7 tech, SlapOfCyrus. Return to the S.S. Zelbess in Home World and ask Pip to rejoin your party. He is the only previous party member who is willing to look beyond Serge's changed appearance.
Stop in Another Marbule to pick up some trap elements. You'll be seeing some heavy-duty attacks flung about by the dragons, so it's a good idea to start a collection through judicious use of traps. Visit the home of the old lady in Another Termina to recruit Skelly once you've found all his body parts.
Finally, there's a fairly involved quest that will let you set events in Home Marbule right. Take Another Fargo to meet his greedy, cheating self on the S.S. Zelbess. The likable Fargo will take the Zelbess and Nikki's ship to Marbule, where Nikki will perform a stage show. After the main performance ends, he'll continue to play. Travel with Fargo to the boat, and the captain will unlock his level 7 tech, invincible. Now you must clear the lagoonates out of Marbule. The music here is pretty awful, so you'll want to bring along a powerful red-innate character to speed the process along. Once every lagoonate is defeated, you'll hear a distant roar, and the people of the village will be free to return.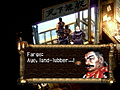
Let the two captains meet to save Marbule. Taking party members to meet their counterparts will often unlock secrets or advance the story.At this point, you should be completely ready to find and defeat the dragon gods to earn their favor. These battles can be tackled in any order (except the sky dragon, who will not fight until you have defeated the other dragons), so the order is at your discretion. Each dragon is based around a certain elemental affinity and can absorb elements of its own nature while dishing out attacks of its innate color. Take this into consideration while forming your parties. Another note for consideration is that every dragon god carries a plate armor of its own innate color. If you bring Fargo along, he can lightfinger these useful armors that can absorb damage from like-colored elements and will be exceptionally useful during certain battles.
At this point, you should also upgrade the equipment of your active characters to denadorite/stone to boost their chances of survival.
Yellow: The Earth Dragon
Travel to Home Earth Dragon Isle and prepare for some heavy blasting. Speak to the expedition members to receive the Explosive key item and jump into the quicksand. Head inside the cavern and track down the RockRoaches. You need a means by which to reach the platform in the center of the lower cave, and the RockRoaches are your key - by placing them over the small geysers, you can force all the thermal pressure into the central spout.
Use the irresistible force that is the Explosive on the immovable object that is the RockRoach at the upper right, and you'll find the irresistible force wins. The RockRoach at the upper left must be fought while standing near the edge of the rock ledge; once you defeat it, it will temporarily retreat into its shell, and you can push it over the edge and onto the nearest geyser. The final RockRoach needed for this trick is puttering around on the cave floor. Fight it and push it over the final geyser to cause the steam pressure to focus from the center boil. Leap into the geyser, and you'll be blasted to the upper platform and therefore free to move to the inner-most cave where the dragon awaits.
Battle: EarthDragon (Innate: Yellow)
Karsh, despite his green-innate nature, is a great character to have here. If you boost his MDEF rating with accessories like MoonShades and elements like StrongMinded, he can weather the yellow-based attacks of the dragon. Yellow status conditions are a concern here, but shouldn't have too much impact on your combat effectiveness in any case. If you've managed to find some of the level 7 summons besides *FrogPrince, they'll be quite useful, provided you can wrangle the field effect to the necessary color state. Once you triumph, you'll receive the yellow relic key item and the level 8 summon *ThundaSnake. You can't equip level 8 summons until later in the game, so keep it in mind until then.At this point, you should be completely ready to find and defeat the dragon gods to earn their favor. These battles can be tackled in any order (except the sky dragon, who will not fight until you have defeated the other dragons), so the order is at your discretion. Each dragon is based around a certain elemental affinity and can absorb elements of its own nature while dishing out attacks of its innate color. Take this into consideration while forming your parties. Another note for consideration is that every dragon god carries a plate armor of its own innate color. If you bring Fargo along, he can lightfinger these useful armors that can absorb damage from like-colored elements and will be exceptionally useful during certain battles.
Battle: GreenDragon (Innate: Green)
At this point, you should also upgrade the equipment of your active characters to denadorite/stone to boost their chances of survival.
Yellow: The Earth Dragon
Travel to Home Earth Dragon Isle and prepare for some heavy blasting. Speak to the expedition members to receive the Explosive key item and jump into the quicksand. Head inside the cavern and track down the RockRoaches. You need a means by which to reach the platform in the center of the lower cave, and the RockRoaches are your key - by placing them over the small geysers, you can force all the thermal pressure into the central spout.
Use the irresistible force that is the Explosive on the immovable object that is the RockRoach at the upper right, and you'll find the irresistible force wins. The RockRoach at the upper left must be fought while standing near the edge of the rock ledge; once you defeat it, it will temporarily retreat into its shell, and you can push it over the edge and onto the nearest geyser. The final RockRoach needed for this trick is puttering around on the cave floor. Fight it and push it over the final geyser to cause the steam pressure to focus from the center boil. Leap into the geyser, and you'll be blasted to the upper platform and therefore free to move to the inner-most cave where the dragon awaits.
Battle: EarthDragon (Innate: Yellow)
Karsh, despite his green-innate nature, is a great character to have here. If you boost his MDEF rating with accessories like MoonShades and elements like StrongMinded, he can weather the yellow-based attacks of the dragon. Yellow status conditions are a concern here, but shouldn't have too much impact on your combat effectiveness in any case. If you've managed to find some of the level 7 summons besides *FrogPrince, they'll be quite useful, provided you can wrangle the field effect to the necessary color state. Once you triumph, you'll receive the yellow relic key item and the level 8 summon *ThundaSnake. You can't equip level 8 summons until later in the game, so keep it in mind until then.
The green dragon isn't strong, but he likes to tip the scales in his favor with the GreenField spell, which turns the field effect meter completely green. This is a very dangerous thing for you, because shortly after using GreenField (or as soon as the field effect otherwise becomes all green), he uses the spell Carnivore. With the added boost of a fully green field effect meter, Carnivore can quite possibly annihilate your party. You can use trap Carnivore if you'd like to add this formidable spell to your inventory, but after trapping a few, you'll want to reduce the green in the field effect meter; any time it becomes all green, have someone cast a spell - any spell, even something worthless - of a different color. Otherwise, you're just setting yourself up for trouble. Also, you'd be best advised to avoid using Heal or HealAll to recover hit points. Most of the dragon's attacks are weak and rely on inflicting status effects to impede your fighting prowess, so as long as you can prevent the use of Carnivore, you should be just fine.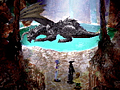
The black dragon will give a party of demi-humans the black relic without a fight, but that may not be in your best interest.
When you defeat the green dragon, you'll receive his green relic and the powerful level 8 summon *Genie.
Blue: The Water Dragon
The water dragon (whom you've met if you undertook the Ice Breath quest) is probably the easiest of the dragons. You'll find him on Home Water Dragon Isle in his cave, although to get to him, you must defeat some large crab-like beasts called SideSteppas.
Battle: WaterDragon (Innate: Blue)
The most powerful attack you'll face here is Iceburg, and if you're smart, you'll set a trap for that particular spell. If Janice or Zappa are along, their high-level techs should offer a lovely means by which to pound on the dragon a bit. Inferno, Volcano, and (if you've managed to trap it) *RedWolf will make certain the water dragon is all washed up. Victory here will net you a blue relic and the *BlueWhale level 8 summon.
Black: The Dark Dragon
There are two ways to earn this dragon's relic: fight or visit him with a party of three demi-humans. If you take three demi-humans, he'll simply give you the relic with no conflict. This is nice, but it also means that you can never forge the rare, valuable prism equipment or steal the useful black plate, so think carefully before you choose this option.
Should you choose to fight, you must complete the Marbule sub-quest with Fargo first. Now, the black dragon will awaken and irritably challenge the party to fight.
Battle: BlackDragon (Innate: Black)
After this battle, Lynx will slink away, leaving Serge free to travel to the peak of the Fort. You'll also open up level 8 element grid slots for many characters, meaning you can equip those characters with level 8 summons.
If you use white elements against this dragon, it will auto-counter with AntiWhite, and even a charm may not always protect you from having your white elements sealed. Therefore, you must spread out your important white-based effect skills among your party so the person with all the RecoverAlls and revives doesn't get hit with AntiWhite. This may be moot, however, as the dragon can cast SealAll, a skill that prevents all combatants from using elements. This will put you at a massive disadvantage, as the dragon can attack quite powerfully with physical strikes, and you can't heal your characters while SealAll is in effect. Also beware its gravitybomb skill, which can hit you for about three quarters of your hit points. The best party for this battle is probably Serge, Grobyc, and Fargo (you'll definitely want Fargo to steal the black plate, as it will be immensely helpful later). If you can survive the black dragon's onslaught, you'll receive the black relic and the *GrimReaper summon (and, ideally, the black plate armor).
White: The Sky Dragon
Once you have bested the other five dragons, return to Sky Dragon Isle and speak to the sky dragon, who will challenge you to judge if you are truly worthy of his favor.
Battle: SkyDragon (Innate: White)
The sky dragon fights in almost the exact opposite manner of the black dragon. While the black dragon used SealAll to negate element use, the sky dragon uses Magnify to boost the effect of elements. Typically, it follows the use of Magnify with WhiteBreath, making a powerful attack even more deadly. Because the white nature of this creature's skills are opposite to Serge's current innate color, he'll be especially at risk during this fight. You should reduce the risk posed by the dragon's attacks by using Diminish to negate Magnify. It's also a good idea to set a trap for UltraNova, an incredibly powerful white element that can be used by white-innate characters to inflict serious damage. Do your best to reduce the advantages that the sky dragon tries to create for itself and bring along characters with high hit points and a high resistance to elemental attacks. When you put the white dragon down for the count, you'll receive the final relic and the last of the level 8 summons, *Saints.
At this point, return to Home Guldove and present the relics to Steena, who will join your party and give you the Tear of Love. Take this item to Home Fort Dragonia to set straight Serge's identity crisis.
Explore the fort and recruit Draggy if you've not already done so. When you approach the elevator to the upper levels, you'll be confronted by Lynx, now known as Dark Serge. Claiming he's not yet ready for Serge to return to his true form, he'll attack with some of the most Devastating battle tactics you've seen yet.
Battle: DarkSerge (Innate: Black)
Even though he's in Serge's body, Lynx has his true black-innate nature and can use all the same techs that Serge can, including the Devastating ForeverZero. To make matters worse, he also can use all the innate-only level 6 spells like Iceburg and earthquake, meaning it's impossible to set up a party that is inherently strong against his skills. You can try trapping some of these skills, but there's no way to predict the order in which he'll use them, so the chances of negating every spell are slim. You really shouldn't bring along white-innate characters here, although Steena's constitution is hardy enough to keep her on her feet even after most of Dark Serge's innate techs, and her power with white elements is formidable. Keep Serge in the lead position of the party, as that's where Dark Serge focuses most of his attacks. With luck, you can manipulate the field effect to allow a level 7 summon, but as long as you're cautious and choose your attacks carefully, a summon shouldn't be necessary to win.
Beyond the doors of the tower pinnacle, Serge will learn more about Lavos, the true nature of humanity, and the history of the vanished Dragonian race. Placing the Tear of Love on the pedestal will let Serge be reborn as his true self.
Once Serge is reborn and puts on some clothes, his former teammates will join him again, causing his party numbers to swell significantly. You can also accomplish a number of small tasks here or in the near future after returning from the Sea of Eden.
Take Steena to Home Isle of the Damned and visit Garai's grave to acquire her level 7 tech, GaraiShadow. Return Orlha's brooch to recruit her into your party. Take her to speak to Doc in Home Guldove to receive her level 7 skill, SisterHoods. Return to Home Marbule and receive Irenes' level 7 tech SirenSong from the doctor in the first hut. In Home Marbule, acquire the master hammer from the blacksmith in the black dragon's cave. It's well worth the 10,000G price.
Once Marbule is liberated, this man will sell the valuable master hammer for a relative bargain price of 10,000G.
Equip the master hammer on Zappa and take him to meet himself in Another World. The two will forge the legendary rainbow axe, and from this point, you can create prism/rainbow/spectral equipment if you have both the money and the components.
Take Skelly to the bartender in Termina to receive his level 7 tech, OnARoll. Have Viper visit the back room of the bar in Termina and examine the tapestry to acquire his level 7 tech, FlagBearer. Take Greco to the shack by the shrines in east Termina and speak to the gravetender to earn his GraveDigger level 7 tech.
Take Mojo to speak to the cat statues in his shrine in Another Arni in the following order: Lasery, Aurey, Lickey. He will receive his level 7 tech, HooDooGuroo. If you take him to speak to Kiki's father in Home Arni, his name will change to Mojoy. Take NeoFio and Turnip to the balcony of Viper Manor to receive Turnip's level 7 tech, VegOut. With Luccia in tow, descend into the basement of Viper Manor through the grate in the kitchen to receive her level 7 tech, TestAmoeba. Take NeoFio to Home Sky Dragon Isle and save the butterfly that has been caught by the land octopus. Dozens of butterflies will bestow upon her a new level 7 tech, BamBamBam.
Battle: Fate (Innate: Black)
Let Nikki meet his alternate reality self aboard the Zelbess, and he will receive his LimeLight level 7 tech (the universal dream!). If Razzly was with you during the Ice Breath quest, take her to Another Water Dragon Isle to speak to her alternate-reality sister Rosetta and receive her Raz-Flower level 7 tech. Take Leena to speak to her mother in Home Arni. If you answered her questions at the beginning of the game sentimentally, Leena will receive her level 7 Maidenfaith tech.
Take Poshul to speak to Leena on the docks in Home Arni to receive her level 7 tech skill, UnLeashed. Take Korcha to the main fairway in Another Termina to examine the mermaid's tank where he first appeared. Then, speak to the mermaid near the shrines to receive his level 7 skill, BigCatch. If Glenn is in your party, take him to Dario's grave in Another Termina, and you will receive a second Einlanzer that only Glenn can equip. With two swords, he becomes an incredibly powerful warrior who can even outperform Serge in combat. If you found Hydra humor for Kid earlier in the game and recovered her element grid from Mel, you can now recruit Mel as the third character capable of stealing.
Once you've resolved these details to your satisfaction, you can move along to the Sea of Eden through the portal in Home World. Upon entering the sea, sail over one of the three fate distortions and warp to Another World. At this point, you will be asked to switch to the game's second disc.
The Arbiter of Time: On Whom the Three Fates Smile
Inside the true Sea of Eden, you will discover a large and perfectly triangular plateau that's veiled by a cascading waterfall. At the vertices of the triangle are three small islands, each of which contains a statue of a fate from Greek mythology: Clothos, the spinner of the threads of fate who oversees the present; Lachesis, who weaves the fabric of fate into the tapestry of history and oversees the future; and Atropos, the fate of the past, whose job it is to cut the threads and end the lives of mortals. Upon viewing all three statues, you will be confronted with Vita, a mechanical mask who represents the three statues you viewed. The final statue you examine will determine the nature of Vita. Vita-Dos, who represents the fate of the future, drops the ultra-rare Vigora spell, so you will probably wish to look at the statue of the future last.
Battle: Vita (Innate: Varies)
Vita - in the form of Vita-Unus (Red), Vita-Dos (Green) or Vita-Tres (Blue) - shifts between the various aspects of the fates as you defeat each one. The most powerful aspect of Vita is the Atropos program, so be prepared to bring out the big guns when it shifts to Atropos.
Once Vita is out of the way, the waterfall vanishes to reveal Chronopolis, a construct of the future that looks like the city Serge saw in his vision when he confronted Lynx in Viper Manor. Anytime you wish to return from the Sea of Eden, you may travel via the fate distortions. But once you're ready to explore this mysterious new city, enter and be prepared to fight.
For your initial foray into Chronopolis, you'll want to bring some hardy, durable, and, most importantly, non-black-innate characters like Glenn, Leah, or Karsh. The reason for this is found hovering at the top of the entryway in the form of PolisPolice, a surprisingly unpleasant robot who doesn't seem too happy to see Chronopolis' new guests.
Battle: PolisPolice (Innate: White)
PolisPolice has the strongest sheer physical power and techs of any enemy you've encountered, with abilities capable of knocking out characters in a single blow. Weaken and HiRes will be a small help here, but mostly you just need strong characters with high hit points and excellent physical defense stats. Black elements are useful, but PolisPolice seems to have high resistance to elements. A more devious strategy is to let the field effect meter become all white and summon *Saints; unlike the elemental dragon gods, PolisPolice does not absorb elements of its own innate nature and will reel beneath the power of Serge's best attacks. However, an all-white field effect meter does give PolisPolice a huge power boost, so you probably don't want to leave it white for too long. Pound the sucker with EagleEye-enhanced strong attacks and dual techs if you have any capable characters along.
Once the robot is down, you're free to explore the outpost. There are mechanical enemies wandering around as well as the shades of researchers who operate the advanced mechanisms found here. With PolisPolice out of the way, you will likely want Grobyc in your party; not only does he have excellent resistance against many of the enemies within (including the ultimate enemy inside), but he can also locate his level 7 tech here as well.
Thorough exploration here will let you discover a number of useful brooch accessories throughout Chronopolis. Be sure to search every nook, cranny, and dead end.
Past the door guarded by PolisPolice is another room, but the exit is locked. Search the hatch at the right side of the room to reveal a ladder into the sewer system of the city. There are several switches here that extend bridges; press the one near the door to extend the bridge leading to the back of the room partway. Unfortunately, the other switch is located across the water system from where your party is located; to access it, you must use the remote control located to the left of the entrance. Activate the little vehicle and steer it along the underwater platforms that are visible beneath the surface (if it falls into the deeper water, you have to start again). Don't miss the CureAll element in the upper left-hand corner. Then, maneuver the drone to hit the switch at the rear right area of the screen. This will complete the bridge; press the triangle button to deactivate the drone and resume control of your party. You can now climb the ladder at the back of the room to reach the area that was blocked by the locked door (which you can unlock to facilitate future exploration).
The next area is a foyer with a glass elevator that is off-limits to low-level personnel such as your party.
First Floor
To the left of the foyer is an underground dock with a welcome Record of Fate and a Chronopolis staff member. Take the door to the right of the foyer, and you'll find a stairwell, a nice low-tech solution to a high-tech problem. You'll definitely want to grab and equip the Forget-Me-Not Pot, an accessory that makes acquiring Doppelgang skills for Sprigg significantly easier. Climb the stairs to the second floor (the passage to the third floor is locked).
Second Floor
There's a laser tripwire here, but the drone it summons is easily avoided. Behind the tripwire is a room with an esoteric puzzle that involves the position of the open doors - the easiest solution is simply to close it and claim the prize inside by inputting the number 00. Put Grobyc in the lead and search the large case to uncover his level 7 tech skill.
Elsewhere on this level is a great deal of information about the history and creation of the El Nido archipelago. You'll witness many shocking revelations in Chronopolis... The floor projection here is simply the first. Examine the computer in the upper right-hand corner of the map room to deactivate the security lock on the doors. Now, you can access everything but the B1 level of the elevator, so head up to the third floor.
Third Floor
There are more backstory revelations here, some of which are of a rather technical nature. Pay attention and try to recall your biology classes. And while you're here, be sure to pick up the HellBound element and rare @Rainbow Shell component located here.
Fourth Floor
Looking around this level will end abruptly when you encounter another door that requires a high-level security clearance. Return to the dock area on the first floor and speak to the staff member, who will return to his experiment. Follow him back to the locked door that's now unlocked. Inside, you'll learn about the function and purpose of Chronopolis - a familiarity with the story of Chrono Trigger will help clarify many of the names and motives mentioned by the staff members. Fight the robot in the left chamber to receive the card key to the elevator and examine the panel at the back of the chamber. The text here comes from the beginning of a Japanese-only game called Radical Dreamers, which served as the inspiration for Chrono Cross and exists here as an alternate reality that perhaps might have been.
With card key in hand, hitch an elevator ride to the lowest level of the city, where you will confront your fate (quite literally) and learn the true reason for Chronopolis, the actions of Lynx, and much more... Save your game at the Record of Fate and forge ahead.
Basement 1
Fight your way past the robots on the bridge and examine the panel at the left of the Project Kid door. Now, you will discover who Lynx is, why he wanted to change bodies with Serge, and what has happened to Kid since you last saw her. But first, you must survive the deadliest enemy you have yet faced: Fate.
You've fought the good fight so far, and this will be the true test of your mettle. Fate's only weakness is that it uses a predictable countdown format for its attacks and uses only black elements. You can use both facts to your advantage; if you equip Serge with the black plate, he will be invincible to Fate's attacks. But if you neglected to steal the black plate, or if you simply want to see how well you can fight without the benefit of special accessories, try the following strategy.
First, be aware that Fate uses no physical attacks. It takes an action for approximately every seven stamina points your party exerts, which means it can quickly flood the field effect with black. It also means summoning is extremely difficult. Fate's actions are very predictable, though, and this will be your salvation. It functions in an endless loop of the following steps:
You must learn to predict Fate's countdown to survive.
- Diminish
- Gravitonne
- Heatray
- FreeFall
- GravityBlow (used twice)
- At countdown zero: DarkEnergy
DarkEnergy is the real threat; if you let the field effect meter remain black when DarkEnergy hits, your party will probably die. Instead, spend your time healing up and building your stamina and element meters as high as possible for the zero count. When DarkEnergy hits, you want the following conditions:
- The field effect meter to have at least one non-black ring
- Serge to have seven stamina points and eight levels charged
on his element meter
- The other characters to have at least one stamina point and
one level charged on their element meters.
After being hit by DarkEnergy, start with Serge and have every character immediately cast a white level 1 skill, even if it's just Purify-3. By the time Serge's turn comes up again, his stamina will be 2 and his element meter will be at 7; use a single weak attack to raise his element meter one final notch and cast *Saints. This attack will critically damage Fate, heal your party, and make the remainder of the battle immensely easy. If you have Fargo or Mel along, take a moment to pillage - if you're lucky, you'll grab a rare HolyHealing element, which will come in handy in the future. Now, finish off Fate and watch the terrible events that follow.Terra Tower: Caught in the Echo of Time
With the fall of Fate comes the rise of Terra Tower, and both Kid and Harle are casualties. But if you have the Mastermune or Chrono Cross, you can undertake a sidequest to save at least one of your former companions.
Visit Kid's bedside at Another Hermit's Hideaway, and the spirits of the Mastermune will recognize Kid from another place and time and send Serge and his party into the past to a critical junction in Kid's life. Otherwise the Chrono Cross will send Serge alone to the same place.
The fiery inferno that greets Serge will be instantly familiar to those who have played Chrono Trigger - it's Lucca's house, converted into an orphanage. The familiar face of combat robot Gato greets the party before deactivating. If you help the children here, you will receive various treasures, such as the valuable @Rainbow Shell. Fight the monsters to save the kids and take the left stairs in the back hall up to a balcony. In the room adjacent to the stair, you'll find an ice gun (which will help extinguish the fires) and a note that should give you an important clue to the device in the entry room. When you take the gun, though, the Mastermune's spell weakens and draws one of your party members back to the present.
If you go back to the main room and input the code L-A-R-A-X (L1-triangle-L1-triangle-X), you'll discover Kid's level 7 HotShot tech. Now, take the right stairs in the main hall and climb down the hatch in the room at the back to find a pantry downstairs that will bring you into the back of the house. When you exit the pantry door, your second party member will vanish. Take a look at the images on the wall, then extinguish the fires to clear the path to the back room. Once you arrive, you will see an unconscious, young Kid, a pair of broken glasses that look suspiciously like Lucca's, and Lynx and Harle leaving the scene. Having accomplished their dirty work already they don't fight, and Serge can save his unconscious friend.
Input the proper code into this device to discover Kid's elusive level 7 tech skill.
Now, Kid will rejoin the party. You can take her to visit Lucca's old friend Luccia at Viper Manor to read the final words from Kid's "big sis." In addition to receiving some cryptic hints about her true past, Kid will also receive a @Rainbow Shell once she's finished reading the note.
The next order of business is to find a means by which to reach the airborne Terra Tower. Although you don't have an airship, one member of your party has a spaceship: Starky. If you haven't recruited the little guy yet, you must do so now. Then, take him to Another El Nido Triangle and dive to the ocean floor. Explore, collect, and fight until you reach the center of the lower area, where you'll find the downed remnants of Starky's ship being guarded by a fierce undersea monster.Battle: RoyalJelly (Innate: Blue)
RoyalJelly isn't very strong, but it's resistant to every kind of attack save red elements. Physical blows and non-red elements inflict zero damage. If you've brought the newly rejoined Kid to the battle, she'll make short work of the beast with HotShot, RedPin, and (if you're into overkill) the *Salamander summon.
With Starky's help (you must go fetch him if he's not with you), you can pillage the anti-gravity drive from the spaceship. Starky will take the party to Chronopolis and use the advanced technology there to install the stellar drive on the party's humble boat, which will transport the group to Terra Tower. You may leave Terra Tower at any time to return to earth, and you can switch party members or forge equipment at the Record of Fate. This is a great place to acquire the rare shiny items for prism equipment as well as an opportune area in which to trap advanced elements. If you return to the ocean floor and search Starky's ship, you can pick up starky's level 7 tech skill, StarStruck.
Here's a quick rundown of the situation. Terra Tower is guarded by six elemental spirits who appear in the form of globes of light. Prepare your party for these encounters prior to facing them by equipping appropriate elements and accessories. These guardians have been known on rare occasions to use level 7 summons, although it seems to happen so infrequently that it's not worth the trouble to Trap. There are several high-level weapons within as well, so keep your eyes peeled for Janice's Beta Carotene, Sneff's Pack Of Lies deck and a Spectral Glove.
The very first elemental spirit you will encounter greets you in the entry corridor.
Battle: Terrator (Innate: Yellow)
The strongest skill this monster has is OmegaYellow, which is deadly indeed; prepare to heal after being struck. It will attempt to amplify its elemental power by casting YellowField, so try to negate its strategy by countering with green elements like Tornado. You can use a summon if you can manage it, but it's almost overkill. Be aware that this spirit - along with all the others in the tower - absorbs elements that are the same color as its innate nature. There's a chance you can trap *golem when the field effect turns all yellow, but it's more likely to use Earthquake or OmegaYellow instead. Your victory will net you the YellowField element.After defeating Terrator, you will come to the central hub of the tower. Time has caused many parts of the structure to decay and crumble, so you must take an indirect route through the tower. There's a stone slab standing upright near the entrance; knock it over to create a makeshift bridge that leads to the left chambers. Take a path down here to end up in a basin of water along the floor, then scramble along the coral growths and head toward the lower left-hand corner of the coral platform. As you head toward the chest in the next room, your footing will crumble, plunging Serge and his party to a precarious ledge along the bottom of the Tower. Listen to the mysterious spirit within the stone face and reenter the tower through the door at the left side of the screen.
Battle: TimeDevourer (Innate: Varies)
Climb along the coral growths and collect the treasures stashed around the area. At the top of the coral, you can return to the central tower hub. Push both stone slabs into place and climb to the center, then head up. The footing here will be far more stable, and ahead you'll see a glowing red sphere - another spirit battle.
Battle: Pyrotor (Innate: Red)
Trap some elements here or simply blast through this guy. Iceburg, Deluge, and *BlueWhale will shred him in a hurry. His OmegaRed attack is dangerous, but if you use blue elements to heal, you'll not only restore your party, but reduce Pyrotor's environmental advantages as well. When you win, you'll receive the RedField spell, which makes summoning *Salamander a snap.
Travel the circular paths ahead and don't miss the Spectral Glove along the way. There's a HolyHealing element to be claimed when you reach the ruined grand staircase. Through the door to the left is a surprisingly familiar place: the bridge leading to Viper Manor's library. Here, the prophet will reveal his true identity: the Enhasan Guru of Time, Belthasar. Chrono Trigger veterans will recognize him as an exile from the wrath of Lavos in 12,000 B.C. who was flung to the far future and developed the time machine Epoch, the "Wings of Time." The things he tells you here are incredibly important, so pay close attention - especially to what he has to say about melody and harmony.
When you leave the library, you can pass through a door in the upper area of the staircase to a room containing immense hovering crystals. Keep in mind the tune they play; if you have the Chrono Cross, you'll recognize the crystals' chimes as sharing the same tones as the orbs that appear whenever an element is used. Cross the bridge, and you'll encounter a green sphere, the Anemotor.
Battle: Anemotor (Innate: Green)
If you have a yellow-innate character in your party, this battle will transpire with almost criminal brevity. Simply have one character use YellowField and follow it up with *ThundaSnake - boom, no more Anemotor. Otherwise, use the same strategies as with the other two spirits and watch out for OmegaGreen. Once you win, you'll receive the valuable GreenField element.
After Anemotor, you'll encounter a very welcome Record of Fate standing before a triple branch. The door ahead is locked, but there are two paths you can choose - left or right, along the upper arms of the tower.
When you head right, time your movements to avoid being pushed into the patrolling cherubs by errant gusts (unless you simply have a desire to fight) and stand upon the platform at the end of the path to be flung to your next battle.
Battle: Luxator (Innate: White)
Unlike the previous spirit fights, this one is actually rather challenging. Right off the bat, Luxator uses Magnify and follows it with OmegaWhite - this combo can even knock Serge down to critical condition. Don't bring a black-innate character to this battle! If you can use Diminish before it has a chance to bring OmegaWhite into play, you'll have a higher survival rate. Black elements are pretty effective, but you're probably best served by sticking to strong physical attacks and LoRes. This victory strengthens the soul of Serge and gives him an UltraNova element to boot.
When Luxator is gone, one of the energy beams blocking the center door disappears. To get rid of the other beam, take the left path from the Record of Fate and prepare to buckle down for another doozy of a fight.
Battle: Gravitor (Innate: Black)
Gravitor represents what would best be described as a massive threat to Serge in particular. You'll want to equip that black plate if you have it or else give Serge a heaping portion of defense-boosting accessories. Luckily, most of his attacks target a single character, which makes him a bit easier to survive than Luxator. Keep your hit points high in case it uses SealAll, as you'll be left in the lurch for a few rounds with no healing elements. Gravitor (along with Luxator) has the highest hit points of any of elemental spirits, so this fight will be a little longer in the running than the other battles. Try to get in a few licks with the UltraNova you won from Luxator and perhaps a FlyingArrow; these attacks should knock the black elemental down a peg.
Take a BlackHole element once you win and return to the central door, which is no longer protected by the light beams. There's one final elemental spirit to face, but it should be no problem.
Battle: Aquator (Innate: Blue)
Short strategy: Use Glenn and Serge to deliver an X-Strike dual tech and defeat him instantly. Slightly longer strategy: Use RedField and follow it with *Salamander. Otherwise: Use the same strategies as with the other spirits. Don't let it get the upper hand and hit it hard. You win a BlueField element and can now take the elevator to the top of the tower. Save before you go...
Now, your party climbs the stairs of Sky Dragon Isle, the path to the Frozen Flame. The mystical artifact will speak to the leader of your party when you arrive, provoking a different reaction from every character. When you reach for the flame, the TimeDevourer - the fusion of the seven dragon gods - will arrive to fight you.
This will be the longest and perhaps most difficult battle in the game - the TimeDevourer changes its innate nature after taking a set amount of damage. All told, it has approximately 15,000 hit points and bombards you with the strongest attacks in the game - omega skills, effect powers, level 6 attack elements, and physical attacks. You'll want to hit it hard, but don't become so absorbed with dishing out damage that you neglect to heal.
The absolute best party for this battle is Serge, Glenn, and Leena. This combination will give you access to the four element types' most powerful attacks. Give characters colorfield spells that will let them set the field effect for the next character in line to summon (or at least use boosted elemental attacks). Equip a variety of elements in everyone's level 1 slots for quick access and be sure each character has a wide variety of healing spells.
The TimeDevourer cycles through all the elements. Prepare your party by choosing a wide spread of strengths and skills for the fight.
The TimeDevourer's transformations mirror the habitats of the six dragon gods and shift in the same order as the Criosphinx's riddle and the chiming crystals you heard before you faced Anemotor. It begins with a white-innate attribute and experiences the following transformations:
- Yellow
- Red
- Green
- Blue
- Black
- White
Plan your attacks around this. With the characters listed previously, you can destroy the yellow, red, blue, and black aspects almost instantly. The first round will require a degree of strategy, but the initial white form of the TimeDevourer tends to use weak attacks. After dishing out about 1,800 to 2,000 hit points of damage, prepare for the first shift by building Glenn's element meter to 8. As soon as the TimeDevourer turns yellow, cast GreenField and summon *Genie; if this doesn't shift the creature to red, it should bring it close to changing.
Once it's become red and shifts to the Mt. Pyre setting, build Leena's element meter to 8, cast BlueField, and follow with *BlueWhale. Fight through the green transformation and pound it with skills like UltraNova and Deluge. When the TimeDevourer becomes blue, hit it immediately with Serge and Glenn's X-Strike - as a red-innate skill, it will inflict nearly 3,000 hit points of damage alone.
When the TimeDevourer shifts to black, you won't have a WhiteField skill, so use the same trick you employed against Fate by building Serge's stamina to 7 and element meter to 8, using three consecutive weak white elements and having Serge attack once and cast *Saints. This will bring the TimeDevourer to its final phase, white, which you can wear down with the remainder of your attack and healing elements (and remember that both Leena's maidenheart tech and the Chrono Cross can recharge spent elements if you need the assistance).
Even if you don't have Leena and Glenn, you can use the general strategy outlined here with a wide variety of characters. Pick your party to provide the maximum number of high-powered attacks and bear in mind that dual techs often have a separate elemental nature not related to the characters who perform it.
Once the TimeDevourer is defeated, it merges with the Frozen Flame to become its true self. Belthasar gives you the Time Egg relic, a device also known as the Chrono Trigger. You can use this to face the true form of the TimeDevourer and set right the rift in history.Chrono Cross: The Point where Destinies Meet
If you've not acquired it already, there's a powerful artifact to be created in Another Divine Dragon Falls (the waterfall north of Arni Village). Place the Tears of Love and Hate on the pedestals in the shrine here, and they will fuse the power of two realities into the lost seventh element, the mystical Chrono Cross. The Chrono Cross is both an element and a key item. As a key item, it can take you into Kid's past in the absence of the Mastermune; as an element, it can recharge your expended elements in battle and - when synchronized with the proper melody - repair the damage inflicted upon time and space. You must forge the Chrono Cross if you wish to see the game's true ending.
Forge the Chrono Cross in this cave to uncover the ultimate secret of the game.
XXVI. For All the Dreamers: Our Planet's Dream is Not Over Yet
When you've taken care of all your business, it's time to head to the place where angels lose their way: Opassa Beach.
After speaking to everyone on the beach to learn the truth about Kid, Terra Tower, the TimeDevourer, and Fate, use the Time Egg at the purple warp spot and choose to forge ahead into the darkness of time.
The true TimeDevourer is a fairly easy battle, but it's slow and will take a while to finish. It uses a wide range of spells from bushbasher to OmegaYellow and requires no physical attacks whatsoever. Summons are effective (even white summons), and as long as you keep your hit points high, this will be the least challenging final boss battle since Earthbound.
Of course, that's only if you want the bad ending.
If you want to see the true ending to Chrono Cross, you must piece together the bits of conversation you've been given by Belthasar and the three children. The Chrono Cross, the chimes, and a certain elemental sequence that has shown up in various places throughout the game: These are part of the key to repairing the damage that time's flow has suffered from Lavos' intrusion. The answer has practically been laid out in preceeding sections and by the in-game text, so it should be pretty easy to realize exactly what must be done. Once you have set up the proper chime-tone sequence, cast the Chrono Cross spell. Then, enjoy the ending!New Game+
After completing the game (with the best ending or otherwise), you can save your game data to your card. If you choose to continue a game from the data file, you will receive two options:
- New Game+: Lets you begin a new game with the stats
and equipment and elements you earned in a previous
game.
- Continue+: Lets you merge your current stats into an
existing save (this only works with saves that are not
made from a New Game+ playthrough).
There are some extra features in New Game+ that are worth checking out.
- You begin the game with the Time Egg, which you can
use at Opassa Beach at any time in the game to face
down the final boss.
- Defeating the final boss prior to completing Terra
Tower will reveal up to nine different extra endings.
Some flesh out the story, some add character depth,
and some are just amusing.
- Use the Time Egg at the warp in Home Hydra Marsh to
visit the Dimension Vortex and let the party from your
previous playthrough join your party. You can even use
Kid while she's out of commission or fight through
Terra Tower with Harle this way!
- Use the timeshifter key item to accelerate gameplay
with the R2 button or slow gameplay with the L2
button.
- Use the relief charm item to replace Serge with a
third fighter during combat. Serge will still be shown
during exploration and events, however.
- Visit the Bend of Time to fight some enemies from
the past.
Battle: Slash (Innate: Blue), Flea (Innate: Red), Ozzie (Innate: Green)
This terrible trio should be a blast from the past for Chrono Trigger veterans: They were Magus' lieutenants in that game. Here, they're even more powerful than they were originally; if you can win this battle, you can consider yourself a true Chrono Cross master. Each adds a unique twist of challenge to the fight. Ozzie is the main nuisance, despite his utter lack of offensive abilities. He can use a skill called MmaxDefense that serves as MagNegate and PhysNegate for the entire enemy party! For several rounds, you'll be subject to their abuses while being unable to retaliate. If you want to survive, you must take down Ozzie as quickly as possible - Leah equipped with a Prism Axe and three Power Seals will be your best asset, as she can tear through Ozzie's defenses quickly. Once Ozzie's gone, you'll want to take down Flea, who poses the second greatest threat with his (yes, his) powerful magic skills and the ability to burn and confuse characters. Fortunately, Flea has the fewest hit points of all the combatants, so he'll go down quickly. After he's out of the fight, Slash should be an easy mark. You'll receive some great items for this victory, and if Sprigg delivers the deathblows, she can add each to her Doppelgang list!
The secret New Game+ battle that awaits at the Bend of Time is difficult. Make things easier by removing Ozzie first.
There are a few caveats about New Game+, however:
- You do not keep summons, key items, and
story-related equipment (Mastermune) in New Game+
mode.
- Items equipped to characters who are inactive when
you complete the game will be lost for future
playthroughs.
- New Game+: Lets you begin a new game with the stats
and equipment and elements you earned in a previous
game.
- Yellow
- Diminish
- Upper position: Switch-chests on the right side of the room.
- 10 - Kneepad