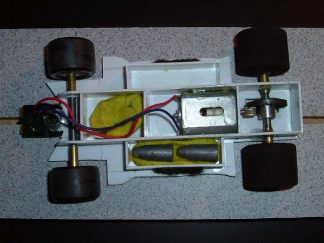
This
is a chassis for those who want something simple without having to solder any
brass. I built this chassis in a hotel room at the beach during a rain storm.
Basically all you need for construction is sheet styrene (I use .040), a straight
edge, Xacto knife, and styrene glue. For glue, I use Testors model glue; the
liquid kind with the brush in the top. First, I put the body on the styrene
sheet and trace around it on the styrene with a pencil. Then I cut out the chassis
pan with an Xacto by scoring the lines and snapping the styrene.
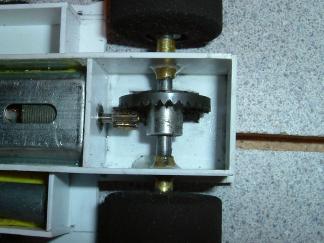
The
next step is to cut the piece to hold the shaft end of the motor. Cut a piece
of styrene wider and taller than the motor. Using the Xacto point, rotate the
knife in the styrene to make the hole for the motor shaft. Keep testing the
hole until it is snug up to the motor. Then trim the piece flush with the bottom
and sides of the motor. Use this as the guide for the width of the two main
chassis ribs. I cut the ribs 3/4" wide and as long as I need for the chassis.
Then I cut the center braces and the side body mounts.
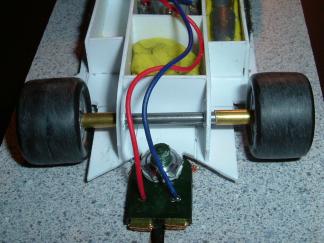
Using
the motor shaft as a guide, I mark the locations for the rear axle holes. The
axle holes are made in the same way as the motor shaft hole. Then I put the
axle through brass tubing pieces for alignment and put the tubing through the
styrene. I use two-part epoxy to glue the tubing to the styrene.
I
cut the hole for the guide flag and mount it to the chassis. After putting the
rear tires on the axle and the guide in the slot of the set up block, I can
measure the location for the front axle holes for the front wheels and tires
I am using. This chassis was going to be used for a Target modified coupe. I
used the wheels/tires that came with the toy for the front wheels. I took two
sets of the wheels and glued them back to back to get the wide look.
When
finished, the motor can be mounted to the chassis with hot glue or epoxy. This
car was set up for my oval track; therefore the weight is all on the left side.
For weights, no they are not ammo slugs. I use fishing weights in modeling clay.
The clay never hardens so it is easy to adjust the weight for different bodies/tracks.
The body is mounted with Velcro tape on the sides.
This
chassis runs very well on my routed oval. After testing it, I found that by
attaching a brass pan underneath the bottom with two-sided tape it handled even
better. When you get the hang of working with the styrene, you can crank one
of these out in about 30 minutes. It is a very cheap and easy way to build a
surprisingly durable slot car chassis.