|
|
|
In this first tutorial, I will show you how to model an AA battery.
The texturing is simple so I won't include that.
Warning: this tutorial uses
alot of images so pleased be prepared to wait a while if you have slow connection.
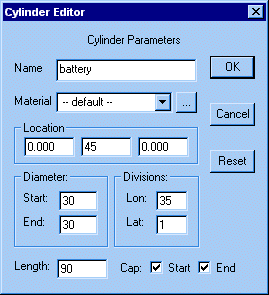
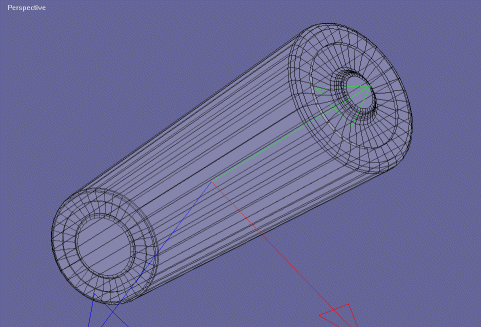
Step 1: the cylinder of doom
First of all, create a cylinder by clicking on the
 button and dragging it
downwards, as straight as possible, on the screen. Then double click on it to bring up the properties
box. Change it to look like this: button and dragging it
downwards, as straight as possible, on the screen. Then double click on it to bring up the properties
box. Change it to look like this:
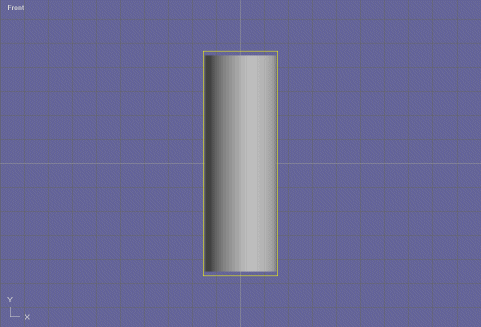
It should look something like this in the front view:
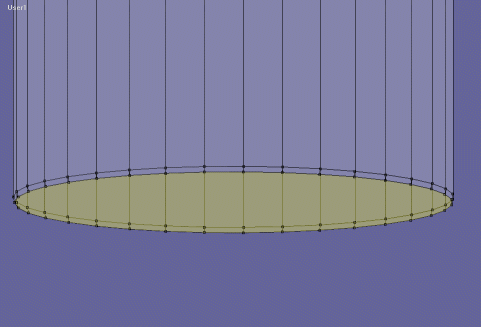
Step 2: curving the base
After that, convert the object to a mesh by selecting it and choosing "convert to mesh"
from the "build" menu. Now, when you select it, it should have a white outline instead of
a yellow one.
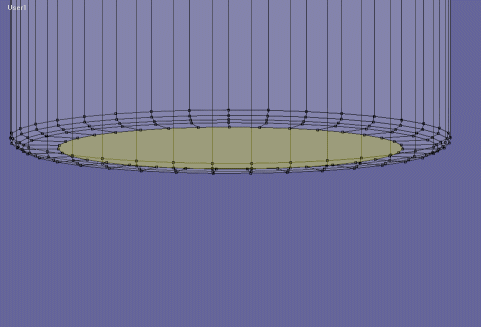
Change the view to point edit mode  and extrude and extrude
 the bottom most face by only by a little bit.
It should look like this: the bottom most face by only by a little bit.
It should look like this:

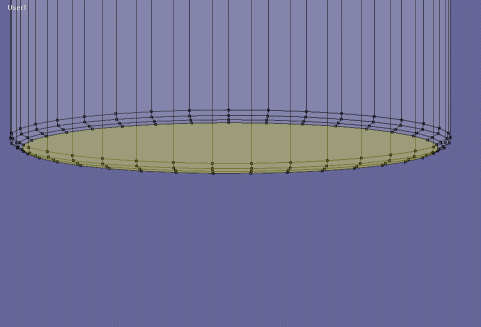
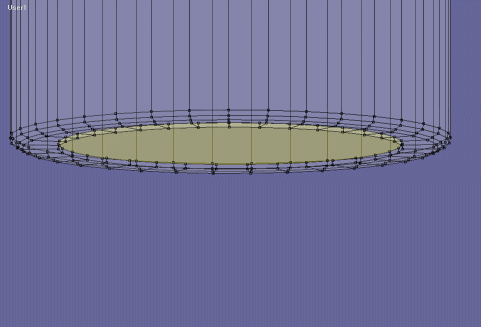
Keeping that face selected, use the scale faces tool  to make the face a tiny bit
smaller, like this: to make the face a tiny bit
smaller, like this:
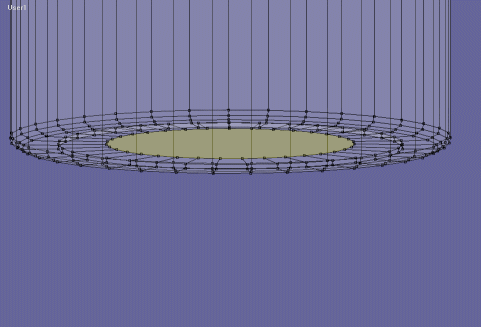
Do this two more times, but each time reducing the size of the
extrusion and increasing the size of the scaling, to end up with something
similer to this:
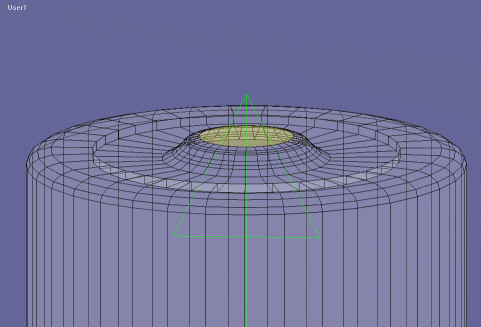
Step 3: the metal
With the last face still selected, using the inset tool
 inset the face so that it looks like this: inset the face so that it looks like this:
Then, extrude it back inwards again:
And again, use the inset tool
to inset the face like this:
Now, we're going to try and do step 2 again, but on a smaller scale:

So that's that bottom part finished, now for the top!
Step 4: the top
For the first part, just do steps 2 and 3, but this time make the bit that's
poking out longer and make more segments so that it's smoother:
Finished!

|
|