Supplies needed:
-Duncan bearing and spacers
-bolt, washers, nut, and lock nut
-drill and dremel


| Duncan Wheel Supplies needed: -Duncan bearing and spacers -bolt, washers, nut, and lock nut -drill and dremel |
|||||||||||||||||||||||||||
| Home | |||||||||||||||||||||||||||
|
|||||||||||||||||||||||||||
| This is probably the hardest wheel to mod for many reasons. First of all the bearing is bigger so it requires more drilling and dremeling. Then the bearing assembly must be centered so there is no wobbling. | |||||||||||||||||||||||||||
| In this pic is my finished Duncan bearing Wheel. It has a performance ring on one side and on the other it has a medical tape ring. The gap on this thing is huge so thats why I needed the extra response. | |||||||||||||||||||||||||||
|
|||||||||||||||||||||||||||
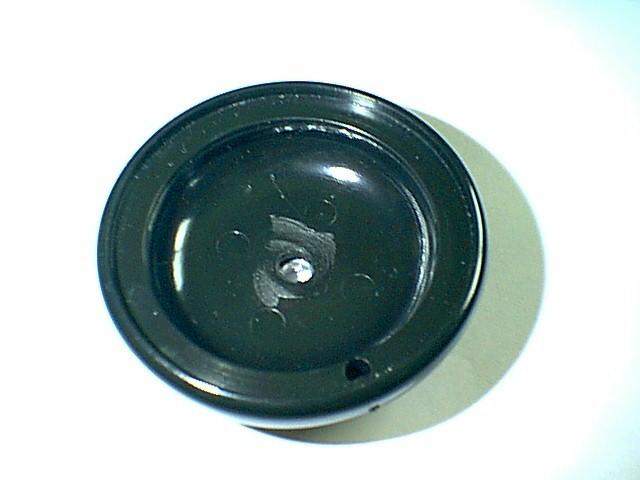
| Again like the other mods the first thing I did after taking it apart was sand down the raised disc on the inner half. | |||||||||||||||||||||||||||
|
|||||||||||||||||||||||||||
| This is what my bolt looks like. It goes bolt, nut, washer, yo half, spacer, bearing, spacer, other yo half, washer, locknut and then finally the end caps. |
|||||||||||||||||||||||||||
| Then it is time to drill and dremel out a seat for the spacer. this was tough because I had to center it perfectly. After I had done that I started dremeling out a space.It wasn't hard to do but it just took a long time to get the depth I wanted. Making it the exact size it important because if it is too big teh string will slip between the gap. not much else to it. The directions are pretty much the same as the TL bearing Wheel but made with a Duncan bearing. | |||||||||||||||||||||||||||
| My way of securing it requires some pliers and I know thats not what you want but this was the only way I could get the thing to stay tight and even. The only thing that you have to figure out is how to make it a take apart yo. Many ways have been discussed from epoxy, super glues, melting the bolt and nut into the cap, and others. So good luck in making your Wheel. if any questions feel free to email me at su_dc3@yahoo.com. | |||||||||||||||||||||||||||
|
|
|||||||||||||||||||||||||||