Note: The links that take you to Yahoo, you will need to search for the program you are looking for.. This window will stay open when you click links to make searching for programs easier.
You will need:
Paint Shop Pro
Simpose
The Base Skins (aka Nakies) - You can down-load these from this site
Body Warp
And The Sims©
Ok, now that we have all the programs we need to make skins, let's get started!
First, you need to make a Wire frame of the .skn file you want to make the skin for. For your convience I have included a wire frame for you to use, it comes with The Sims game.
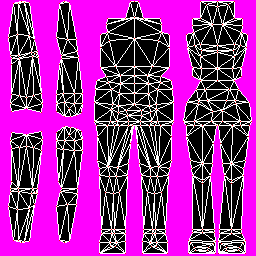
That's a simple wire-frame. It tells you where the peices of clothing will go on the sim. Experiment with the wire-frame to find out what part of the skin you want to go where. Right click the image and click save - to save to your hard drive.
Now we have our wire frame, let's paste the fit female nakies on top of the wire frame. Open these files - NFFitlgt_01.bmp
NFFitmed_01.bmp
NFFitdrk_01.bmp
Paste each one over the wire frame, you should have something that looks like this
I'm a couple steps ahead now. Notice I've went through my layers
 (click that to open up your layers box) and re-named the layers (Layer1, ETC) to the skin color (lgt, drk or med) it helps you keep track of the color
Now, we have our layers set we can start the skin! follow the pictures
Click the icon on your layers box that looks like 2 sheets of paper.
Type a name for the new layer (I've used dress here for obvious reasons :p )
Click the new layer.
Click the selection tool

At this point, you might want to open up your layer box, and click the pair of glasses beside each layer (except for background) so you can see where the dress should go.
Click the flood fill tool

I've chosen the color red - so you can see better, make yours any color.
Fill the selected area in with color.
This is where simpose comes in. Open up the SimPose program and load your skin, check and see if everything is lined up and looks good. Mine does, so I'm going to continue.
Note: ALWAYS remember to save your skins in 256 colors (short-cut ctrl+shift+3 in PSP) otherwise they will crash your game.
Now, we have the dress made... Let's do some sleeves and then add some texture.
Click the select tool, then the sleeve part of the skin. Look at my picture if you need to :)
Fill the sleeve area in with color.
Ok, now remember to save...
Let's start adding pattern!
Make a new layer, read above on how to do so.
Name your new layer 'pattern' so it doesn't get confused with the others.
Click the magic wand

Click the red
Click 'Asphalt'
Click the flood fill
Click the bottom color (the green) and change it to another color
Click the red place.
Check in Simpose.
Add shoes an your done :D