|
Click on any photo below to see larger version |
||||
|
||||
| Painting and Weathering | ||||
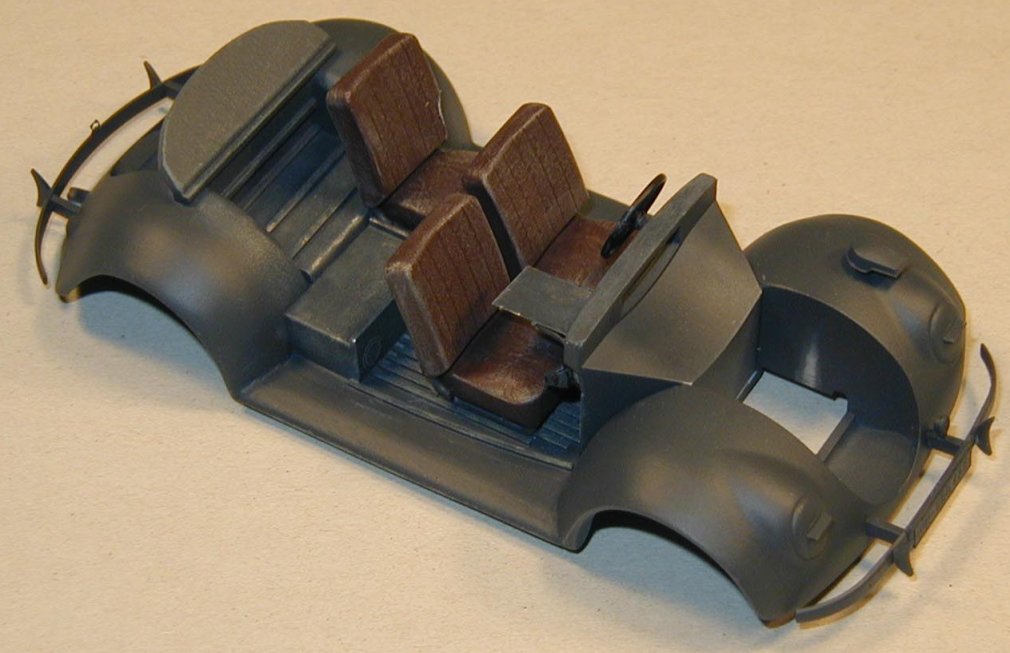
| Perhaps the most challenging aspect of constructing CMK’s kit is the painting stage. Due the way in which the parts are designed I found it best to paint the interior completely, including weathering prior to gluing the floor pan and fender assembly to the top of the body. Many Type 87s left the factory in panzer dark gray finish, particularly those early models that were shipped to North Africa for service under Rommel’s forces. Consequently, I applied a base coat of Humbrol HM4 8163 German Panzer Gray. |
|
|||
|
After this dried several
days I weathered the interior surfaces as they would have retained their
gray finish even after the exterior scheme was modified in the field.
Several more days passed until I over sprayed the entire vehicle’s
exterior surfaces with Humbrol HM2 Afrika Korps Desert Yellow. My
initial reactions were disgust as I noticed the yellow began drying
extremely glossy. My frustrations peaked and I left the model to rest
and tended to other models I was working on at the same time. About a
week later I inspected what appeared to be my ill-fated Beetle. As I
felt that stripping the entire exterior would be too much work I began
to sand the exterior surfaces of their yellow paint. What transpired
next was a miracle as the glossy finish quickly dulled to the desired
appearance. In those areas that I wished to depict extreme wear I used
a heavier grit paper and worked the yellow to the point that the gray
undercoating began showing through – just like on the real Type 87s! I
then went over the entire vehicle with very smooth sandpaper to achieve
a finer finish. After I got the surface to where I liked it I applied
several coats of Model Master’s Dullcote.
Prior to weathering the vehicle’s exterior I painted a Desert Army Korps (DAK) palm tree insignia on the Beetle’s doors with the aid of Verlinden’s German World War II AFV & Vehicle Markings template (VE 1286) that retails for $9.95. Rather than stark white paint I used off-white to better simulate age. In areas of extreme wear in which bare metal may have been revealed I dry brushed the vehicle with Model Master’s Steel. What followed was a series of dry brushing episodes in which I scrubbed the vehicle with lighter shades of its basecoat, achieved by mixing white with the Afrika Korps Desert Yellow. The suspension, particularly the wheels, received a wash of artist’s oil Burnt Umber and Testor’s Rubber. |
||||
| The Beetle’s muffler then was treated with Rust-All, a highly effective super detailing finish marketed to modelers in the early 1990s. After all of the weathering was accomplished I recoated the entire vehicle in Model Master’s Dullcote, including the windshields, which later appeared dusty once the Dullcote dried. To simulate areas that would have been wiped clean by both the Beetle’s windshield wipers and by its passengers, I cleaned the windows with a chisel brush dipped in turpentine. |
 |
|||
|
Conclusion Overall, I am pleased with the end result of super detailing CMK's kit to represent a desert version of the Type 87 Beetle. By making the necessary modifications to the body and adding the CMK, Jaguar, DML, and Verlinden aftermarket update and super detail sets the basic kit becomes a real jewel. However, if I had to do it over, I would go several steps further by combining the CMK kit with even more items from other kits including much of the running gear of the Tamiya desert Kübelwagen and CMK's aftermarket engine compartment. I also would open the Beetle's trunk and retrofit Jaguar's Schwimmwagen tires with Kronprinz wheels from the Tamiya desert Kübelwagen. Now that would be a Beetle to behold! Special thanks go out to friend and fellow model builder Keith Frape for providing images of the Kübelwagen and Schwimmwagens taken at a local military show in November 2003. |
||||