DIAX Soft Phone version 0.9.10f
latest version always available at: http://www.laser.com/dante or http://www.oocities.org/tdanro
or
User manual
Program graphical interface design
Integrate DIAX functionality in the Web browser (Internet Explorer)
Modifying Asterisk server to support extended Message Waiting information
* * * * * * * * * * * * * * * * * * * * * * * * * * * * * * * * * * * * * * * * * * * * * * * * * * * * * * * * * * * * * * * * * * * *
Overview This is a full featured and very small (just around 300KB for all the files) IAX2 based software phone for Microsoft Windows platforms (only). It is based on the iaxclient library (see Steve's K. web page at: http://iaxclient.sourceforge.net). For the full credentials, please click here. Some of the features are:- registering with Asterisk PBX; - supporting IAX2 protocol (only); - multiple audio codecs support (with autoo-negotiation): aLaw, uLaw, GSM, iLBC, Speex; - can register with multiple servers (max.. 8);
- independent audio codec configuration for each registration server; - fully support for the ATCOM AU-100 USB pphone (http://www.atcom.com.cn/engweb/bUSBPhone.html);
- fully support for the Yealink USB phone (http://shop.voismart.it/products.php?cat=12);
- fully support for the Eutectics Inc. USB phones (http://www.eutecticsinc.com/products/products.html);
- web browser integration (start app and/or dial using a link like diax://number/alias); - configurable audio latency;
- microphone and speaker level adjustments during a call, including MUTE;
- custom buttons for Macros to send DTMF strings during a call;
- accept URLs during a call and open that page in the default browser when the call is answered; - can be controlled through Bluetooth fromm an Ericsson/SonyEricsson phone (T68/T39/T610, etc); - autoanswer and remote control (X10 devicces and Applications) functionality based on DTMF tones and/or CallerID; - can have different context for each regiistration server; - registered server represented by a frienndly name (alias); - can change the default registration servver with just one click; - IAX2 native blind transfer; - call timer display;
- display the number of old/new messages per each registered server; - MWI (with Old/New message(s) counter); - display registration status with each seerver (including time in seconds from the last registration acknowledgement); - Windows XP look and feel interface (on XXP only); - IAX2 debug mode support (save in a log ffile); - right click on display to change the collor of the ALIAS name; - multilingual support (English, Romanian,, German, Dutch, Italian, French, Spanish, Portuguese, Czech, Thai, Swedish, Lithuanian and Polish (and others to come by request); - the language can be automatically selectted based on the current system locales; - configurable keyboard support for increaased compatibility with some USB type IP Phones; - you can launch DIAX with command line swwitches (/d for debug mode, /m to start minimized); - polyphonic ring tones (based on MIDI filles); - web browser integration: you can use a hhyperlink to launch DIAX or to dial a phonenumber; - support for IAXTEL direct number dial (iif registered at iaxtel.com); - you can use the phone even if not registtered; - support for both plaintext and MD5 autheentication; - selectable Digital Signal Processing (Dee-noising, Automatic Gain Control); - can use any audio device as ring device (including PC speaker), independent of the play device; - advanced phonebook(search/add/replace/deelete); - 12 memories with one click access (just click one of the 12 buttons to directly dial the number; - you can memorize IAX type addresses thenn call them with a click of a button; - 99 memories with two keys access (Mxx);< - unlimited number of memory locations (juust limited by your HDD capacity), accessible through the phonebook interface; - can use separate audio device than the ddefault one (you can play MP3's through your soundcard/speaker and use an USB headset fort phone purpose); - digital VU-meter; - linear volume control through sliders + MUTE buttons for Microphone and Speaker; - redial/callwaiting callerID functionalitties; - can switch between two calls; - out/in/missed/rejected/all calls list; - save forms positions between restarts; - missed calls indicator; - you can use the PC keyboard to control tthe phone (dial, answer, hang-up);
NOTE: Even if you do not have an Asterisk server installed, you can try the application by clicking on the CallMe in the Help menu to call my desk phone from home. If I'm not available you can leave me a voice message. Please do not close the phone without leaving a message. It is very important for me to hear your opinion.
This is still a prerelease of the application. It can still have some undetected bugs. Please be patient and help me find them. My time is very limited and this is a free time project. I'll do the best to solve them ASAP.For simplicity, there is no installer for this application. Just unzip the file from the diaxxxxxx.zip archive (where xxxxx is the current release, like diax0910f.zip) In order to run the application you just need the diax.exe file. All others required files are included in this one and build at first run: diax.html - sample web page to access DIAX
diax.exe includes all other files presented in the previous versions:
diax.cfg - phone configuration file diax.cl - calls list file diax.pb - phonebook file wiax.dll - low level library diax.exe.manifest- file used by the Windows XP graphical interface ringin.mid - the polyphonic ringtone in MIDI file format
For USB phone support you need to download the diaxusbxxxxx.zip package too. Unzip it in the same directory.
The following DLLs are used for USB phone support, so you can keep only the required ones for your model, to save some disk space:
1. ATCOM U-100: CM_HID.dll
2. Yealink: ylwrap.dll, YLUSBTEL.dll
3. Eutectics: EUSBi2cHook.dll, EUSBControl.dll, EusbEvent.dll
If you want to have the help file available offline from inside the application, yo need the following package too:
diaxhlpxxxxx.zip
Unzip it in the same directory with the application.
The application can be put on a removable media (diskette of flash disk) and take it with you. If the credentials are stored in the configuration file, you're not asked to enter them when you want to place an authenticated call. In this way, you can use the phone even from an Internet Cafe. To launch the application just start "diax.exe".
The graphical interface is very intuitive. Moving the mouse pointer over different objects in the form, a small description is displayed related to the object functionality . A status bar is available too, in the lower part of the window. All the error messages and/or information are displayed in this status bar.
Mute button. You can press it during a conversation if you want to mute your microphone. The correspondent VU-meter will disappear. Click again to restore the microphone sound; (24) - Speaker level digital VU-meter; the indication goes to red if over modulated;; (25) - The Monitoring ON status indicator. This indicator is flashing (red) when the monitoring is activated; (26) - Unattended transfer button (visible only during a call);
(27) - Macro buttons to automatically dial DTMF tones during a call;
(28) - Microphone MUTE button/indicator;
(29) - Speaker MUTE button/indicator;
(30) - Call timer (starts at the beginning of the call; (31) - Ring signal volume (when polyphonic ring is selected in audio configuration menu). This is visible only when phone rings;
When this label is visible, the debug mode is activated. If green, then the debug log (diax.log) contain information; (32) - X10 events activated (see operation here);
(33) - Bluetooth mode indicator;
(34) - Auto answer mode indicator.
Config Menu
Calls menu
You can select which call list to open: Outgoing, Incoming, Missed, Rejected or All calls.
Help menu
You have the following options: display the help file Content (this file you see right now), select CallMe (dial my desk phone from my home, make an echo test or leave me a voicemail message), access DIAX Site containing the latest version of this application or About (see application version info and copyright notices).
For each of the registration server you can select a default codec and the available ones for that server. You can select the default codec ONLY from the list of the available ones.
Enter the username, password and the name (fully qualified domain name) or IP address of each Asterisk server. You can define a specific context for each server or to keep it blank. If you do not want to register with a specific Asterisk server, then uncheck the "Register" checkbox. This option, together with the credentials and the IP Address for each server will be stored in the configuration file. Each server has an index from 1 to 8 which can be directly selected from the corresponding list box. The small box from the left side of the server ALIAS displays the default registration/dial server index number. If you make any modification in the window, the 'OK' button changes to 'Save' in order to permit you to save the changes in the configuration file. If you exit the registration window by clicking on 'OK', the application restart the registration process for all the defined servers. You can delete any defined server by just clicking on 'Delete' button. You can set your own CallerID information (Name and Number) which will be used if the Asterisk server will accept this. This information is common for all registration servers.
NOTE: The 'Alias' list box displays the defined servers. If you want to define a new one, select an empty index from the list and then fill the whole form and click on 'Save'. A possible shortcut is to right click on the corresponding registration server button in the main window to enter the registration menu automatically for that server. The same result is obtained if left clicking on the button of a non-defined server.
You can select any available audio device as input, output or ring and more, you can select PC Speaker as ring device too. In this way you can use a headset on the soundcard and when someone ring you do not need to have the headset on your ears in order to hear the ring. Another option (used by me too) is to use an USB headset (in my case a wireless Bluetooth headset) as Record and Play device and the normal soundcard as Ring device.
The Mic Boost option works only on selected soundcards. You may check it to see the results.
USB Auto mode means that if you have one of the supported USB phone connected to the USB port before the application is started, that device is automatically configured for Rec, Play ands Ring device.
You can select to mute the ring signal for incoming calls by checking 'No ring' checkbox.
You can then hear the ring in the speakers, even if you play some MP3's in the same time, click on the headset switch (if Bluetooth) to connect audio and.... you're in the call. In a future release this operation will be automatically for a Bluetooth headset, like it is when you use it with your mobile phone (ring in headset too and click to answer).
Some Digital Signal Processing options can be set from the DSP frame: De-noising filter, Auto Gain Control (AGC) and Echo cancellation (not available in this version). You can play with those options for best audio experience using DIAX.
The key beep can be disabled from the same window. There is a mic boost option, if the soundcard permit this. The standard keypad beeps are now replaced by the corresponding DTMF tones.
All those settings are saved in the configuration file.
From this menu you can configure the Auto answer functionality based on CallerID or unfiltered.
If you want to use autoanswer all the time (for all received calls), then check 'Unfiltered'. The list of users will be grayed out.
If you want selective autoanswer based on CallerID, uncheck 'Unfiltered' and from the list of the available callers (this list is build based on the current phonebook), right click on the specific user to toggle 'Enabled' field between 'YES' and 'NO'.
When you finish the configuration, click on OK to return to the main window.
the COM port used to interface with the Bluetooth phone and the CM11/12 or other type of X10 interface,
Read the manual of your Bluetooth dongle to know how to determine the COM port used by the Bluetooth device for Serial connection. Select from the list of the installed COM ports the one used by Bluetooth.
To enable monitoring of calls and executing Application and/or X10 commands, check "Enable Mon".
<home>
You can choose to display any of the available call list: Outgoing, Incoming, Missed, Rejected or All calls.
Here is presented the window for the All Calls list.
The difference between the lists is just the last column, which is not displayed on the other type of lists.
From this window you have some possible options:
Delete a selected entry, delete all entries or dial a selected entry. You can select multiple entries using CTRL key when clicking on a row. If multiple items are selected, the Dial function applies to the first one selected only. After clicking on Dial, the full CallerID information is transferred on the phone display, the server automatically selected and the Call List form closed. You can then change the server (if you want) and then click on Dial in the main window.
For each call you have the following information:
If you initiate a call and then hangup before the other party answer, this type of call is not registered in any type of call list
The calls are ordered as the last placed/received/missed call is placed first in the list. You can choose to order after any column you want by clicking on the column header.
Click on 'Exit' to return to the main application window without transferring the selected call information to the phone display.
<home>
You can directly access the Phonebook form by clicking on the PBook button in the main window.
They are 4 combo boxes: Position (the position of the entry in the phonebook), Name (the name associated with this position), Number (phone number or full IAX address associated with this position) and Srv Alias (the server used to dial that specific extension). The lists points by default to the first item.
Clicking on the New button the first available position greater than 12 is automatically selected. This is because the first 12 positions are reserved for the Speed dial buttons in the main window. You can still manually edit the position number and choose one from the 1-12 interval. The same result is obtained by right clicking on the speed dial buttons in the main window.
There is a search field where you can enter any string to be searched in the phonebook. At each press of the 'Search' button, the next occurrence of that string is displayed. If no entry is found then the following message will be displayed: "No record found matching your query!".
To enter a new entry click on New button. If you previously selected an existing entry, you can edit it and then click on save to save it modified. A confirmation message will be displayed in the status bar. The list will then be reloaded to include the modification. You can enter in the number field some specific characters after the phone number, as follows:
- '#' this is considered the termination for the dial number. the call will be initiated with the number before this char. Everything after this one is considered a post dial string and will be dialed after the call is established;
- 'p' this include a pause of 1s in the post dial string;
- 'h' this will produce a hangup in the current call.
Using those special characters you can automate the access to some special services without the user intervention.
You can delete any selected entry by clicking on Delete button. A confirmation message will follow to be sure that you want to delete it.
You can directly dial any selected item from the phonebook just select it and clicking on the Dial button.. The Name & Number will be transferred to the phone display and the call initiated automatically.
You can exit the phonebook and return to the main window by clicking on Exit button.
<home>
Minimizing the application in tray
You can minimize the main application window in tray by clicking on window minimize button or hitting 'ESC' key when the application has the focus. You will se a small window in the right down corner, like in the following picture:
![]()
Moving the mouse over that icon, you get the phone status containing the total number of: missed call(s), new voicemail message(s) and old voicemail message(s).
Double clicking on the icon you restore the main window.
You can restore or close application from the right click menu.
When you receive an incoming call, the windows is restored automatically, without getting the focus.
When in monitoring mode, a small flashing yellow light will be seen on the small phone icon. This goes to flashing red if a call was answered in monitoring mode and is waiting for DTMF commands.
<home>
The configuration file (diax.cfg) is a text based file which can be edited using for example Notepad. There is no need to manually edit the file. All the operations can be done using only the graphical interface.
If this file does not exist, is automatically generated at the first run of the main application.
NOTE: Starting with DIAX version 0.9.9f, the configuration file will be backward compatible. You will be able to use older version without the need to reconfigure everything again when a new version of DIAX will be available.
NOTE: Use a simple text editor. Do not use Microsoft Word or any other document editor. Keep a copy of the original configuration file for the situation when you will not be able to start the program with the modified configuration file.
The configuration file contain 2 sections (GENERAL, END) plus a description at the beginning, as follows:
# DIAX configuration file
# Copyright Dan Toma 2003, 2004, 2005
#
[GENERAL]
...
[REGISTRATION]
[X10]
...
[Application]
...
[Monitoring]
...
[END]
The [GENERAL] section:
[GENERAL]
VERSION=0.9.10a
# The version of the configuration file (the same as the of the DIAX application)
PLAY=Bluetooth Audio
# The currently
selected audio playback device (can be any available audio output device).
REC=Bluetooth Audio
# The currently
selected audio input device (can be any available audio input device).
RING=PC Speaker
# The currently
selected playback device (can be any available audio output device).
FORMAT=512
# The default audio codec, as follows: 2=GSM, 4=uLaw, 8=aLaw, 512=Speex, 1024=iLBC.
SILENCE=-99
# Currently used silence threshold, values between -99 and 0 (used for VAD), not yet implemented.
DENOISE=1
# This is 1 if denoising filter is used, 0 if not.
AGC=1
# This is 1 if Automatic Gain Control is used, 0 if
not.
ECHO=0
# This is 1 if Echo Cancellation is used, 0 if not.
PTT=0
# If 1, then 'Press to talk' is used (not implemented in the current version).
VUMETER=1
# If the value is 1, then the digital Vu-meter is activated during a call, if 0 it is disabled (to use less computer resources).
BEEP=1
# If the value is 1, then the phone keyboard beep is activated, if 0 it is disabled.
ONTOP=0
# If the value is 1, then the main application window is always on top of other windows, if 0 then only when it got the focus.
CIDNAME=Dan NB
# This is the CallerID name used when placing a call. It can be changed after that by the Asterisk server.
CIDNUMBER=110
# This is the CallerID number used when placing a call. It can be changed after that by the Asterisk server.
SHOWSTATUS=1
# If the value is 1, then the Status Bar is visible, if 0 then it is not visible.
LANGUAGE=0
# This is the current language index used by the application (for Multilanguage support) as follows: 0 - default system language, 1 - Englisg, 2 - Romanian, 3 - German, 4 - Dutch, 5 - French, 6 - Spanish, 7 - Italian, 8 - Portuguese, 9 - Czech, 10 - Swedish, 11 - Lithuanian, 12 - Polish.
REGTYPE=14
# Registration type information (integer value) as follows:
- bit 0 - not used
- bit (1-8) - 1 for 'need to register' with the corresponded
server (1-8)
- bit (9-11) - default registration server (0=1, ... ,7=8)
- bit (12-14) - not used (for further development
BTCOM=6
OTHERS=14
- bit0 - enable Autoanswer;
- bit1 - enable Bluetooth;
- bit2 - enable unfiltered Autoanswer;
- bit3 - enable X10 commands;
- bit4 - enable Application commands;
- bit5 - enable Infrared commands;
- bit6 - enable Monitoring;
- bit7 - enable Silent Mode (No Ring)
X10COM=3
LATENCY=60
FORM=8115,6255
#Key code values (US keyboard) :
# `
# ESC 27
# 1 49
# 2 50
# 3 51
# 4 52
# 5 53
# 6 54
# 7 55
# 8 56
# 9 57
# 0 48
# - 45
# = 61
# BACKSPACE 8
# TAB 9
# q 113
# w 119
# e 101
# r 114
# t 116
# y 121
# u 117
# i 105
# o 111
# p 112
# [ 91
# ] 93
# \ 92
# a 97
# s 115
# d 100
# f 102
# g 103
# h 104
# j 106
# k 107
# l 108
# ; 59
# ' 96
# ENTER 13
# z 122
# x 120
# c 99
# v 118
# b 98
# n 110
# m 109
# , 44
# . 46
# / 47
# * 42
# # 35
# SPACE 32
# UP 38
# DOWN 40
# LEFT 37
# RIGHT 39
# + 43
#
# The keycode for the main keys of a standard PC US keyboard, in decimal. This is used to easily edit the KEYMAP parameter in the configuration file.
#KEY_assignment in the form
FUNCTION1/KEY1/keycode1,FUNCTION2/KEY2/keycode2,FUNCTION3/KEY3/keycode3,...
# Always use 3 digits for the keycode (for ex: 000, 001, 023)
#Please change (edit) only the key and the keycode and leave FUNCIONx
unchanged!!!
KEYMAP=1|1|049,2|2|050,3|3|051,4|4|052,5|5|053,6|6|054,7|7|055,8|8|056,9|9|057,0|0|048,*|*|042,#|#|035,TRANSFER|t|116,DELETE|BACKSPACE|008,DIAL|ENTER|013,HANGUP|ESC|027,REDIAL|SPACE|032,ANSWER|SPACE|032,REJECT|r|114,MEM|m|109,VOLUP|UP|038,VOLDOWN|DOWN|040,MUTE|s|115,MINIMIZE|z|122,EXIT|x|120,AAEna|a|097,BTEna|b|098,X10Ena|o|111,IREna|i|105,AppEna|p|112,MONITOR|y|121,
MICBOOST=1
# A value of 1 activates the Mic boost functionality;
YLRINGTONE=5
# The selected ringtone for the Yearlink USB phone;
CUSTOM1=MACRO1,132p#22#
CUSTOM2=PASSWD,252#
..
CUSTOM6=PASSWD,2p1312#h
# Here is the definition of the custom buttons used for Macros during a call;
The [REGISTRATION] section:
[REGISTRATION]
SERVER1=E5?851<<87632?=T
# The Asterisk server fully qualified domain name or IP address used to place an authenticated call and/or to register. The string is scrambled. There is one record for each of the 8 servers, even if empty.
ALIAS1=5?851<<87632
# The Asterisk server Alias (a short name to easily represent it). The string is scrambled. There is one record for each of the 8 servers, even if empty.
USERNAME1=G12tfsd2
# The username used to place an authenticated call and/or to register. The string is scrambled.
PASSWORD1=t4234fgvjf723429y8
# The password used to place an authenticated call and/or to register. The string is scrambled.
CONTEXT1=g36dghas
# The context (if any) used for that specific Asterisk server. The string is scrambled
All those parameters can have any index from 1 to 8, depending on the number of registration servers defined. The order is not critical and some of them (like CONTEXTx) can miss.
DEFCODEC1=1024
# Default code for that registration server, as follows
- GSM = 2
- ULAW = 4
- u-Law (G.711) = 8
- A-Law (G.711) = 16
- SPEEX = 512
- ILBC = 1024
AVAILCODEC1=1026
# The list of available codecs. This value is obtaining
from a sum of the respective codecs values.
The
[X10] section
[X10]
# Available X10 devices definition
X1=b1,Living corner
X2=b2,Living main
X3=b3,X-Mas Tree
X4=b4,Living background
X5=</END>
This filed is edited through the graphical interface (Config X10 Menu). The section has an end delimiter (</END>).
The [Application] section
[Application]
# Application execution list
A1=@C:\WINDOWS\notepad.exe,Notepad
A2=C:\WINDOWS\cmd.exe,Command
A3=C:\Program Files\Winamp\winamp.exe,Winamp
A4=@C:\Program Files\MP3Gain\MP3GainGUI.exe,MP3 Gain
A5=@C:\Program Files\Winamp\winamp.exe "c:\my music\allmp3.m3u",Winamp2
A6=C:\WINDOWS\Media\town.mid,MIDI
A7=C:\MyMusic\Pink Floyd - Bring The Boys Back Home.mp3,PlayMIDI
A8=</END>
# You can define an unlimited number of applications (scripts), sounds files (wav, mid or mp3) to be executed when a specific call is received. The file is represented using the full path. The "@" character specify that the respective file is executed with display interaction. If it is missing, then the file is executed in background. For each file a friendly name is defined.
This filed is edited through the graphical interface (Config Application Menu). The section has an end delimiter (</END>).
The [Monitoring] section
[Monitoring]
# Monitored events list
M1=1&301,Application&Notepad
M2=-&320,Application&MP3 Gain
M3=2&*,X10&Living corner&On
M4=-&304,Application&Command
M5=309,Application&Winamp2
M6=321,Application&MIDI
M7=322,Application&PlayMIDI
M8=</END>
# You can define an unlimited number of monitored events. Each of them is represented by the DTMF&CallerID (number), the output device (X10 or Application), the sub-device (only for X10) and the friendly name of the command, as defined in the specific section. The section has an end delimiter (</END).
The '-' for DTMF means that only the CallerID is considered for that event. A '*' character for CallerID means that any call will be automatically answered and the command executed only based on DTMF.
<home>
The Phonebook file contain 2 sections (PHONEBOOK, END) and a description at the beginning, as follows:
# DIAX Phonebook file
# version 0.9.9k auto generated file
# Copyright Dan Toma 2003, 2004, 2005
#
[GENERAL]
VERSION=0.9.9k
[PHONEBOOK]
...
[END]
The [PHONEBOOK] section:
[PHONEBOOK]
1=4,207,ECHO,1
2=</END>
# they can be from 0 to an unlimited number of phonebook entries (better say... limited by the HDD capacity and the possibility to handle a very large text file, but this is not an issue for some thousand records which is more than enough for a standard phonebook). All of them has the same format. First number represent the position in the phonebook (usually starting with 1). They do not need to be consecutive, but ordered in the ascending order. The first 12 positions are used to populate the Instant Access Memories. After the first ',' the phone number follow. It can be a numerical value (if dialing using the standard provided credentials in the registration form) o a full IAX type address, like user:pass@server/exten@context . After the second ',' there is the Name allocated to that number and then the index of the used Asterisk server for that specific phonebook record. An '8' is added to this number if that specific position is defined for AutoAnswer.
For example, if the registration server is 1 and that position is defined for AutoAnswer, then the value will be 9 (8+1).
[END]
#This is the end of the file marker.
<home>
The Calls list file contain 2 sections (CALLS, END) and a description at the beginning, as follows:
# DIAX calls list file
# version 0.9.7
# Copyright Dan Toma 2003, 2004
#
[CALLS]
...
[END]
The [CALLS] section:
[CALLS]
"VM"<201>,22-Nov-2003,17:40:19,00:00:08,2,2
# they can be from 0 to an unlimited number of calls list entries (better say... limited by the HDD. Each line is in the form:
CallerID,Call_Date,Call_Time,Call_Duration,Call_Type, Srv_Index
Call_Type can be as follows: 0 (None), 1 (Incoming Call), 2 (Outgoing Call), 3 (Missed Call), 4 (Rejected Call), 5 (Dialed), 99 (Unknown Type)
<home>
If you have entered some credentials in the Registration page (for a minimum of one server) , you will be able to directly dial a phone number by entering the number using the keypad, select any available server by the respective button and then clicking on DIAL button. The alias of the used server is displayed in the phone display background. You can edit the number before dialing by clicking on DELETE button. The last entered digit will be deleted. If you delete even the last entered digit, the function buttons will be both disabled.
When you click on DIAL, if the number exist in the phonebook, the full CallerID information is displayed. If the number is not in the phonebook, "Unknown" is displayed as CallerID Name information.

NOTE: For better visibility you can right-click on the phone display in order to toggle the color of the displayed Alias from gray to white and reverse.

You can use the numeric keypad from your PC keyboard to enter the number too and then press ENTER to dial.
NOTE: If you have entered some digits from the keypad, by clicking on
"DELETE" for more than 2 seconds, the full number is deleted.
During a call you can send DTMF codes by clicking respective keys from the keypad. Some special characters are accepted too:
'p' - 1 s pause (long press on the '*' key)
'h' - hangup (long press on the '#' key)
Those are accepted in the Custom Macro buttons too.
<home>
Custom Macro buttons during a call
During a call you have access to 6 configurable buttons. You can assign post dial strings containing only the following characters:
0-9, #, *, p, h
See in the precedent chapter how to enter those special characters.
To configure the Custom Buttons, choose the respective option from the configuration menu.
The main window will change to:
Enter a Name for the Macro, a post dial string and then click on the button you want to program.
If the two fields are empty and you click on a Macro button, that one will be cleared. Dragging the mouse over thye buttons you will see the post dial string allocated to that button.
To exit from this you click again on the option in the configuration menu.
You can use the buttons only during an active call.
<home>
Dialing using the Instant Access Memories
They are 12 available memory locations for direct dial. They are allocated to the positions 1-12 from the phonebook. In order to define each of them, use the phonebook menu. The associated Name for each of the 12 positions will be displayed as the button caption.
Note: Try to use names with max. 6 characters for the first 12 positions, in order to be fully displayed on the respective button. Store the number you dial most of the time on those positions.
To dial one of them, just click on the respective button. The full CallerID information is displayed and the defined server for that position selected. You can change the server if you want to and then click on Dial button.
<home>
You can directly dial any of the first 99 entries from the phonebook (pos. 01-99) by clicking on M-- button and then entering a 2 digit number representing the position you want to dial.
When you first click on M-- button, the display will show you M-- and wait for you two digit position to be entered. Each entered digit will be displayed.
After you enter the second digit of the position, the full CallerID information regarding that position is displayed. You can then check to see if it is what you are looking for, change the server if you want to and then click on Dial. If is not what you want, you can click on DELETE. The full information from the display will be deleted and you can try again with another position. If the memory position you have entered does not exist in the phonebook, then the message Not found! is displayed in the status bar and the display cleared.
<home>
Click here too see how to use the Call List and to dial from it.
<home>
Click here too see how to use the Phonebook and to dial from it.
<home>
How to use the PC keyboard to control your phone
You can use the PC keyboard (even the numeric keypad) to control many of the DIAX phone functions. The keyboard is active only if the DIAX window has the focus.
This is the default allocation of the keys for different functions:
- 'ENTER' key can be used as DIAAL (when there is no active call) or as '#' when you are in a call (for example to enter the information in the Voicemail menu);
- numeric digits keys, '*' and '>#' keys can be used as their respective signification;
- '.' or ',' key can be usedd as '#' (to allow you to use it from the numeric keypad or when ENTER has another function); - 'ESC' key can be used to minimize the main window (in tray) and/or to close any secondary window (equivalent with a click on 'Cancel' button from that window;
- 'M' or 'm' key can be usedd as MEM button, when available;
- '-' key can be used as DELETE< (when available). Useful when dialing with the numeric keypad;
- 'SPACE' key can be used as HANNGUP/REDIAL/ANSWER (depend on the
app status);
- 'n' or 'N' key can be used as REJECT,
when available;
- 'X' or 'x' key can be used to exit
application at any time if the app main window has the focus;
- arrow keys can be used to control audio output volume :
LEFT or DOWN = Vol Down, RIGHT or UP = Vol Up;
- 'Z' or 'z' is used to minimize in tray the application window;
- 'O' or 'o' is used to enable/disable X10 commands. The respective icon appear in the main window if activated;
- 'B' or 'b' is used to enable/disable Bluetooth functionality. The respective icon appear in the main window if activated;
- 'A' or 'a' is used to enable/disable Autoanswer functionality. The respective icon appear in the main window if activated;
- 'I' or 'i' is used to enable/disable Infrared functionality (not yet implemented). The respective icon appear in the main window if activated;
- 'P' or 'p' is used to enable/disable Application functionality. The respective icon appear in the main window if activated;
- 'Y' or 'y' is used to enable/disable Monitoring mode. A small red flashing LED appears in the bottom right corner of the phone display if activated;
All those predefined
keys allocations can be changed by manually editing the
configuration file (see configuration file here for more
details).
<home>
If you have dial even a single number from the moment the application was started, during the idle period the REDIAL (first function button) is active. You can click on this button to redial the latest dialed number. The dialing is automatically, without the user intervention, using the same server.
<home>
When a new incoming call arrives, the CallerID information is displayed on the phone display and the server from which you have receive the call is displayed in the background. You have two options: to answer the call or to reject it. Click the ANSWER button to answer the call. The total number of calls box (16) will be incremented and the active call number box (14) will display the current active call number (1 if this is first or 2 if this is the second one).
<home>
Click the REJECT button to reject the call. The total number of calls box (16) will not be incremented.
The CallerID of the calling party will be deleted from the display.
<home>
Handling two simultaneous calls
DIAX is capable of handling a maximum of two simultaneous calls. When you are in a call and a new one arrives, you can see the CallerID of the new one on the phone display and to ANSWER/REJECT that call too.
If you choose to answer the call, the total number of calls box and the active call number box (12 and 17) will display '2'. In this moment, the function buttons will display HANGUP/SELECT. You then can switch between the two calls pressing SELECT or hang the current call with HANGUP. If you click on HANGUP, you are automatically connected to the other active call. The display shows all this time the CallerID of the other party for the currently selected call.
When you switch to another call using SELECT button, the previous call is put on hold (and Music on Hold activated if available).
<home>
When you are in a call, a new button (Transfer) under the keypad become visible.

Click on 'Transfer' button and the display will show:

Enter the extension to which you want to transfer the call and then click again on Transfer. The call will be automatically connected to the new extension.
NOTE: You can still transfer a call (if permitted by the extensions.conf file) by clicking on '#' or the other equivalent key (click here for details using the PC keyboard), using the standard Asterisk procedure.
<home>
Go here to see how to configure the Auto answer feature. When finished, the phone can be entered in Auto answer mode by pressing 'A' key or from the Config menu.
A small icon will be displayed to know that Auto answer mode has been entered.

You can disable Auto answer mode pressing again on 'A' or through the Config menu.
The autoanswer can be performed Unattended (for each received call) or based on the DTMF/Caller ID, as defined.
<home>
Using Bluetooth to control DIAX
You can use any Bluetooth enabled Ericsson or Sony Ericsson phone to control DIAX.
The application was tested using SonyEricsson T68i and T610, but it must work with any other SonyEricsson phone too, even over a serial cable connection.
NOTE: The feature is not compatible with any other Bluetooth phone from other manufacturers because of the incompatibility at the protocol level.
Go to Configuration > Bluetooth menu to configure the the COM port used for Bluetooth communication.
To enable Bluetooth press 'B' key or Enable Bluetooth from this form.
You will be able to use the GSM phone for any of the following operations:
- enter the number to dial (use keys 0-9);
- the two DIAX context based buttons are emulated by the 'Yes' and 'No' keys from the GSM phone;
- a clone of the DIAX display is represented on the GSM phone display. You can get feedback on any operation done and the actual function of the two buttons ('Yes' and 'No');
- you can go back to the GSM normal operation clicking on 'C' key.
- left and right buttons (joystick) from the GSM phone can be used to scroll through the available registered servers.
When you exit from the DIAX mode, you can reenter it from the Accessories menu of the phone. A new item named 'DIAX Soft phone' will be available after the connection is established.
DIAX monitor the BT connection all the time as the BT is enabled. Even if you go outside the range, when you come back the connection will be re-established automatically.
You can pair a Bluetooth headset with the PC and use it as a headset for DIAX too.
<home>
Defining Applications to be executed
From the Config menu you can access Application Configuration
In this form you can define application/scripts/sound files to be executed/played when in monitoring mode and one specific event has been triggered.
To enable Application execution when a monitored event is triggered, check "Enable".
Enter a name (alias) for the application/sound and then click on the small folder button to browse the filesystem for the file to be executed/played.
You can select Executable Files (exe or com extensions), Batch Files (bat and cmd extensions) or Sound files (wav, mp3 or mid extensions). After you browse and select the file, click on Open. The full path and the file name is entered in the "Name" textbox. You can then enter a friendly name for that file in the "Alias" field and select if you want or not to interact with desktop by selecting or not "Display" checkbox. When you finish, click on "Save" button to save that entry in the configuration file.
You can delete an already defined application by selecting it from the list and clicking on "Delete" button. Take care that there is no warning before deleting it.
<home>
From the Config menu you can access X10 Configuration.

You can enable/disable X10 functionality from this window.
First select a House Code (from A to P) and the Device code (1 to 15) as on the physical device you want to control. Then enter a friendly name for that device, like "Living Main Light" (you can use spaces too inside the name) in the "Description" field and then click on "Add/Edit" button.
The new device is added to the list without any other confirmation.
You can change the friendly name of an already defined device by editing the "Description" field and then clicking on "Add/Edit" button. A confirmation is required before committing this modification to the configuration file.
To delete a device from the configuration file you must first select the corresponding description from the list and then click on "Delete" button. A confirmation is required before committing this modification to the configuration file.
<home>
From the Config menu you can access To Monitor menu.
To define a new monitored event, you have multiple options:
- select a DTMF digit, and nothing for the CallerID. In this way the phone automatically answer for any call and waits for a specific DTMF digit to be received in order to trigger an event;
- enter both a DTMF digit and a CallerID (number). In this way, the phone answer a call if it is from that specific CallerID and waits for that DTMF digit before triggering the event;
- select '-' (ANY) as DTMF digit and enter a CallerID. In this way the event is triggered by the CallerID only and the phone answer the call only if Autoanswer is defined for that call or unattended. You can in this way execute commands without even answering the call.
Using those features, you can have an unlimited number of commands from the same remote phone keypad.
Then select from the list one of the already defined X10 device or Application and the desired command to be executed. The command list is filled automatically accordingly with the selected device.
Then you must click on "Add" button to save the event in the configuration file.
When you finish all events definitions, you click on "Exit" to return to the main application window.
To delete an event, just select it from the 'Available monitored events" list and click on "Delete" button.
From time to time, after you have deleted some of the X10 devices or applications from the configuration file, you must used the cleaning functionality ("Clean" button) to delete orphaned monitored events (ones with no more existing defined devices).
During a call, (or if autoanswer is enabled) you can command using DTMF tones anything on your computer, from any phone in the world.
A suggestion for the "extensions.conf" file in order to use Home Automation based on DTMF/CallerID (X10 and Application execution) functionality is to allocate a range of extensions for the HA purpose, as follows (for the range 300-399):
exten => _3XX,1,SetCIDName(Home
Automation)
exten => _3XX,2,SetCIDNum(${EXTEN})
exten => _3XX,3,Dial(IAX2/dan,40)
In this way you can have up to 100*12=1200 events defined for a single DIAX phone.
In this case "dan" is the IAX2 account registered in DIAX. When a call is made to an extension between 300 and 399, the CallerID is changed to that number and then DIAX called. For example, if you call 301, the following will be displayed in DIAX:
![]()
If a monitored event is defined for 301, then that command will be executed. Combine this with the DTMF functionality and you can get practically an unlimited number of events.
<home>
Using the ATCOM AU-100 USB phone with DIAX
The USB phone supported by DIAX is produced by ATCOM (http://www.atcom.com.cn/engweb/usbphone.html)
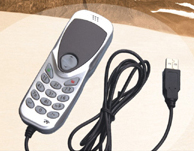
You have full access to the phone keyboard and to the included ring device.
To enable full ATCOM USB Phone support (not only audio), you must select it in the Config Menu.
When the application is started, it automatically detect the USB phone and configure the Audio Devices for the Record and Playback devices.
You can select "Generic USB Audio Device" for Ring Device too, in this situation the internal USB phone ring will be used.
The polyphonic ring tone can still be used if the internal PC soundcard is used as a Ring Device
The left (green) and the right (red) buttons from the USB phone keyboard are equivalent to the ones from the DIAX main window, so the functionality will be the same (Dial using the green key and Hang up using the red key).
If DIAX is minimized, when a key from the USB phone is pressed, the window is displayed to see what you type.
The Fn key from the USB phone is used as "#" key and the "<-" as the "*" key.
Up & Down keys directly control the default system sound volume, because in this way it is implemented in the phone DLL by the manufacturer.
<home>
Using the Yealink USB-P1K USB phone with DIAX
This is a high quality USB phone with a sound comparable with the high-end phones. Even at high output level, the sound is crisp and clear. It has 10 available ringtones which you can select from the audio configuration menu and a large display. The call list (output and input) is stored in a flash memory inside the phone and can be used to direct dial through DIAX.

This phone can be ordered in Europe from the following location:
http://shop.voismart.it/products.php?cat=12
To enable full Yealink USB Phone support (not only audio), you must select it in the Config Menu.
In order to use internal phone ring signal, you must select in the audio configuration window Generic USB Audio device as Ring Device. The operation mode is very similar with the one of the DIAX phone, based on the SonyEricsson two button style.
<home>
Using the Eutectics IPP400/IPP520 USB phone with DIAX
Eutectics is one of the leading manufacturers of high quality USB phones.
DIAX has been tested with the following Eutectics USB phone models:
IPP 400 IPP520


The operation mode is very similar with the one of a standard analog PSTN phone.
When you take the handset off hook you will hear a dialtone. Dial the desired number and wait for the call to be completed.
There is a time-out of around 3s before the entered number is dialed. If you want to dial faster, end the dialstring with a '#'.
DIAX fully support the supplemental buttons in IPP520, like volume and Transfer.
<home>
Integrate DIAX functionality in the Web browser (Internet Explorer)
From the Config Menu you can select "Integrate in Browser". A REG file is generated automatically in the same directory as the application (diax.reg) and you are asked if you want to integrate browser functionality. If you answer yes, then the necessary registry settings are done to support this. This is the only situation when the application writes something in the system registry.
Each time you move the application to another place (system and/or path) you need to regenerate the REG file in order to keep this functionality.
After this step, you will be able to integrate links in a web page to directly call a phone number, even DIAX is not yet started.
An example file (diax.htm) is included in the package to show you how to use this feature.
You will be able to start DIAX and dial a number using the following syntax:
diax://number/alias
where number is the number you want to dial and alias is the Asterisk server alias (as defined in DIAX) used for this specific call.
<home>
Starting DIAX with Command Line switches
DIAX now supports some command line switches when it starts. Depend on your feedback, many others will be added in the future.
/d - start DIAX with Debug support (see here for details);
/n - start DIAX with no Callbacks. This mode is used ONLY for debug purpose. No status and or messages are displayed. You cannot even place calls. Use this if you have unexpected crashes during idle periods and see if the crashes still occurs doing nothing with the phone;
/m - start DIAX minimized.
<home>
Changing the default polyphonic ring tone
You can use any ring tone you want by changing the default ringin.mid file in the application directory with the desired one. This file is auto-generated at the first run of DIAX.
NOTE: Take care that the file must be a standard MIDI format one. You cannot change the name/extension of a MP3 file and use it as a ring tone for DIAX.
<home>
When the default audio device is used for ring and a call is received, a small ring volume slider is displayed under the numeric keypad:
You can adjust the level for the ring tone as desired.
<home>
Changing the application language
This application supports in this moment 10 languages: English, Romanian, German, Dutch, Italian, French, Spanish, Portuguese, Czech and Thai. You can select the language from the Config > Language Menu:
After the selection, the application is automatically reinitialized and everything will be displayed in that language.
You can directly select the language using the keyboard shortcuts, as in the previous picture. Using 'F2' key you select the Default Locales for the system as the application language. You can select another language directly by using CTRL + a key, as presented in the picture.
<home>
Sample Asterisk configuration files
In order to be able to use DIAX in the 'real life', Asterisk server must be configured.
You can find here some sample configuration sections for the main Asterisk configuration files: iax.conf, voicemail.conf and extensions.conf.
iax.conf file
[general]
bindaddr=192.168.33.99
context=noaccess
group=1
callgroup=1
pickupgroup=1
amaflags=default
bandwidth=low
disallow=all ; same as bandwidth=high
disallow=ulaw
disallow=alaw
allow=gsm
allow=iLBC
allow=Speex
jitterbuffer=yes
dropcount=2
maxjitterbuffer=500
maxexccessbuffer=400
tos=throughput
mailboxdetail=yes <-------- NOTE: This line is essential to get the full mailbox info (old/new messages)
[guest]
type=user
context=iaxguest
callerid="Guest IAX User"
[dan]
type=friend
username=dan
secret=mysecret
auth=md5
host=dynamic
context=fullaccess
mailbox=101 <-------- NOTE: This line is essential to get the full mailbox info (old/new messages)
callerid="Dan"<101>
[cami]
type=friend
username=cami
secret=mysecret
auth=md5
host=dynamic
context=fullaccess
mailbox=102 <-------- NOTE: This line is essential to get the full mailbox info (old/new messages)
callerid="Cami"<102>
voicemail.conf file
[general]
format=gsm
serveremail=user@domain.com
attach=yes
maxmessage=180
skipms=3000
maxsilence=10
silencethreshold=128
maxlogins=3
pbxskip=yes
fromstring=Dante's PBX
emailbody=Draga ${VM_NAME}:\n\n\tVreau sa te anunt pe aceasta cale ca ai primit un mesaj vocal de ${VM_DUR} min. (numarul ${VM_MSGNUM}) in cutia vocala ${VM_MAILBOX} de la ${VM_CALLERID}, la data de ${VM_DATE} deci poate vei fi interesat sa-l asculti atunci cand ai putin timp la dispozitie. Multumesc!\n\n\t\t\t\t--Dante's PBX\n
[zonemessages]
bucharest=Europe/Bucharest|'vm-received' q 'digits/at' kM
;eastern=America/New_York|'vm-received' Q 'digits/at' IMp
;central=America/Chicago|'vm-received' Q 'digits/at' IMp
;central24=America/Chicago|'vm-received' q 'digits/at' H 'digits/hundred' M 'hours'
;
; Each mailbox is listed in the form <mailbox>=<password>,<name>,<email>,<pager_email>,<options>
; if the e-mail is specified, a message will be sent when a message is
; received, to the given mailbox. If pager is specified, a message will be sent there as well.
;
[default]
101 => 1234,Dan,dan@server.ro,,tz=bucharest <-------- NOTE: This line is essential to get the full mailbox info (old/new messages)
102 => 1234,Cami,cami@server.ro,,tz=bucharest <-------- NOTE: This line is essential to get the full mailbox info (old/new messages)
extensions.conf file
[general]
static=yes
writeprotect=yes
[globals]
[macro-stdiax]
; ${ARG1} - user to ring (IAX)
; ${ARG2} - voicemail number
exten => s,1,Dial(IAX2/${ARG1}|20|Ttr)
exten => s,2,Voicemail2(u${ARG2})
exten => s,3,Hangup
exten => s,102,Voicemail2(b${ARG2})
exten => s,103,Hangup
[fullaccess]
include => parkedcalls
include => local
[local]
exten => 101,1,Macro(stdiax,dan,${EXTEN})
exten => 102,1,Macro(stdiax,cami,${EXTEN})
exten => 200,1,Answer
exten => 200,2,Wait(1)
exten => 200,3,VoicemailMain2
exten => 200,4,Hangup
exten => 201,1,Answer
exten => 201,2,Wait(1)
exten => 201,3,VoiceMailMain2(s${CALLERIDNUM})
exten => 201,4,Hangup
exten => 205,1,AbsoluteTimeout(60)
exten => 205,2,SetLanguage(ro)
exten => 205,3,Playback(demo-abouttotry)
exten => 205,4,Dial(IAX2/guest@misery.digium.com/s@default)
exten => 205,5,Playback(demo-nogo)
exten => 205,6,Hangup
exten => 206,1,Answer
exten => 206,2,Playback(demo-echotest)
exten => 206,3,Echo
exten => 206,4,Playback(demo-echodone)
exten => 206,5,Hangup
exten => 207,1,AbsoluteTimeout(60)
exten => 207,2,SetLanguage(en)
exten => 207,3,Playback(Beep)
exten => 207,4,Echo
exten => 207,5,Playback(demo-echodone)
exten => 207,6,Hangup
exten => 209,1,AbsoluteTimeout(30)
exten => 209,2,SetLanguage(ro)
exten => 209,3,Answer
exten => 209,4,Wait(3)
exten => 209,5,DateTime
exten => 209,6,Hangup
[noaccess]
exten => s,1,Ring
exten => s,2,Wait(5)
exten => s,3,Answer
exten => s,4,Playback(ss-noservice) ; invalid extension
exten => s,5,Hangup
Using those simple config files, you can place calls between the two DIAX phone (Cami and Dan) using the extensions 101 and 102.
You have some other services too, like: 200 (generic Voicemail access), 201 (direct Voicemail access), 205 (Digium test), 206 (Echo test with explanation), 207 (Direct echo test), 209 (Time and Date).
<home>
Displaying supplemental information
Using a simple modification in the /src-path/asterisk/channels/chan_iax2.c file (see this link for details) you can now in each moment the number of new/old voice message for each of the registered servers. You can see too interval (in seconds) from the last registration refresh for each registered server, by simply moving the mouse over the corresponding server button. You get the following information:
If the registration refresh interval is greater than 90s, the button automatically goes to red, meaning that the registration is lost (usually no more link to the Asterisk server). The info in the ToolTip changes as in the following picture:

When the link comes back, the button goes to green, to show you that the registration is again active.
When you have new voicemail message(s), the button of the respective server flashes. After you enter the voicemail and listen to that message, it appears in the list of the old messages and the flash stop.
You can get the total number of missed call(s), new/old voicemail message(s), meaning the sum for all the registered server from the tray icon tooltip or from the tooltip of the specific controls (11), (12) and (13).
When there is a minimum of one missed call and/or new/old voice message, the respective box flashes.
<home>
They are many shortcuts in DIAX to help you during the phone operation. This is just a small list. For all others I let you discover them
during day to day usage of the phone ...:-)
- right click on the registration server button to directly enter the registration form for that server;
- clicking on an undefined registration server button, you directly enter the registration form for that server;
- use ESC key to exit from any internal DIAX form;
- right click on the speed dial buttons to directly edit the phonebook corresponding with that position;
- click on the currently selected code in the main form to directly enter the registration form for the current server;
- right click on the display to change the way the ALIAS is displayed.
- to be continued ...
<home>
You can put the phone in Debug mode by right clicking on the phone main window area under the numeric keypad. The char "D" is displayed in black in the upper right part of the form if the log file (diax.log) is empty and starts to flash when something is written in the log for the first time. All the communication and status related messages are stored in the diax.log file, together with the time stamp, in real time.
You can clear the log file by keeping the 'SHIFT' or 'CTRL' key and right clicking on the same form zone. You can know that the log has been cleared because the 'D' sign stop flashing.
You can see the content of the log file using any text editor (except Windows Notepad) which does not provide line separation.
The log file can have the following form:
16:34:48: DEBUG: libiax2/src/iax.c line 1708: Making new session, peer callno 2,
our callno 10526
Rx-Frame Retry[No] -- OSeqno: 000 ISeqno: 000 Type: IAX Subclass: NEW
Timestamp: 00019ms SCall: 00002 DCall: 00000 [82.78.18.193:4569]
VERSION : 2
CALLED NUMBER : s
CALLING NUMBER : 102
CALLING NAME : Dan Office
LANGUAGE : en
USERNAME : dan
FORMAT : 1024
CAPABILITY : 1024
ADSICPE : 2
DATE TIME : 161251944
DEBUG: libiax2/src/iax.c line 1775: [01031850] We are at 0, packet is for 19
DEBUG: libiax2/src/iax.c line 1944: Delivering packet in 19 ms
Tx-Frame Retry[-01] -- OSeqno: 000 ISeqno: 001 Type: IAX Subclass: ACK
Timestamp: 00019ms SCall: 10526 DCall: 00002 [82.78.18.193:4569]
16:34:48: 122Tx-Frame Retry[010] -- OSeqno: 000 ISeqno: 001 Type: IAX Subclass:
ACCEPT
Timestamp: 00020ms SCall: 10526 DCall: 00002 [82.78.18.193:4569]
FORMAT : 1024
Tx-Frame Retry[010] -- OSeqno: 001 ISeqno: 001 Type: CONTROL Subclass: RINGING
Timestamp: 00003ms SCall: 10526 DCall: 00002 [82.78.18.193:4569]
123Rx-Frame Retry[No] -- OSeqno: 001 ISeqno: 001 Type: IAX Subclass: ACK
Timestamp: 00020ms SCall: 00002 DCall: 10526 [82.78.18.193:4569]
DEBUG: libiax2/src/iax.c line 2022: Cancelling transmission of packet 0
Rx-Frame Retry[No] -- OSeqno: 001 ISeqno: 002 Type: IAX Subclass: ACK
Timestamp: 00003ms SCall: 00002 DCall: 10526 [82.78.18.193:4569]
DEBUG: libiax2/src/iax.c line 2022: Cancelling transmission of packet 1
16:34:49: Tx-Frame Retry[005] -- OSeqno: 000 ISeqno: 000 Type: IAX Subclass:
REGREQ
Timestamp: 00003ms SCall: 10522 DCall: 00000 [192.168.216.128:4569]
USERNAME : dan
REFRESH : 300
<home>
NOTE: Follow the further steps only if you have an older version of Asterisk installed (prior to Summer '2004).
I use now a version of the Asterisk server from CVS dated 21-Sep-2004 which does not require this modification!
In order to get the message number (old/new) information you need to modify the following file:
/src-path/asterisk/channels/chan_iax2.c
This is the original version (CVS from January 2004, can be different for other releases):
line 3594:
if (strlen(p->mailbox)) {
msgcount = ast_app_has_voicemail(p->mailbox);
if (msgcount)
msgcount = 65535;
iax_ie_append_short(&ied, IAX_IE_MSGCOUNT, msgcount);
}
must be changed to:
if (strlen(p->mailbox)) {
int oldMsg, newMsg;
ast_app_messagecount(p->mailbox, &newMsg, &oldMsg);
msgcount = (newMsg + 256*oldMsg);
iax_ie_append_short(&ied, IAX_IE_MSGCOUNT, msgcount);
}
After this you need to enter the following commands from the asterisk source directory:
make ; make install
NOTE: I am not aware of any malfunction of the system caused by this modification.
You can leave the source unchanged, but then you will get '1 new message' for any situation when the new messages number is greater than 0.
<home>
1-Mar-2005: Prerelease (v0.9.10f)
- volume and mic levels saved in the config file;
- master and wave levels adjusted in the same time for the play device;
- better handling registration status when server name is used instead of server ip address;
- no more displaying 1 new message when Asterisk not configured for mailbox details;
- fixed ATCOM USB phone support;
- independent codec configuration for each registration server;
- use control chars in the dial string to automatically send some DTMF codes after dialing: '#' dial separator , 'p' pause 1s, 'h' hangup;
- accept URLs during a call and open that page in the default browser when a call is answered;
- fully support for the Eutectics and Yealink USB phones;
- redesigned Registration and Phonebook forms and operation;
- faster language change inside application;
- select the USB phone type in the GUI, not through command line switches;
- USB phone connected indication;
- USB phone menu not available if missing USB phone DLL;
- automatically set the USB audio if an USB phone is connected before the app startup;
- redesigned audio level display and volume adjustment;
- phonebook menu replaced with a button;
- no other files in the basic package, just the exe and the USB support DLLs;
- mic level adjustment;
- Mic and Speaker Mute buttons during a call;
- custom buttons for DTMF sequence send during a call;
- right click on memory buttons to edit them directly, even empty;
- Lithuanian and Polish language added;
- IAXCLIENT library version displayed in Help>About box;
- DTMF tones when using the keypad, instead of beeps;
- new ringtone for outgoing calls;
- debug file only 'technical' messages;
- directly dial from phonebook and shortcut buttons;
- separate dll's for USB support, if you do not have USB phone then you can delete them;
- DTMF & CallerID events (AND / OR based);
- truncate at 7 chars for speed dials aliases(1-12);
- taskbar icon flashing when in monitoring mode and minimized (yellow-idle/red-execution mode).
8-Feb-2005: Prerelease (v0.9.10a)
- independent codec
configuration for each registration server;
- use control chars in the dial string to automatically send some DTMF codes
after dialing:
- '#' dial separator
- 'p' pause 1s (long press on '*' key)
>
- 'h' hangup (long press on '#' key)
- accept URLs during a call and open that page in the default browser when the
call is answered;
- fully support for the Yealink USB phone<
- redesigned Registration and Phonebook foorms and operation;
- redesigned audio level display and volumme adjustment
- phonebook menu replaced with a button;
- mic level adjustment
- Mic and Speaker Mute buttons during a caall
- custom buttons for Macros to send DTMF sstrings during a call;
- the old call list file is replaced with the new one (old list is lost);
- right click on memory buttons to edit thhem directly, even empty;
- Lithuanian and Polish language added;
- DTMF tones when using the keypad, insteaad of beeps
- new ringtone for outgoing calls
- no more 'technical' messages in the stattus bar...only in the debug file.
- directly dial from phonebook and shortcuut buttons (no need to press "DIAL")
- all files in the executable (including rring and dll), except USB phone
support, as separate DLL
- separate dll's for USB support, if you ddo not have USB phone then keep just
wiax.dll
- DTMF & CallerID based events (AND / OR based)
- up-to-date iaxclient library
- add 'END' in the files sections to reducce handling time
- truncate the name at 7 chars for the aliias from the speed dials (1-12)
- taskbar icon flashing when in monitoringg mode and minimized
(yellow-idle/red-execution mode)
- new debug mode operation
Solved bugs:
- sometimes corrupted FORM parameter in coonfig file make
the application to crash as startup;
- when using the FQDN for the server regisstration, the button does not goes to
green
- IAX native transfer broken because of thhe call timer
- DIAX forms positioned outside the screenn when the main form is at the screen
margin
- some calls contain wrong CIDName
during a call,
accept DTMF tones as monitored events to trigger output commands
14-Jan-2005: Prerelease (v0.9.9g)
- during a call,
accept DTMF tones as monitored events to trigger output commands
- call timer on the phone display
- Swedish language added
- can run a command from the monitoring deefinition form, to test it
- ENTER key validate all fields in the Reggistration form
- you can select both preffered and acceptted codecs
- do not autoresize main form when receiviing a call and monitoring activated
- use /m switch to start DIAX minimized
Solved bugs:
- crash when trying to dial without registtration server defined
- Config Audio form positioning issue
- not saving the main form when closing thhe app from the systray
- X10 send error if CM11/12 interface has some commands in the receiver buffer
- error if trying to delete for the secondd time the log file
- unexpected crashes when registered with IAXTEL and/or other remote servers
04-Jan-2005: Prerelease (v0.9.9f)
- uLaw, aLaw Speex, GSM and iLBC codec suppport with auto-negotiation capabilities; - fully support for the ATCOM AU-100 USB pphone; - web browser integration (start app and/oor dial using a link like diax://number/alias); - save all application forms position betwween restarts; - home automation support (start applicatiions/scripts, send X10 commands, Infrared to come), based on CallerID; - Thai language support; - configurable keyboard support (USB phonee keyboard); - midi file as ringin signal (polyphonic);; - you can launch DIAX with command line swwitches (/d for debug mode, /u for USB phone (Atcom) support); - clicking on DELETE for more than 2s deleete all from the display; - the application is minimized if clickingg on 'X' in the right up corner;
- extended debug info in debug mode;< Solved bugs: - if reducing the number of registration sservers, the deleted one goes to red even not defined; - call volume - no counter incrementing; - audio configuration with different soundd device for playback and ring; - Missing MSSTDFMT.DLL in WinXP SP2 and soome Win98 systems; - no need to close the application in ordeer to save the debug log file.
08-Jun-2004: Prerelease (v0.9.8)
- unconditional autoanswer or based on CallerID (user configurable);
- use any Ericsson/SonyEricsson GSM/PCS to control DIAX (feedback on the phone display);
- move HANGUP function on the right button;
- modified CallMe destination to point to my new IP Address
- 'h' key can be used for Hangup
Bugs solved:
- Missed calls counter is not reset after you consult the Missed Calls List;
- Echo Cancellation option disabled in the audio menu (not yet functional);
- Beep enable/disable selection not functional.
07-Mar-2004: Prerelease (v0.9.7)
- can register with multiple servers (max. 8);
- can have different context for each registration server;
- registered server represented by a friendly name (alias);
- can change the default registration server with just one click;
- IAX2 native blind transfer;
- display the number of old/new messages per each registered server;
- MWI (with Old/New message(s) counter);
- display registration status with each server (including time in seconds from the last registration acknowledgement);
- Windows XP look and feel interface (on XP only);
- IAX2 debug mode support (log file);
- add Default User locales as new language;
- right click on display to change the color of the ALIAS name;
- multilingual support: English, Romanian, German, Dutch, Italian, French, Spanish, Portuguese, Czech
- no more IAX(1) support.
22-Nov-2003: Prerelease (v0.9.4)
- IAX2 support (new DLL);
- selectable DSP: Echo cancellation, AGC, Denoise;
- plaintext and md5 authentication supported;
- the phonebook is now in a separate file;
- can configure your own callerID (Name and Number);
- no need to re-enter credentials when entering the registration window;
- the application is even smaller - less than 100K for all the files (except help file);
- ordering calls in lists (last on the first position by default, click to order after columns);
- double-click on missed calls indicator to open the missed calls list;
- add ',' as key for '#';
- ESC key can be used to exit from any secondary window (Cancel button equivalent);
- display the type of the message in the status bar (STATUS/NOTICE/ERROR/IAXMSG);
- ask for audio settings at first run;
- tab key in Registration window select the full field;
- solved bug: crash at exit;
- solved bug: phonebook open in the back when main form always on top if calls list opened first;
- solved bug: app crash when the number string starts with the name;
- solved bug: cannot dial any entry from the calls list (just first number from the list is dialed)
12-Nov-2003: Prerelease (v0.9.3)
- accept blank passwords;
- accept for registration/calls host namess, not only IP Address;
- password no more displayed in clear in tthe registration window;
- if no username is entered in the registrration form, then 'guest' is used by default;
- tooltip for memory buttons as full CalleerID;
- missed calls indicator display now the nnumber of missed calls (in the tooltip too);
- tooltip for tray icon is now "You hhave X missed call(s)";
- A bunch of signal processing stuff from speex (implemented in the Steve K's iaxclient library, see
http://iaxclient.sourceforge.net fro more details):
1) A denoising filter: This is a very effective filter which reduces background noise;
2) New AGC: This AGC implementation from speex seems to work much better than the
compander implementation used previously;
3) A new "automatic" silence detection based on speex' VAD. If you set the silence threshold to
a positive number, you now get speex' VAD, instead of my hacky noise-threshold code;
4) Bias removal: Removes bias from input signals. This makes other DSP functions work correctly,
including the VU-meter, which was often incorrect when bias was present;
5) echo cancellation: Speex echo cancellation is used
- Some bugs solved:
- after clicking on VOL UP/DOWN only the left channel is heard;
- tab stop in Registration form corrected<
9-Nov-2003: Prerelease (v0.9.2)
- some bugs solved:
no more crashes when the last record form the phonebook is deleted;
incorrect order in the phonebook entries when adding new records;
corrupt phonebook when editing an existing record;
not able to dial '*' and/or '#' from the keypad
- disable Audio and Registration from the Config menu when
there is a call in progress;
- disable Dial from the Phonebook menu when there is a call
in progress;
- option to stay on top (user configurable, saved in the
configuration file);
- application moved on top when ringing, but without getting
the focus (you can keep your work without been disturbed);
- key beep can be enabled/disabled from thhe Audio Configuration menu (value
saved in the configuration file);
- help file added in the package;
- 'ESC' key can be used to minimizee the main window (in tray);
- '-' key can be used as DELETE< (when available). Useful when dialing with the numeric keypad;
- 'SPACE' key can be used as HANNGUP/REDIAL/ANSWER (depend on the
app status);
- 'n' or 'N' key can be used as REJECT,
when available;
- 'X' or 'x' key can be used to exit
application at any time if the app main window has the focus;
- 'ENTER' key can be used as DIAL or as '#',
depend on status (for example when querying Voicemal, it works as '#';
- '.' key can be used as '#' (to allow you to
use it from the numeric keypad or when ENTER has another function). '#'
key can be used too for the same purpose;
- arrow keys can be used to control audio output volume :
LEFT or DOWN = Vol Down, RIGHT or UP = Vol Up;
- 'M' or 'm' key can be used as Instant
Access Memory key (MEM), when this button is available.
3-Nov-2003: Prerelease (v0.9.1)
- solved some bugs reported by the users;
- no more crashes when exit from the system tray;
- no need to restart application after a registration change;
- single form for the registration data. You can choose not to register in the registration window (able to use the phone even not registered with an Asterisk server);
- DLL in the same directory as the application, no need for an installer anymore. You can run it now from a removable drive (like a flash memory or a flloppy);
- double click to restore app from the icon tray;
- can use the keyboard to dial: 0-1 keys, ENTER=DIAL or # (depend on status), SPACE=HANGUP/REDIAL, depend on status;
- force to stop the ring if answered and/or rejected.
02-Nov-2003: First prerelease (v0.9.0)
<home>
This application is distributed as a freeware. You can distribute it freely if you keep the original file package, including all the copyright notice.
The wiax.dll DLL is licensed under the GNU LGPL, version 2.0 or greater. The source code is included and can be downloaded here. In order to be able to compile it, you need to build first the iaxclient.lib based on the source files which can be downloaded from the Steve K. web page at:
http://iaxclient.sourceforge.net
This program contains the iaxclient library, which is (c) 2003 HorizonLive, licensed under the GNU LGPL, version 2.0 or greater.
This program also contains the libiax2 library, which is (c) 2001 Linux Support Services, Inc. and also licensed under the GNU LGPL, version 2.0 or greater.
This program
also contains parts of the PortAudio Portable Real-Time Audio Library
Copyright (c) 1999-2000 Ross Bencina and Phil Burk".
This program also contains the GSM 06.10 implementation
Copyright (c)
1992, 1993, 1994 by Jutta Degener and Carsten Bormann, Technische Universitaet
Berlin
New versions of this application will be available at:
http://www.oocities.org/tdanro
Please send any comments or bugs to:
Dan Toma (visit one of the web pages to send me an e-mail)