|
1979 Red Devil Formula 440
|
Resurrection of a Rusty Old Abandon race car. Will I ever do another one? I can only say maybe.
 |
 |
 |
||||||||||||||||||||||||||||||||||||||||||||||||||||||||||||||||||||||||||||||||||||||||||||||||||||||
1979 Red Devil (2007). First time out. |
Mid season, finding out it takes all my time on the weekend. |
The last event, It was sold the following day. I got my weekends back. |
||||||||||||||||||||||||||||||||||||||||||||||||||||||||||||||||||||||||||||||||||||||||||||||||||||||
 |
 |
 |
||||||||||||||||||||||||||||||||||||||||||||||||||||||||||||||||||||||||||||||||||||||||||
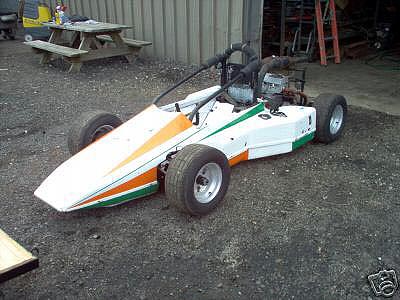
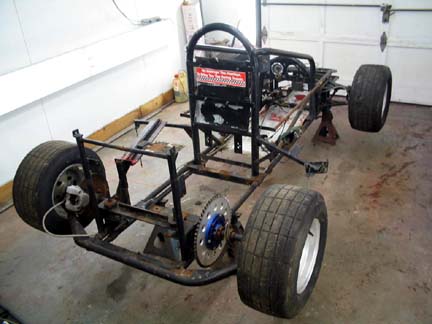
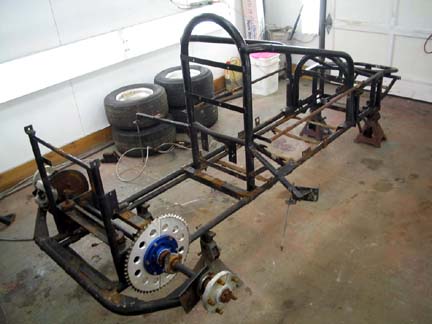
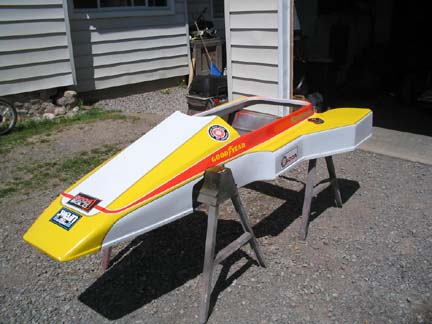
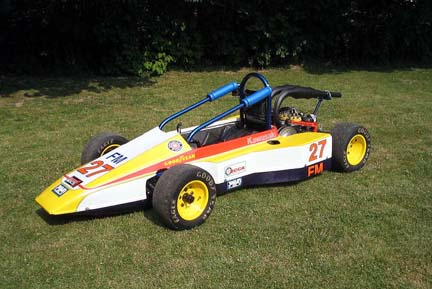
1979 Red Devil (2006). Now that all the Yugo's were gone they were replaced by a racing kart and now a Formula 440. I campaigned 2 440’s in 2000 and 2001 achieving 4 regional SCCA championships in Solo2 autocross. Sandi wanted to experience one so I found a "good deal". |
While the wife’s kart was fun to drive for the day I am more at home with the larger formula 440. This is the car on pick-up day at Grand Island, NY. It was last run prior to 1995 by the markings on the body; no other history is known. It was left outside in the elements unprotected for years. |
This is one of the first Red Devil Formula 440’s, chassis number 102. It has all the traits of the first year 1979 Red Devil formula except the front suspension, which is double A-arm instead of a straight axle. This could have been upgraded at some point later in the cars life which was not uncommon. |
||||||||||||||||||||||||||||||||||||||||||||||||||||||||||||||||||||||||||||||||||||||||||
 |
 |
 |
||||||||||||||||||||||||||||||||||||||||||||||||||||||||||||||||||||||||||||||||||||||||||
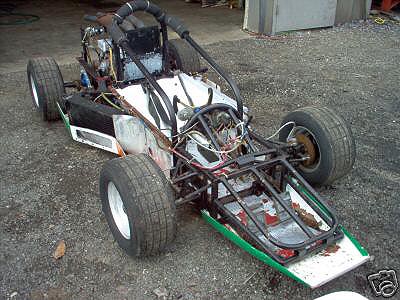
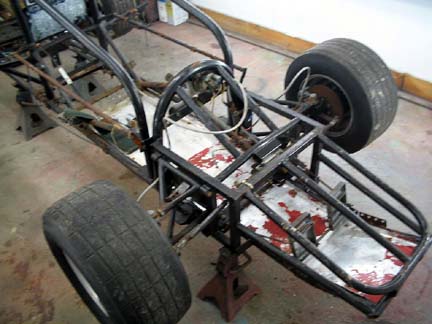
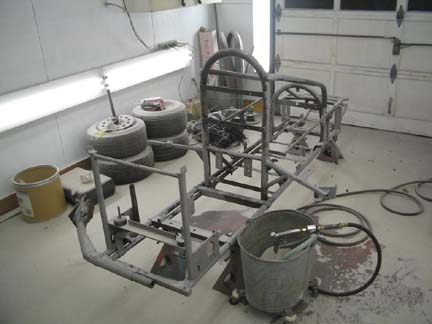
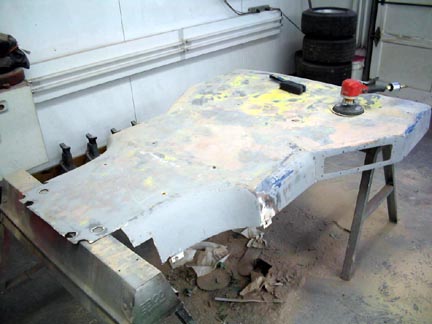
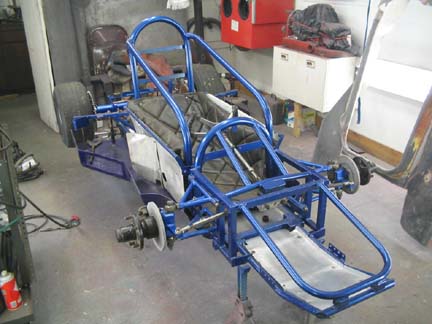
With the formula now in my ever-getting crowded shop the top body was removed. I took several detailed pictures of the formula before disassembly; there are no manuals on how to repair or build these vehicles so note taking is very critical. Although this car will be competing in autocross for this year coming very few, if any changes will be made to the configuration as it is. It will remain in vintage trim. |
It's a bit of a disadvantage for an all out autocross car not to upgrade the chassis, but it will be of more resale value if it can still vintage road race. I would also like to experience the formula the way it was in 1979. After a good going through the formula appears about 95% complete though it shows signs of being left outside in the elements for a very long time. |
The easy stuff was removed from the formula, exhaust, wiring, cooling system, etc. The radiator was also moved at some point from the rear of the chassis to the right side pod evident by the body support being cut and moved to the rear and poor welding. I am not sure yet if I will leave it or move it back to the rear until the new Kawasaki engine is installed. |
||||||||||||||||||||||||||||||||||||||||||||||||||||||||||||||||||||||||||||||||||||||||||
 |
 |
 |
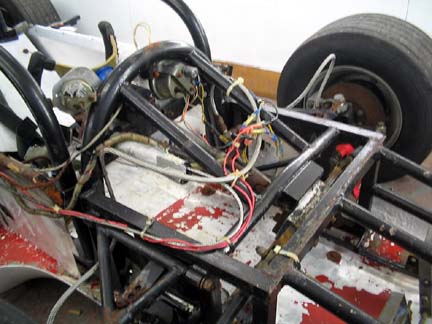
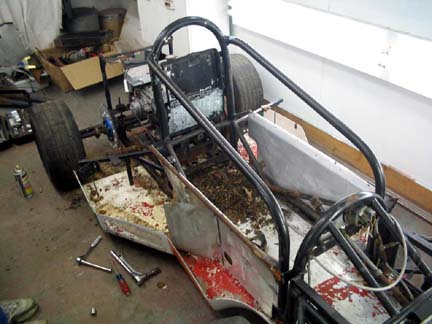
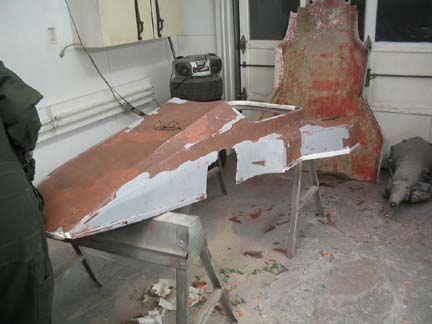
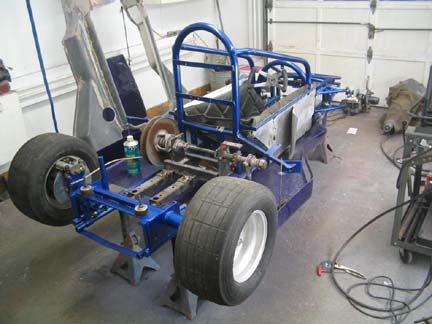
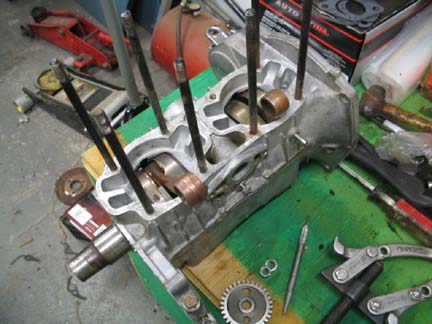
The lower body pan, side panels and floor tin were removed. Next the engine came out. This engine is a early 1970's Chaparral 440cc liquid cooled snowmobile engine. It will be replace with a 1980's Kawasaki 440 unit. The formula is placed in the center of the bay ready to receive the final disassembly. |
The cars used either 440cc engine in it’s day but the Kawasaki is greater on performance and parts can still be found much easier than the Chaparral 440 engine. This class has progressed into the Formula 500, now using AMW and Rotax 500cc engines. |
Everything is tag and bagged as it comes off the formula. Today it’s finally down to the bare chassis. The only part I had to sacrifice was the rear axel, it was bent and rusted way beyond repair and had to be removed in 4 sections using the cutting torch. |
 |
 |
 |
*** |
*** |
*** |
 |
 |
 |
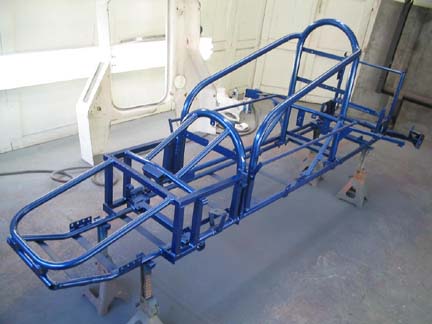
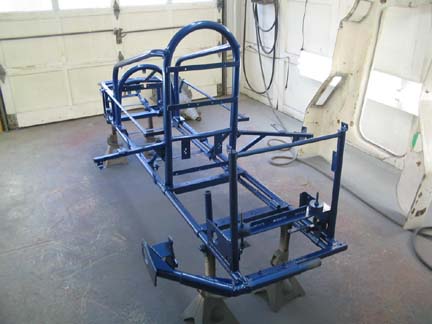
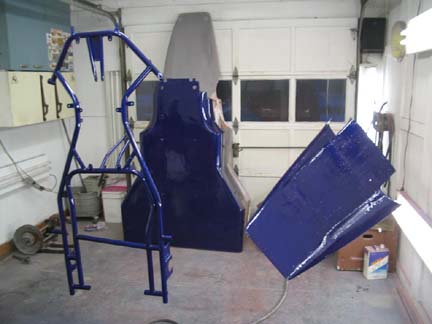
I applied the first coat of paint to the chassis, a dark blue, followed by a second color, an electric blue metal flake topped off with clear coat. I was very happy with the final results all from spray cans no less (saves a lot of money). |
I like to get the large paint projects finished first before any assembly, to the formula or any other projects due to the mess it makes in the shop. I am limited on space in the winter so I have to plan with care. |
The bottom pan of the body will be stripped of paint inside and out. I will remove all of the filler as the formula will be competing in closed course events where the speeds are much less than road racing but weight (the lack of it) is more of a factor. |
 |
 |
 |
More scraping, grinding and sanding. This is a horrible and tedious job, but the results will show positive, both in pride of appearance and performance. |
The top body is in place ready to be striped of paint and vinyl. The topcoats of paint will be scraped first and then the remainder sanded till it’s down to the gel-coat. |
All the body panels are fiberglass which I find are easier to work and repair for a racecar. |
 |
 |
 |
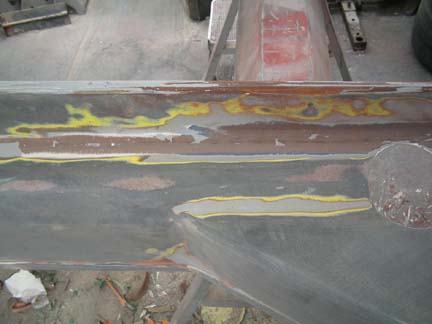
After scraping off 2-3 layers of paint already I have to sand off another 4 to 6 layers of old paint. I will be removing a considerable amount of weight in old paint alone which is the real reason why I am stripping it to the gel coat, not just for a good looking finish. |
This shows the many colors of this race car. It is not uncommon to find this many layers of paint on the body. The original color of the car the best I can tell was yellow. An amazing 35 pounds of bondo and old paint were removed from this small body, yes, I swept it up into buckets as it came off the car to weigh it. The time spent was well worth the effort. |
The new paint is applied to the formula’s lower body panels. I had a few spots that the paint would not take to on the panels, looks like a spider web, due to contamination and old oil in the fiberglass. It was not a surprise but I also didn’t want to spend the entire winter on these panels, especial when they are not seen. They are now clean, neat, light and presentable which is much better than what I started with. |
 |
 |
 |
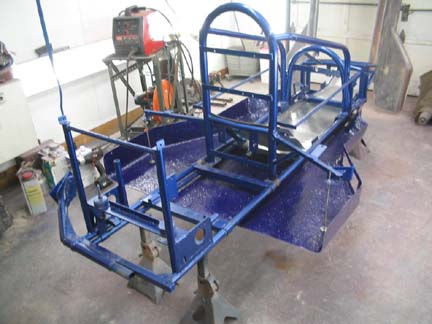
The lower body pan is fitted and mounted to the frame. |
The start of the assembly has begun. |
Here’s a sore spot. After doing a mock up for the rear axle I found the left outside support beam is bent. It also has a previous repair which renders this set up useless. The Red Devil is so old it is hard to get any parts for them so I’ll have do some creative engineering back here. Someone get me the torch. |
 |
 |
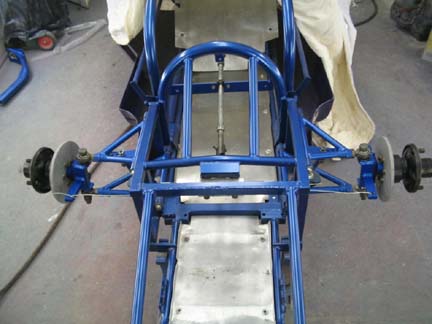 |
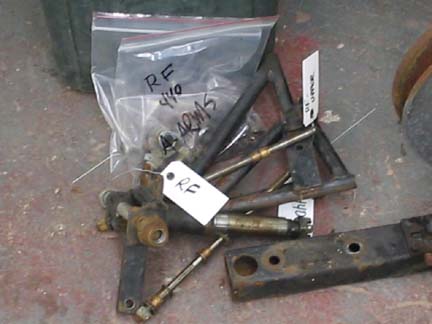
Front suspension assembly begins. A-arm bushings are cleaned and fitted, heim ends cleaned, tapped and the arms installed on the chassis. |
Spindles, hubs and brake rotors are cleaned, sandblasted and painted prior to installation. So far so good. The assembly is slow and tedious, but getting done. The isolation dampeners are also installed. |
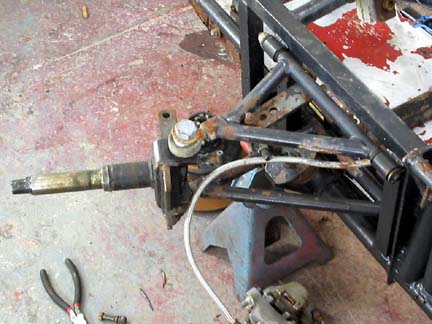
Steering rack and steering shaft are cleaned and reassembled. I have quite a bit of play from the pinion gear due to wear in the aluminum backing plate. The play is more than I like but I’ll leave it for latter. I want to have the formula rolling soon so I can alternate projects. |
 |
 |
 |
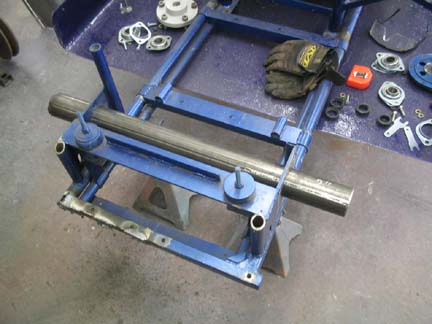
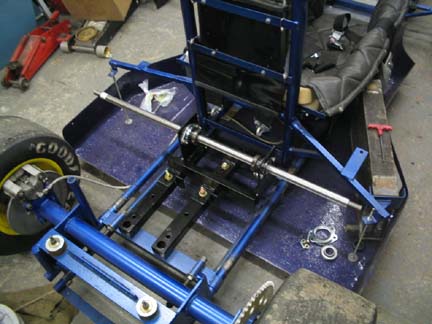
With a cut off saw and the torch I removed all the old outer axle supports along with the old radiator mount in the rear. I was careful during this process not to upset the inner axle bearing supports. This is where I’m going to locate a 2 inch tube that will become the new cross support for the main frame rail and also carry the axle. |
A trip to southern tier metal and I have a new proper sized axle tube. About 3 hours of fussing was necessary to get a good square tight fit. I am very happy with it so far. |
The axle tube is welded in with the end bearing supports in place. I removed the last of the old cross supports from the frame. This is a much easier setup to work with than the original. |
 |
 |
 |
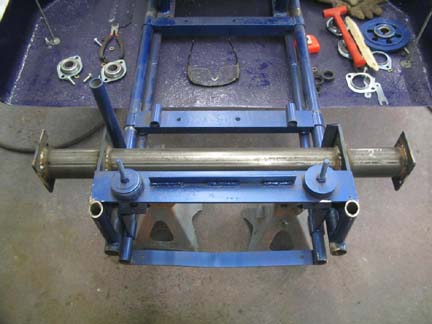
With the axle installed I started measuring for the brakes and drive. Now that I have only 2 bearing the axle could be prone to bending in the middle. If this proves to be a problem down the road I will switch to a 1 Ľ inch chrome molly. I already had the new 1 inch axle and the conversion to 1 Ľ will be an additional expense over $500. |
Brake rotor and caliper mount are installed and the outer wheel hubs. All the dimensions look great. If it holds up (and it should) the rear axle is actually an improvement, especially in weight savings over the old layout. Next I’ll make it pretty and start moving forward after this slight setback. |
Set spacing on the axle hubs, keyed and locked them in. Cut the axle back with 1-inch overhang in case I need to move the wheel hubs out a bit during chassis setup. Everything is finished and double checked on the rear axle, a good recovery after finding the original axle bent. |
 |
 |
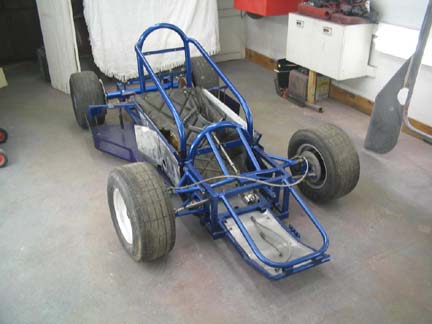 |
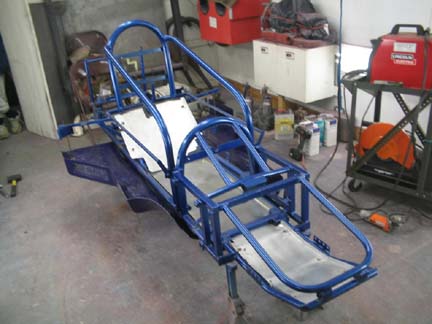
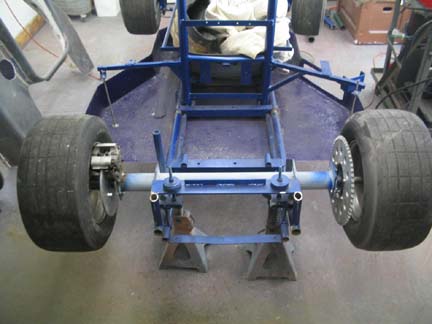
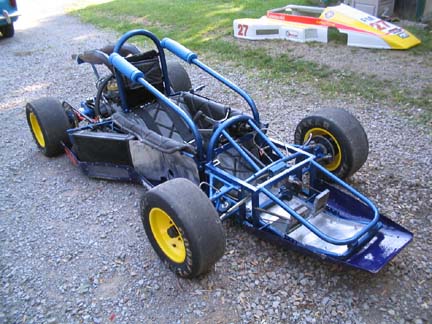
It's getting close to being a roller again. |
Some last minute checks before it's back on all 4 tires. |
At last, a roller. The progress is starting show. |
 |
 |
 |
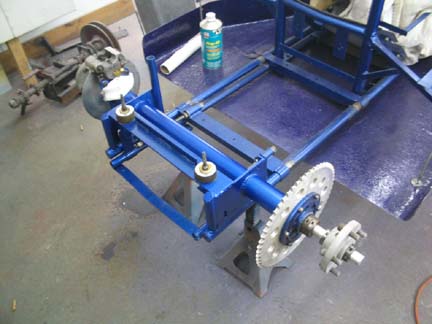
The wheels looked in rough shape sitting outside for 10 years. They were safe to use but would not polish due to heavy corrosion. Sandi suggested sand blasting and painting which we did and it came out perfect. We had a new look and it was a big money saver over new wheels. |
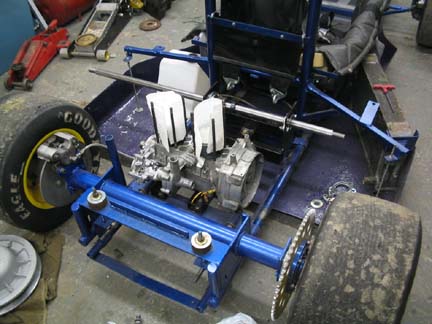
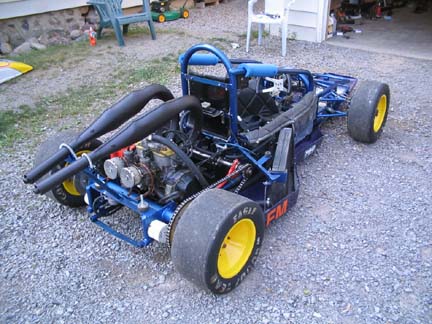
The Formula was moved out of the work bay while I start to build the engine and the drive assembly. At least now it rolls and steers while looking like a race again. |
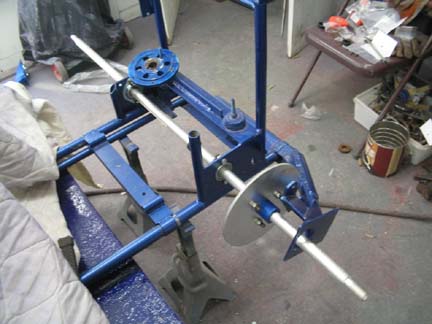
This is the cradle that will hold the engine, CVT assembly and final drive jackshaft. This setup allows for an extremely wide range of engine to axel drive ratios. They are not the easiest to adjust on the old cars but this is proven to work. |
 |
 |
 |
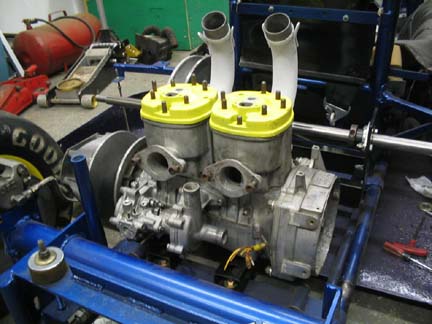
The engine is an older Kawasaki liquid cooled Invader 440cc snowmobile engine. They are early 80's vintage so a used one is sourced for rebuild. Cost is around $100. |
It has received a typical overhaul of the bottom end, cleaning and new seals. Not much else is needed as this engine already provides enough zip for autocross. |
The engine is test fitted before final assembly. If there is a problem, and there was, it’s easier to maneuver the engine in place. The problem was with clearance to one of the mounting holes. |
 |
 |
 |
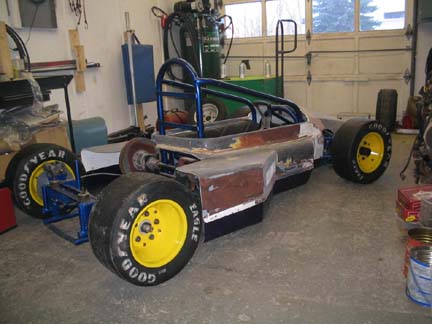
The engine assembly is finished. The pistons and combustion chambers are thermal coated along with the header pipes. The oil injection was removed and the fuel pre-mixed before each event. This engine ran strong and clean all year, I only wish I had used the electric start, not just the pull start. |
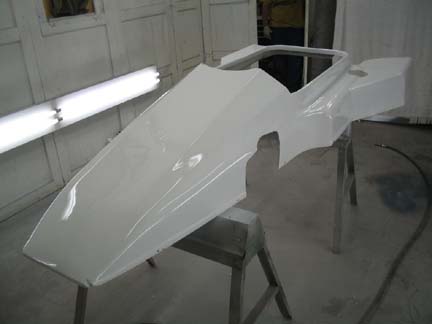
It's down to the last of the body work. I applied a top coat of white after the final prep. The top body section came out very nice. The time and effort was well spent. |
The Formula is about 95% complete at this stage; running, moving and stopping under its own power. The little things are left to tighten up and of course the long road to learning the proper setup for this particular race car. But that too, is the fun of the sport. |
 |
 |
 |
***. |
***. |
***. |
 |
 |
|
***. |
***. |
***. |