This guide explains the steps to extract
audio from a DVD and the conversion into an MP3 file. The tools
required are all available for free. The tools used are:
DvdShrink www.dvdshrink.org
ac3Tool www.videohelp.com/tools?tool=AC3Tool
Audacity http://audacity.sourceforge.net
Also requires lame_enc.dll: www.dlldump.com/download-dll-files.php/dllfiles/L/lame_enc.dll/download.html
There are 3 major steps to the process:
Select
the desired audio from the source DVD
Extract
the Audio from the Video object
Edit
and Convert To MP3
Before starting, get all the tools mentioned
above and install them on your machine. The installation is pretty
straight forward except that Audacity requires the lame_enc.dll file to
be able to export MP3 files. Just put this dll file in the same directory
where you installed Audacity. The first time you export an MP3 in
Audacity it will ask where the file is.
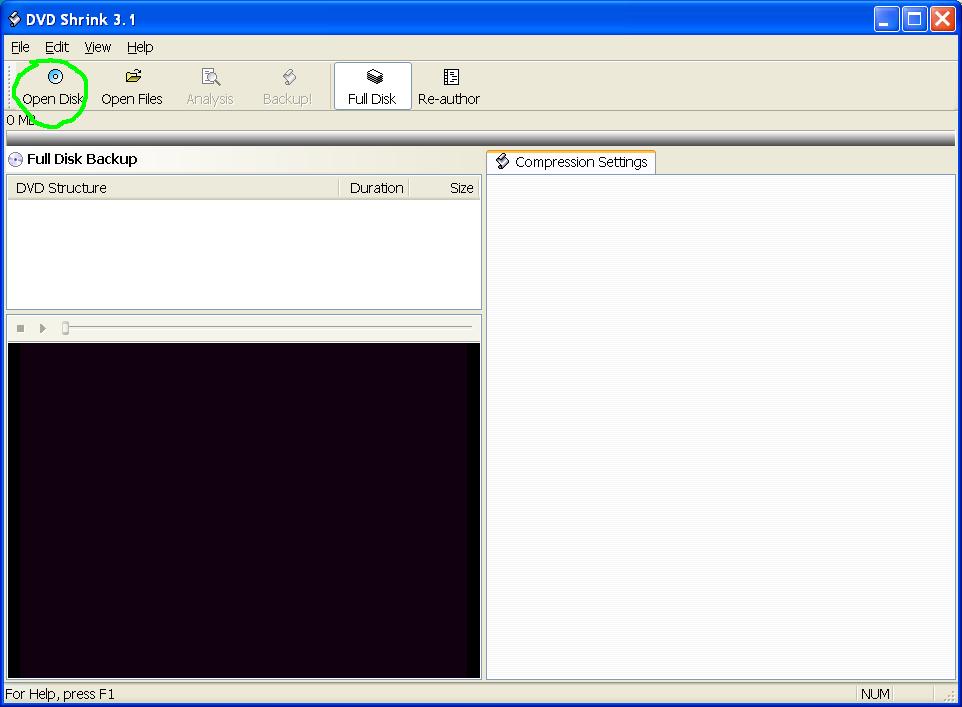
Step 1.1:
Place your DVD into your DVD drive and fire up DvdShrink. Once the program starts up click the Open Disk button. Once you have told it which drive it will do a simply analysis of the disk to figure out what is on it. If you have previously copied the disk on to your hard drive use the Open Files button instead.
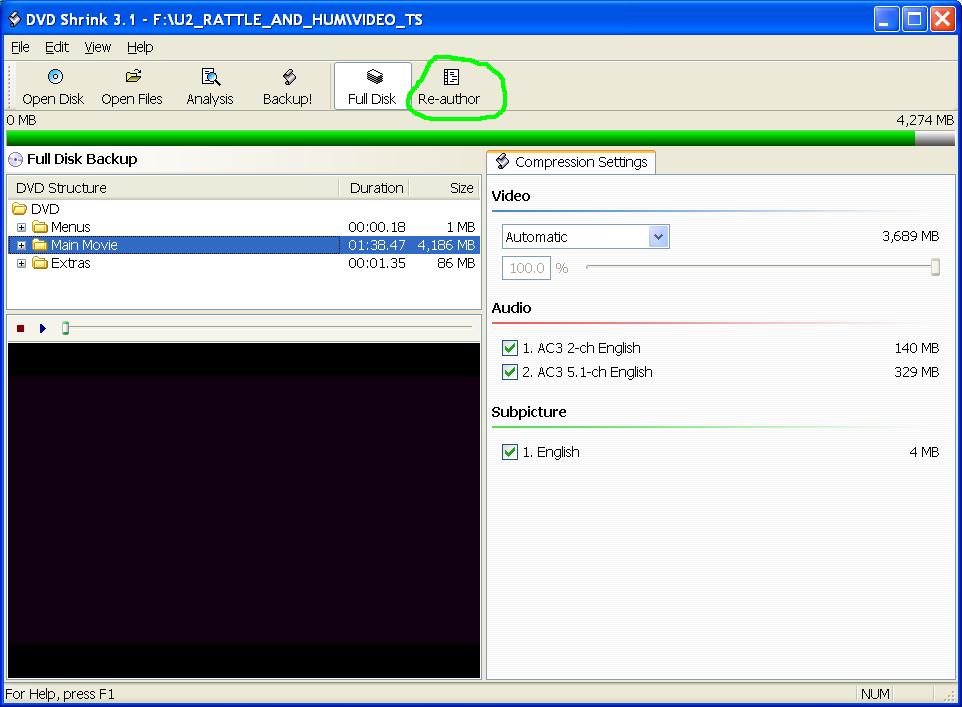
Step 1.2:
Change to Re-author mode by clicking the "Re-author" button. This allows you to select which part of the disk to extract.
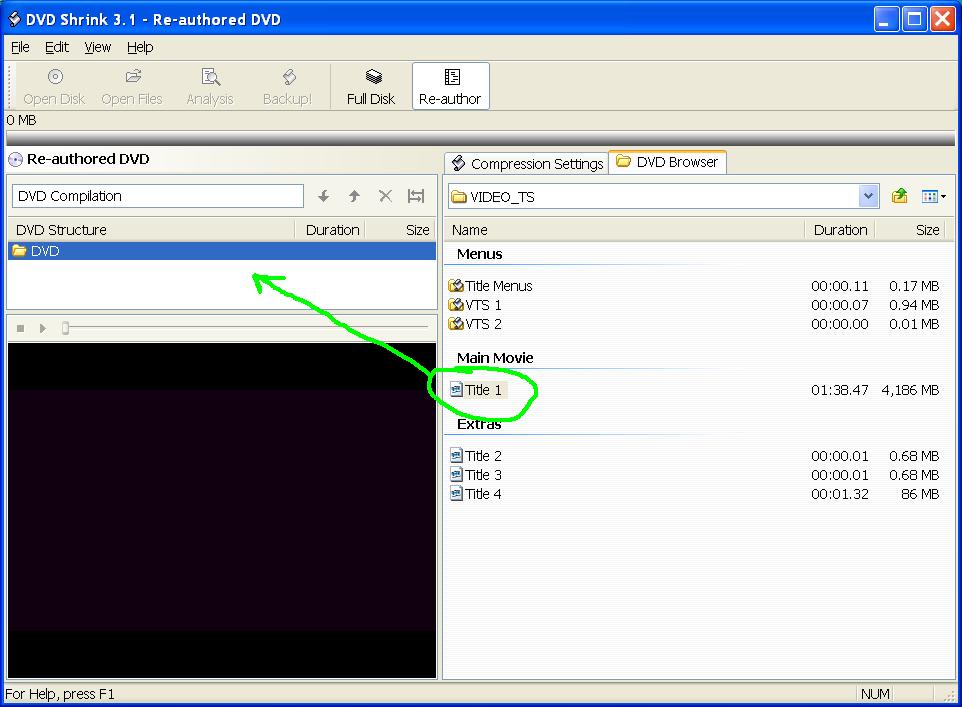
Step 1.3:
Select the Main Movie by doing a drag and drop for Title 1 as shown below. If the audio you are interested in is located in an Extras file, then select that file. Use the preview window to make sure you are getting the correct extra by dragging the extra to the DVD folder then selecting it and hitting the blue arrow in the window below it.
Step 1.4:
Select the section of the main movie to extract by clicking the start end button shown below. If you are just doing an extra music video there is no need to do this as you want the entire video segment. Just skip to step 1.6 if this is the case.

Step 1.5:
Select the desired chapter or manually select which portion to extract. The example below shows how to extract only chapter 18. Note that the start frame uses the start of a chapter while the end frame uses the end of the chapter. Click Ok when done.

Step 1.6:
Now that the desired movie and range are specified, click the Backup! button to extract the video from the DVD onto your machine.

Step 1.7:
Specify the desired destination then click OK as shown below.

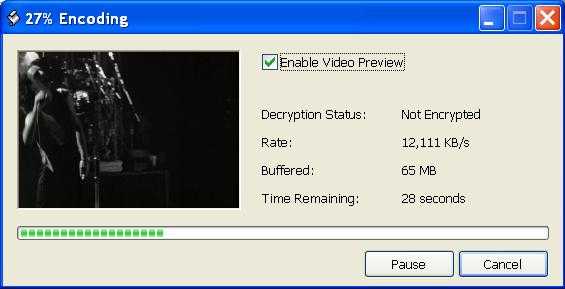
Step 1.8:
Progress will be shown in a dialog box like below. When the work is finished click Ok and then exit DvdShrink.
At this point DvdShrink has created a video object named VTS_01_1.VOB which contains the video and audio from the desired segment. These next set of steps separate out the audio which is in AC3 format and convert the audio to wave format and then MP3.
Step 2.1:
Start up ac3Tool and click on the "AC3 extraction" tab.

Step 2.2:
Select the video object file produced by DvdShrink then select the desired audio channel. Some disks have multiple audio channels so click on the down arrow in the "Extract channel:" box to see the list of available channels. For the example shown, the 2 channel version was chosen as it was known to be the same as the 5.1 channel Dolby. For most disks, the 2 channel audio channel is the director's commentary so it is not what you want. When in doubt choose the 5.1 channel over the 2 channel. If you guess wrong you can always try again.
After the channel has been selected, choose and output directory and filename. Once this is specified start the extraction by clicking the "Extraire" button (French for Extract).
When the tool finishes, you will have an AC3 file on your disk that you should be able to play on your computer. Windows Media player may need a codec to play AC3 files but it is possible. This is a good point to listen to the file to make sure you have selected the correct range and audio channel.

Step 2.3:
This step and the next is used to convert the AC3 file to WAV format. Select the "AC3 Analysis" tab and then select the file generated in the previous step. Finally, click the "Launch analysis" button. This step is required before the AC3 > WAV step as this is the only way to specify the input file.

Step 2.4:
Click the "AC3 > WAV" tab and specify the output name at the bottom and then click the "AC3 > Wav" button at the bottom to begin the conversion.
If you do not want to modify the audio continue on to the final step of converting the wave file into MP3. If you would like to change the volume or add fade in/fade out to the audio then skip ahead to Step 3.1.

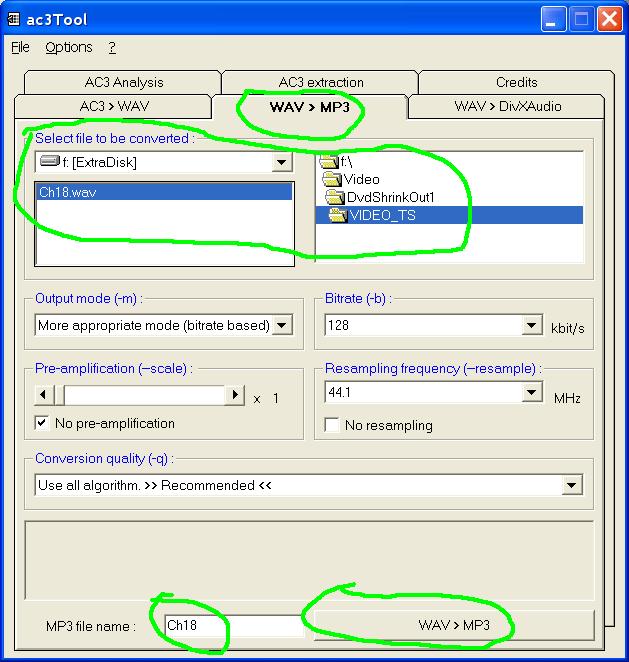
Step 2.5:
This is the last step
as you should skip ahead to Step 3.1 if you want
to edit the audio. Click the "WAV > MP3" tab and select the wave
file to convert. Then enter the filename at the bottom of the screen
and click the "WAV > MP3" button to complete the conversion.
If you do not want to modify the audio then as explained above this part can be skipped as the ac3tool can also export MP3. This section is for the case where you would like to raise the volume of the audio or taper off the end. For a concert DVD you might want to fade in the beginning and fade out the end.
Launch Audacity and load the .wav file created with ac3tool by using the File then Open menu item.

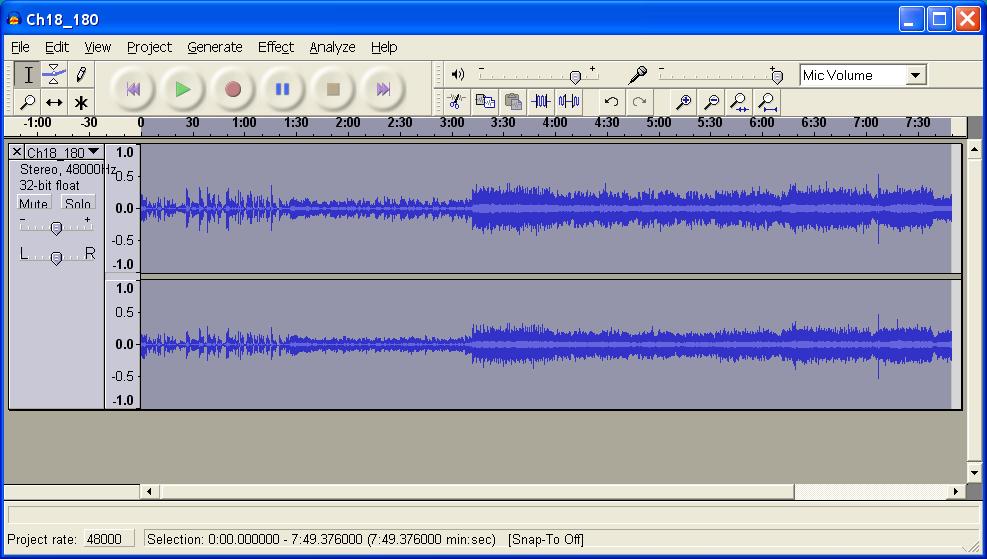
Step 3.2:
Now that the wave file is loaded, it can be manipulated. Before any effect can be performed a range has to be selected. The entire range can be selected by clicking to left of the waves under the L R slider. Also, a range can be selected by clicking and dragging over the waveform. The selected range can be played by clicking the green arrow button. A more precise range can be selected by zooming in to the start point and doing a left click on the wave. Then, zooming in to the end point and doing a left click while holding down the shift key.
Once a range is selected, the Effect pulldown menu becomes active. Amplify, Fade In and Fade Out are what I use the most. It is also possible to delete a range to remove irritating rambling before the start of a song. When you are done you can select the entire range and preview the audio with the play button.
When you are happy with the result, Select File then "Export as MP3 ..." to save the final result.
That's it. You can delete all the intermediate files from your disk.
If you are only doing a few songs the above technique is not too bad as it goes faster with practice. If you find it too painful then give this tool a try for 30 days. After that, they want $28.50.
http://www.castudio.org/dvdaudioextractor