[NOTE: The following was prepared in case Laylah ever handled the Asanos directly. In play, this never happened--she never touched it without its coverings until after the cleansing ritual. She learned the key details of the following from priests with historical knowledge, and thus never required such a vision herself.]
(Information for Laylah): Early on during the efforts to restore the Asanos, the wrapping and wards on the item are removed in order to start afresh. During this transition, you black out and have the following vision:
You are in a corridor, which you conclude in somewhere in a great temple due to the occasional religious icons adorning the wall. The images are the symbols and likenesses of the Celestian Gods.
A man walks down the hall, examining the wall. Instead of clerical vestments, he is wearing dark jeweled clothing under a wine-colored cloak. He pushes a hidden catch that opens a secret door in the stone wall. Down a narrow passageway is a small room, where a lantern on the ceiling illuminates a alcove that holds a small altar. On the altar is a dark wooden box bound in silver and covered with gems set in the patterns of constellations.
The man moves quickly to the altar and slowly, carefully opens the box. A brilliant white light immediate shines out from an object inside the box: a silvery-gold circle with crosspieces, about the size of a man's palm, with a golden chain attached to one side. [This is clearly the Asanos in its original, intact state.] You can see the man's face clearly in this light: He is in his twenties, has a short black beard and striking blue eyes, and has a hint of cruelty in the set of his mouth. There appears to be something resembling a misty, transparent snake coiled about his brow, but you can't see it clearly. [You recognize the man as Ormenlind, the shadowy rider from your party's nightmares, as he must have looked in life. The snake-thing has none of the distinctness of form it had in those dreams.]
The man takes the item out of the box, slips the gold chain around his neck. He tucks the amulet inside his clothing and the light vanishes. You see the snake move slightly just as the light leaves his face. The man leaves the room, and disappears down the corridor.
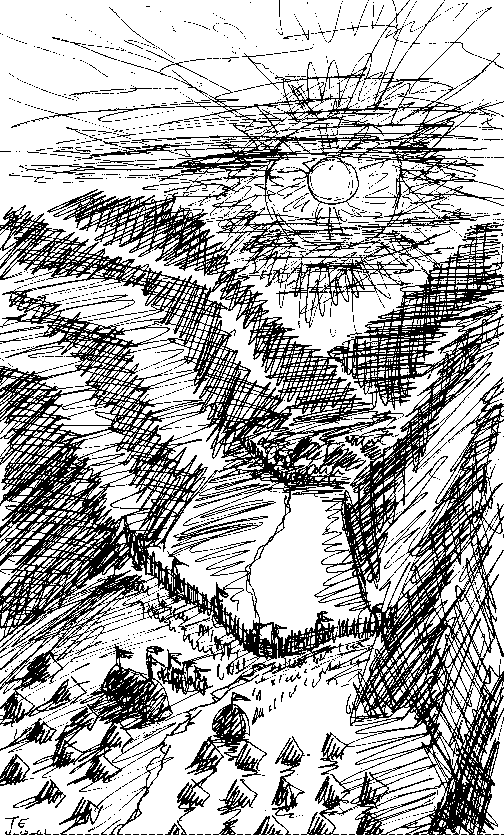
The scene shifts to a lightly wooded mountain pass, as the predawn glow appears in the night sky. You can see the camp of a large army on the east side of the saddle. The majority of the force is busy fortifying the high point of the pass.

The suns rise in the east. The disk of Rashira is transiting that of Uralos, giving the illusion of a giant gold-and-white eye. As the suns rise higher into the sky, you can see the reason for the fortifications: Another army of mixed cavalry and infantry is marching up the pass towards the improvised fortifications. The commanders of both armies, and their battle standards, are now visible.
The leader at the fortifications is the young man who stole the glowing amulet. He now sits a huge black warhorse and wears the heavy armor, kite shield and longsword of a Krithian knight. He looks at least a few years older, and has acquired an ugly scar across the left side of his face, which makes his mouth and eyes appear even more cruel than before. The misty snake-thing is coiled about his helm. It looks a little more solid than before, and bears an uneasy resemblance to the green dragon design on his black shield and standard. The amulet is nowhere to be seen.
The leader of the approaching army bears a very strong resemblance to the first man--so strong, in fact, that you are certain that he must his older brother. His temples are graying, and his build is slightly shorter and stockier, but except for his less prominent scars, his face is a close match to the other man's. His blue eyes are identical, but are sad instead of cruel. He, too, is equipped in knightly armor, but with more elaborate decoration, including a gold, spiked circlet around his helm and a dragon rampant on his breastplate. He rides a horse of the same breed and age as his brother. The strengthening wind catches his standard, displaying the gold dragon on red field of the Krithian Empire, and you realize that this is indeed the Emperor.
As the Imperial forces approach the barricades, the wind grows in force, and clouds begin to cover the sky. The archers of both sides begin to let fly, the Emperor's men charge the fortifications, and the first men and horses begin to die. The golden eye of the suns now looks very much like a human eye to you. That eye begins to weep, and rain begins to fall. The clouds soon move in like a veil to hide the suns.
The armies continue to fight in spite of the rain. The gloom and the mud soon make it difficult to tell friend from foe. The images of carnage soon merge into a merciful blur, but the mixed smells of rain, mud and blood becomes overwhelming. The scene clears again much later in the battle. The sky is a uniform slate gray, and rain still fails intermittently. The dead of both armies litter the battlefield, but it is too dark to see them clearly.
The knight with the scar has been unhorsed and fights on foot beside several heavily-armed warriors who appear to be the remnants of his personal guard. His ruined shield lies on the ground near his feet. The amulet is now visible, hanging around his neck, but it no longer sheds any light. The snake-thing's tail, more solid than ever, is coiled around part of its chain.
A knot of Imperial knights breaks through the chaos of the battle, and rushes to attack the enemy leader. His guards keep most of them at bay, but one of the Imperials manages to reach him. This soldier, who bears a huge mace, uses his shield to block his enemy's swings while looking for an opening of his own. He finally finds one, and lands a staggering blow that sends the other knight's sword flying. He follows up with a blow to the chest that strikes square on the amulet. A flash of green and violet light erupts from that item. As the wounded man falls, the amulet's light goes out. You can see that it is now tarnished and broken, and missing several pieces of its circle and cross. [It is now an exact match for the amulet that Darra found in the Mouth of Klur, just not quite as dark yet.]
The soldier with the mace was momentarily stunned by the flash. One of the fallen leader's guards breaks free from his Imperial opponent, and reaches the mace-wielder before he can move forward again. The guard's long spear skewers the defenseless warrior through the chest. As the rest of the guards finish off their adversaries, they converge on their fallen commander. He is very plainly dead. The broken amulet is plainly visible, as is a strange scorch mark across the front of the badly-dented breastplate it rests upon. You can no longer see the snake-thing. A new group of enemies approach, forcing the guards to defend themselves again. The last man to turn away from his dead lord is a short, wiry man whose bony face and pointed teeth do not appear completely human. He pulls the amulet off the body, tucks it inside his own armor, and flees away from the battle as his comrades slowly die behind him. Just before he vanishes from sight, you see a very faint snake-like shape begin to form around his head.
Soon after, the Imperial commander is led on foot to the site where the enemy leader fell. He asks the officer leading him a few short questions. The man shakes his head in answer to each one. When the lord sees his dead brother, he begins to weep, and slowly sinks to the ground beside the body, lifting it to hold in his arms. After a moment, his face hardens. He drops the body again, rises, gives some orders, and walks back the way he came without looking back. His officers bring a stout lance to impale the body and raise it so that it can be seen from anywhere on the battlefield. Upon seeing this gruesome sight, the remaining members of the enemy army either flee or surrender.
The vision ends here, and you come to, surrounded by worried-looking clerics. After you relate the vision as best you can, Theolodia and others affirm that to the best knowledge of the Imperial historians, the theft (in the mother church in Krynan) and the battle (in the pass at the border with Ongrica) occurred as you had seen. The progression of the link between Ormenlind and the serpent proves enlightening (and reinforces many past guesses), but will require more reflection to understand fully.
Your information on the theft of the freshly-broken Asanos is new knowledge; none knew before how it had vanished. Ormenlind did have an officer who was rumored to have partly-nonhuman blood (probably Unseelie sidhe?), and who was never sighted again after that battle. He must have fled deep into the Outlands, considering that your party found the Asanos as far south and west of Tembar/Ongrica as you did. In its current corrupted state, its history is nigh impossible to divine (as is casting most other spells upon it). If the clerics can restore it (or at least cleanse it), then they will be able to cast further divinations to trace its history since its sundering.
Return to the Campaign Journal index page.
Return to the Arcadayn index. | Return to the Game Room. | Return to the Lair.
This page last updated 11/8/2003 by Timothy E. Emrick. | Copyright 2001-2003 Timothy E. Emrick.