Modifying Volvo Brake
Calipers
After experiencing much frustration
with repairs to my front brake calipers, I decided to give the Volvo brake
caliper conversion a try. Much to my surprise, it went like dream! The conversion
delivers improved braking action at a fraction of the cost of new OEM brakes.
I read several conversion stories
at XKE-Lovers forum, each of which
used a different approach to a couple of required modifications. Due to the
Volvo's caliper having two separate circuits (for enhanced safety/reliability?),
it's necessary to either use two brake lines, or join the circuits internal
to the caliper. Since I hate making brake lines, AND prefer a neater appearance,
I chose to drill between the two cylinders.
Disassemble
the calipers (I recommend you work on one at a time) and remove all rubber items.
Anyone attempting this should know enough to use a wooden or plastic impliment
to avoid damaging the rubbers. If not, then you probably shouldn't be attempting
this modification.
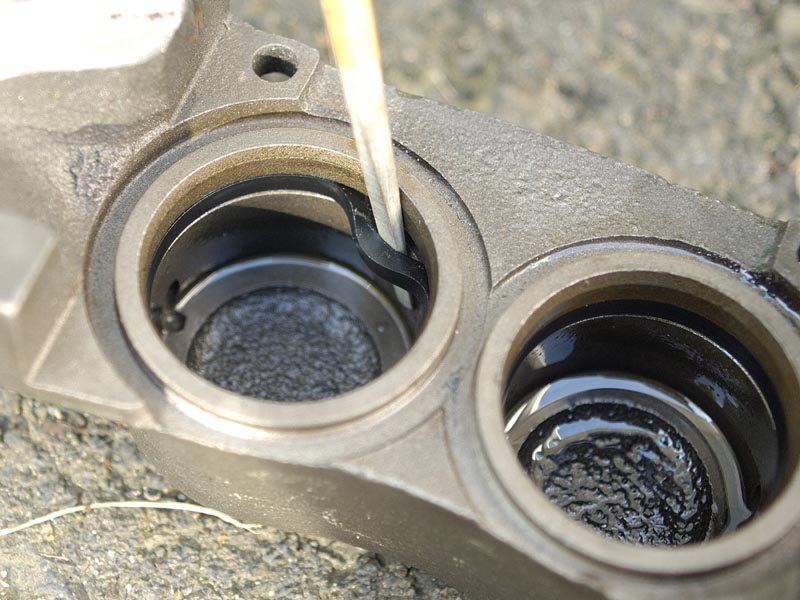
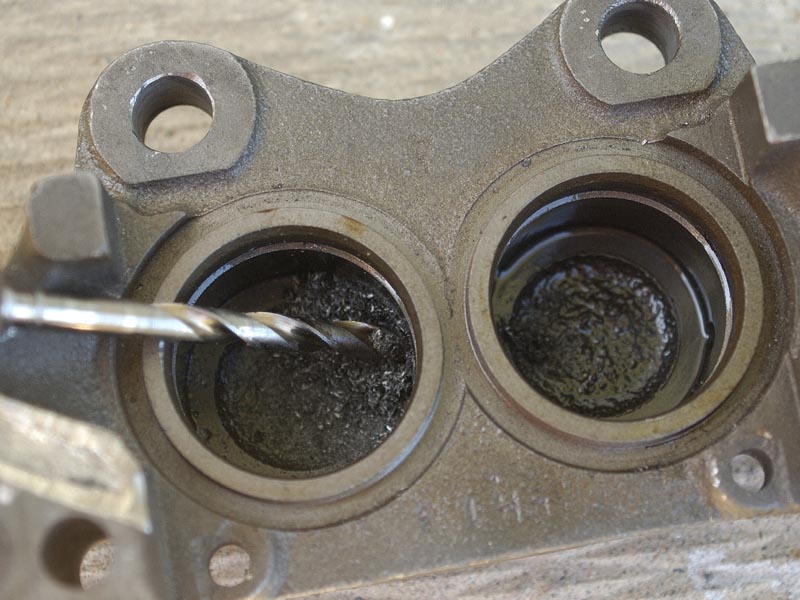
I
found that there was already a hole in one side of the caliper (it led to the
fluid bleed port) so it was only necessary to drill one side. Start the hole
on the side of the wall vice the bottom. It is possible to drill through the
caliper if one is not careful. I made a small cutout with a small carbide bit
in a die grinder to start the hole.
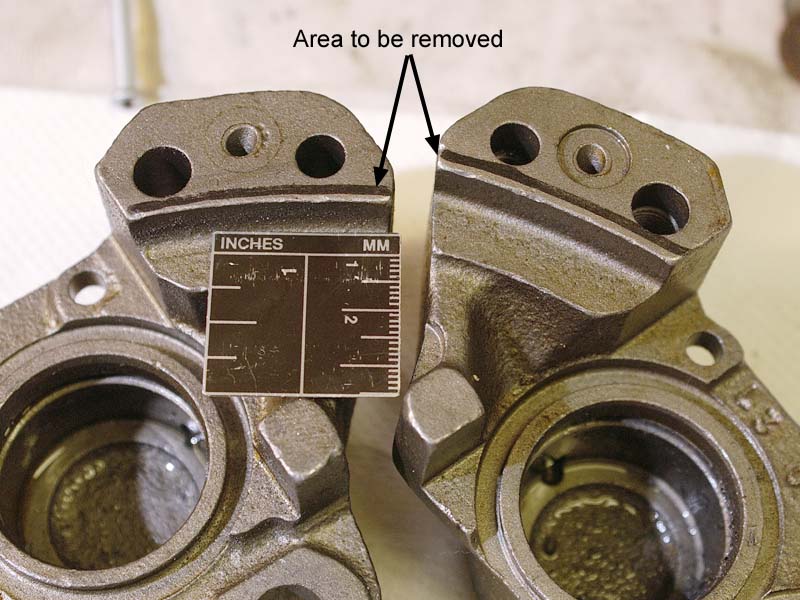
It
is now necessary to grind away some material to allow it to fit over the rotor.
The picture indicates how much I removed. I went almost to the large bolt hole
(three to four mm). I used a grinding disk in my die grinder.
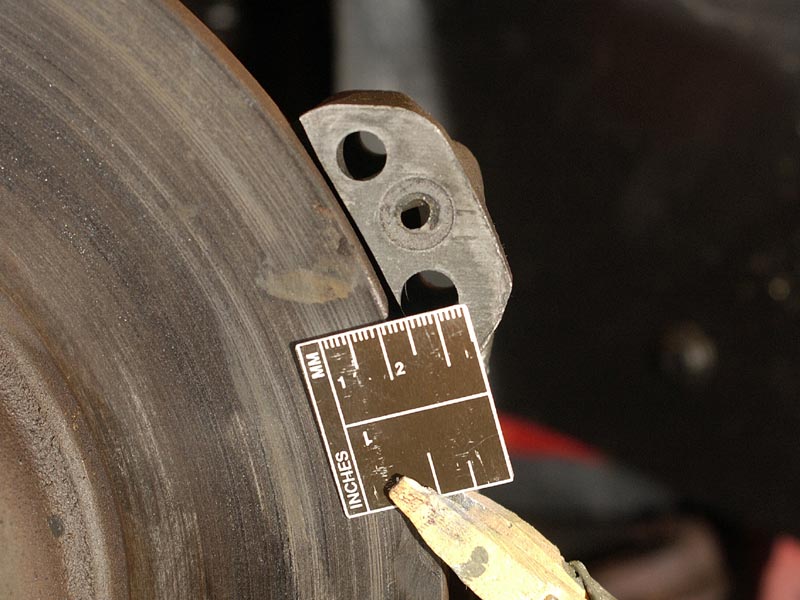
This
image indicates the clearance obtained. It's about 2mm. I did not want to cut
down the brake rotors ( as other persons have when implementing this mod) as
I felt that I would need every bit of metal for heat dissipation. I also didn't
want to remove the hubs and disassemble the rotor.
Plug
the upper hole with an appropriate plug (or bolt) and make a line for the lower
hole. The Volvo's caliper is METRIC. You'll have to make a line with the proper
fittings at each end. Measure carefully! The gentle 'S' curve can be bent over
a wooden stick. Use steel lines for better safety (I don't believe you can buy
copper lines anymore anyway). The two bleed screws on the rear of each side
can be tightened up as you'll use only the upper screw to bleed.
I used rebuilt calipers form my
local UAP/NAPA dealer.
They are located all across Canada and are known in the USA under the NAPA
banner. Part numbers are for the parts I obtained in Canada. THEY MAY BE DIFFERENT
IN THE USA. In any case, ask for the following:
1) Left and right brake calipers
for any S200 series car from 1975 to 1987 (non-vented): 242-6423 and 242-6422.
2) Brake pads: AE-784
3) Caliper pins: 82452
The brake shield was bent out at
each upper and lower corner to clear the larger Volvo caliper. I did not modify
the mounting tabs that are normally held by the caliper mounting bolts. Being
in something of a hurry to get the car on the road (summer was quickly waning)
I simply left the shield unsecured at the rear. It is stiff enough that it
doesn't move much. I intend to make a new set of shields this winter.
The
brake pad retention pins WILL contact the rotor. I cut them down on a lathe
to obtain 1mm of clearance. It takes a gentle 'persuasion' with a small ball-peen
to get them into their holes. Once in place they have sufficient clearance.
Properly
installed, each caliper will have a bleed screw near the TOP of the caliper.
I received two right hand calipers (one box was miss-labeled) and didn't catch
on untill I went to install them. This installation cost me $260 Canadian (summer
2004) and is about 1/5th the price of new E-Type calipers.
My
e-mail: Throwaway8@hotmail.com