 |
|||
 |
 |
 |
 |
 |
|||
 |
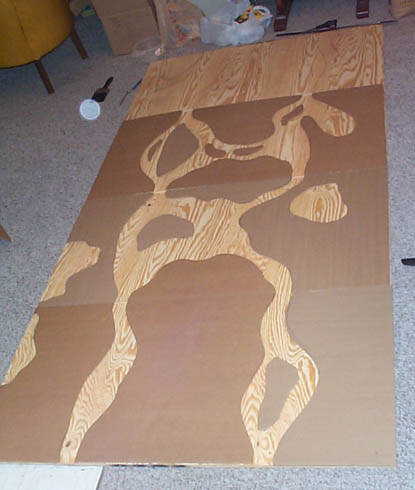
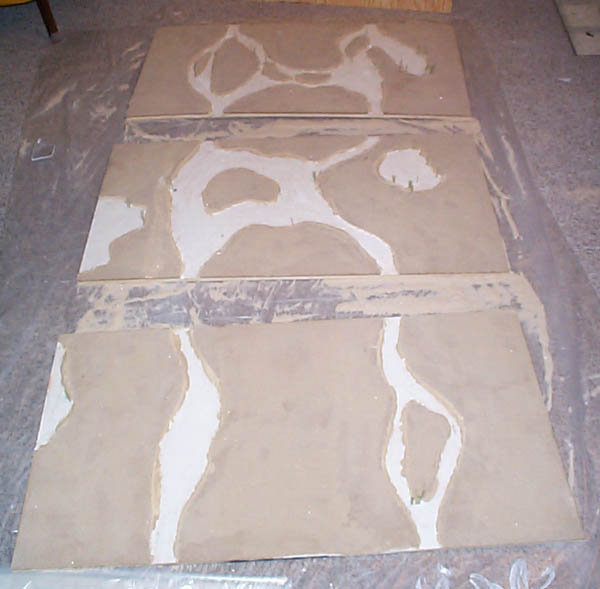
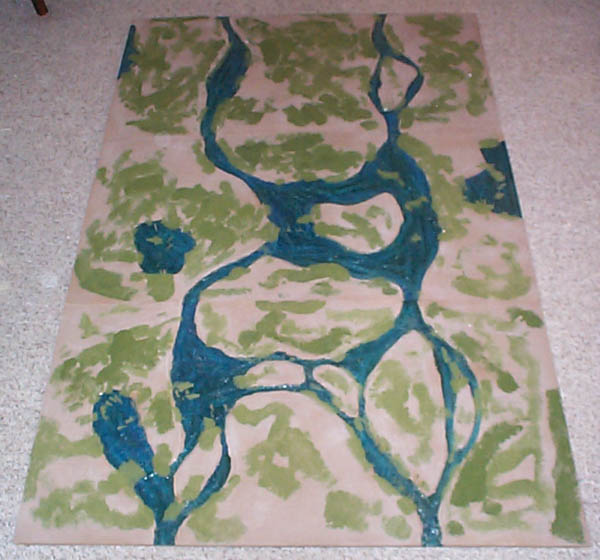
SWAMP CONSTRUCTION I decided to create a set of terrain boards specifically with the Goblins in mind, though it will no doubt see plenty of general use in all sorts of games. I am running a Crucible game at our group's "Game Fest" and thought I'd try to do this in time to bring with me. More than anything, it's the 'cool factor' of having the home field for my own army that made me do this. Previously, I had made small 2' x 2' terrain boards for DBA using 1" foam insulation, using blended flock, and some cut out features like rivers and lakes. The next project was eight 2' x 2' modular terrain boards that a friend and I made using a blackened look, for Mordheim and to fit in theme with our chaos armies for WFB and 40k. These were on 2" foam, coverd with sand and glue, painted black and drybrushed a bit. There were a few lava flow features cut out. The swamp will be another
step up. It will be four 2' x 4' boards, with identical water elements
touching the long ends, so that they cam be placed in any order, and reversed
as well. They can also be turned the other way (in a 2 x 2 pattern), though
two of the edges will either have to be adjecent (due to mirrored water
features), or on the edges. The solid ground will be raised a bit from
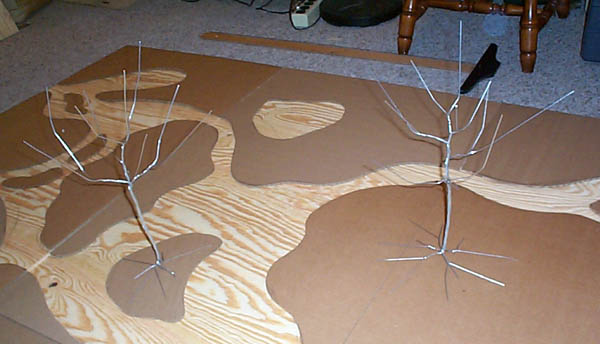
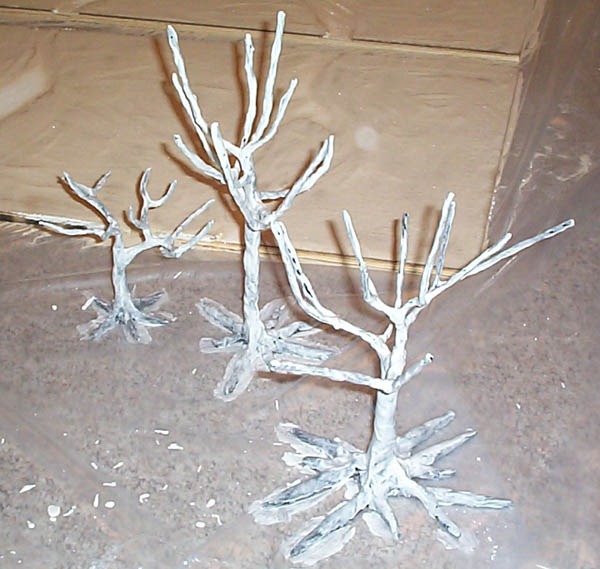
the swampy watery parts. I also plan on making at least a few HUGE deaad
trees, with enormous roots being the only "base". I will also probably
make a few other removable terrain items as well. The boards themselves
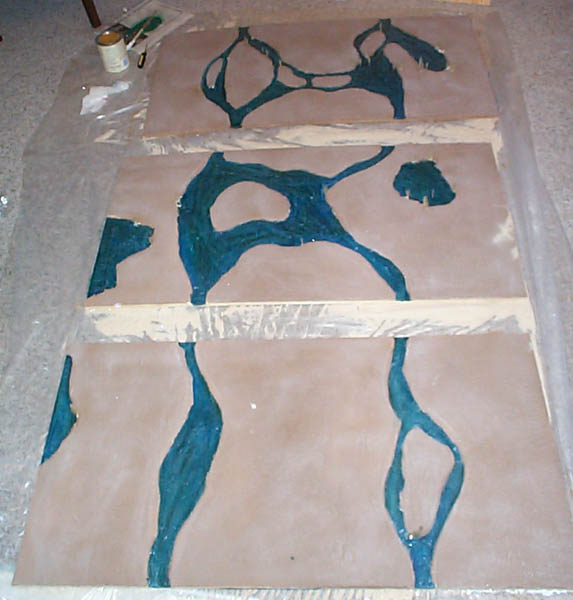
will be textured with sand and glue, as before, then painted brown and
drybrushed. The water areas will be painted, and glazed, with scattered
groupings of reeds. Flock will be scattered in patches on all areas. Maybe
some rocky spots, maybe some other details will be added as I go...
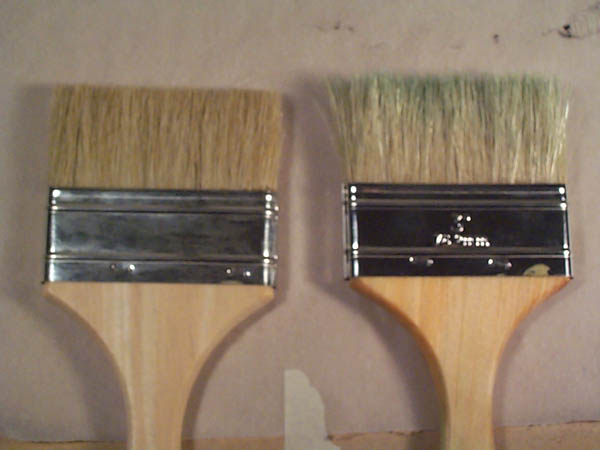
Buying the Supplies I make my shopping list and head to a friends house to pick up left over supplies from our last project. I'm in luck, we have almost a quart of brown paint, half a gallon of glue, some spackle (aka joint compound), and two almost full 50lb bags of sand (one playground sand, the other construction type sand). Now on to the hardware store... And that's where things go wrong. I had always had them cut the foam for me, since their saw gets nice straight cuts, and I can't fit full 4' x 8' sheets in my car. But they no longer cut anything except for plywood becuase it dulls thier saw blade (?!?!?). So, I leave, mope, then go back and pick up some 4-ply, 5/8" plywood (actually a little smaller, 19/32 or some such thing they call it...). I decide I will just have to use plywood and raise the "dry" areas, rather than cut into foam for the "water" areas. I also nab a dropcloth for the floor, and some cheap paint brushes to cut up for reeds. Next stop is the craft store
where I grab some 20 guage florist wire, and some Crayola Model Magic air
curing clay (which is on sale for $.97 a bag!)
Day 1
I had debated using 2 layers
for the raised portions, but after testing some figures on the edges, I
decide against it, in the name of playability.
Well, that was it for Day
1. I figure I will let the glue dry, and run out and pick up the last bit
of corrugated cardboard tomorrow. I have to run around and scour the not-so-local
stores for whatever Crucible figures I can get my hands on, and will pick
it up then.
Day 2
Careful observers may notice
that there are only 3 boards here. I spent most of the daytime hours today
with my girlfriend, and never made it back to pick up more cardboard in
time. I would have just hit the dumpsters for free cardboard (check behind
appliance and furniture stores), but it's been raining for the past few
days, so I figure I'd wait.
That's about it for day 2. I had planned on getting the sand on the boards tonight, but I am tired, still need more cardboard, and should probably get some more paint brushes for reeds. Perhaps I should start on the end frames/ladders as well. I have acually had a few
other ideas that don't involve any real construction. First, I had planned
on thowing some lichen on the table, for small bushed or other plant life.
I am thinking about taking some moss from the floral department of the
craft store and simply scattering it all over the table. It will get shoved
around as the game plays, but it will keep the boards looking overgrown.
Not all terrain has to have a function in the rules. I am also thiking
about using some stretched out cotton scattered about as a low mist/fog.
I guess I will have to wait and see how that looks when it's finished.
Day 3
That was it, for a while.
I had to run a bunch of errands, so I was gone most of the day, and when
I got back home in the evening, the glue was dry. So then I used an even
thinner version of the above glue mixture to coat the entire board. This
will help seal the sand onto the board, and also give a hard, smooth (but
still with texture) shell to the spackle that was used to cover the "water"
areas.
Well, that was about it for today. That may be the last I work in these until after the wekend. Not sure, I may get the first coat of paint on them tomorrow. I'd also like to take a moment
to thank the Live365.com radio channel "Afternoon Nap 2.1" for providing
the sound-track for this project. It's almost all I've been listening to
while I've worked. Good stuff if you like ambient and trance. Normally
I'm I like something a bit heavier and more upbeat, but for some reason
this channel has really caught my fancy.
DAY 4
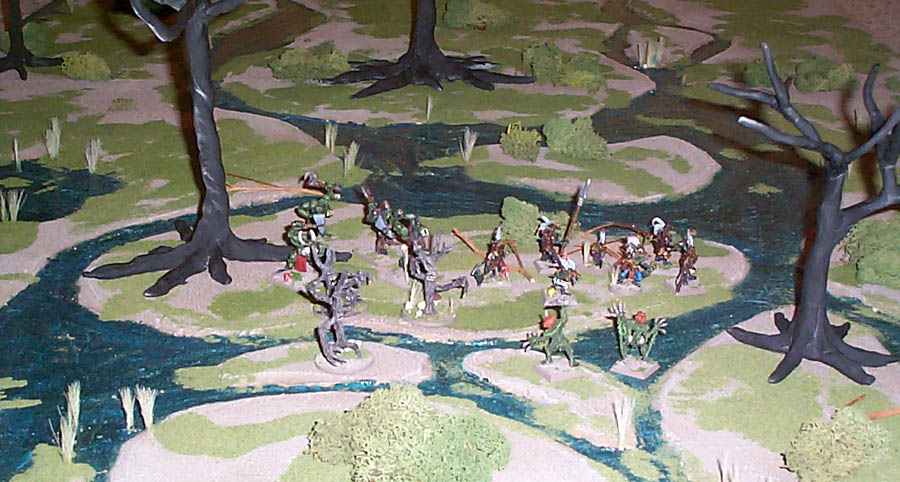
OK, that's about it for the how-too, since alot of the remaining work will be tweaking and repairing the boards. I was in a rush to get the 4th piece done for a game, so no individual pics, but you get the idea, right? The terrain can be seen in
action in the 6-Way Battle
Photos gallery.
|
||
 |
|||
 |
|||
 |
|||

|