Simple Star Trek Ship Tutorial 3
page 1
This is a simple tutorial to make a Star Trek type ship using trueSpace 3 or 4.
In this tutorial we will make a Klingon K't'inga class ship, but the steps will be similar for any ship.
This is zip of all the textures you will need.
textures
You will need 2 programs : trueSpace (any) and any paint program.
step 1 Get a Schematic of the ship you want to model , print it out for reference.
Now open your paint program and crop the image to have only the top view. Enlarge the image to 800 x 600
with the image centered covering about 2/3 of the screen . Save this image as topoutline.jpg.
I put a copy of this in the zip file above with several other reference pictures
Lets do a litte set up work.
 step 1a : TS 3
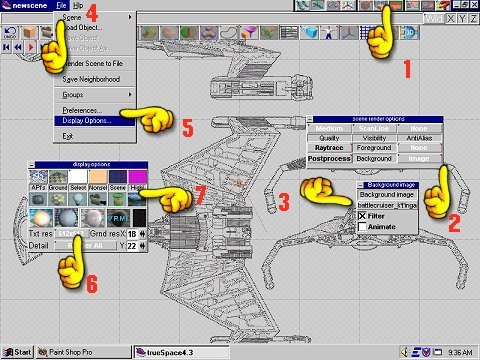
We shall start with the top view.
Select render options (hand 1) right click to pull the menu down . Then select Anti-alius x4
(hand 2)
Next Select the background you want and x in the square (hand 3)
Now select File(hand4) and select the Displays option(hand5), Texture options to 512 and white lights.
Select background again and x in the show background block(hand6).
You should have a image in the background
step 1b: TS 4
Again we start with the top view.
Select the render options control with a right click (hand1)
.Select adaptive ant-alius
(hand2). Click the blank next to background(hand2)and a new menu appears.
Then select the image you want.(hand3)
Next select File(hand4) which gives you Display options (hand5).
Click it and another menu appears.Select white lights on and textures to 512 or more. Push in the window that looks like a valley with shy and clouds(hand 7)
Now your image should appear.

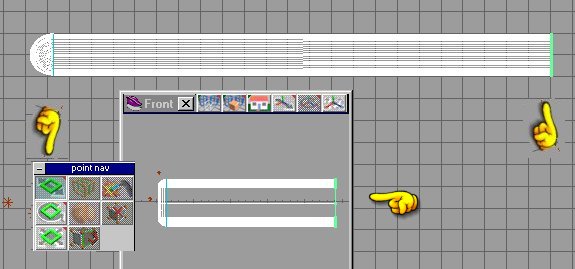
Now we are ready to model . Slow and easy and simple.
Page one will be devoted to the engine nacelle
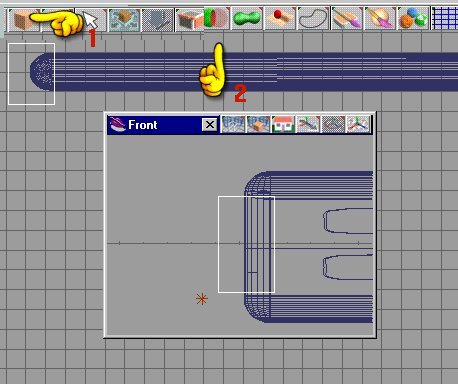
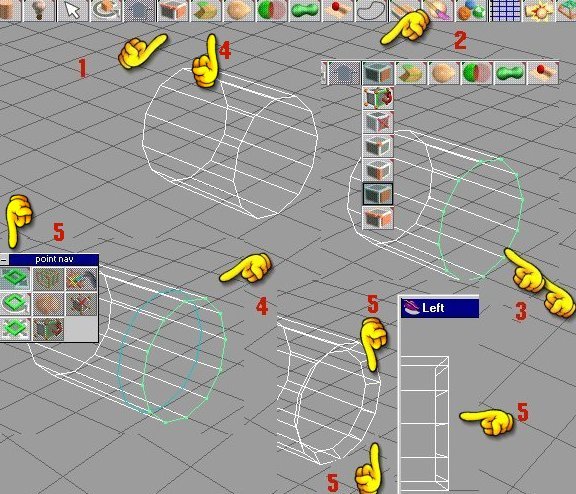
Select the ball and the tube (hand).
Place the ball ontop of the tube , stretch the tube a little.Place another ball on the bottem of the tube. Select the object combine/object subract tool(hand-picture below).
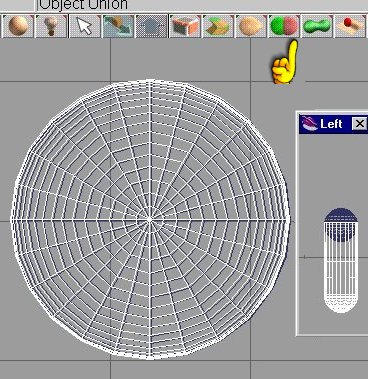 We will combine all the shapes into a tube with rounded ends using the combine tool(hand)(picture on the right)
This isn't hard at all.
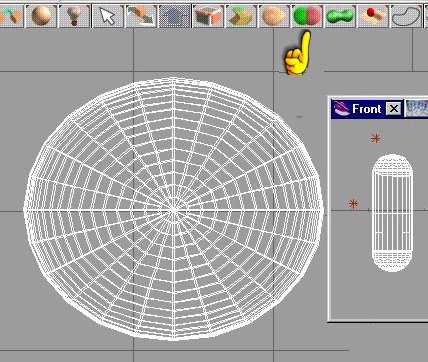
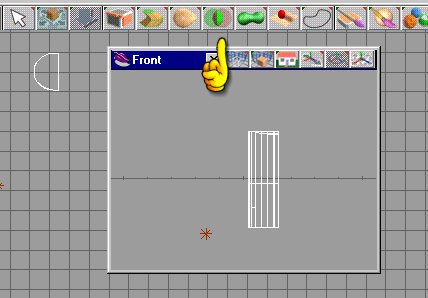
Now we take a square (this will be a cutting tool)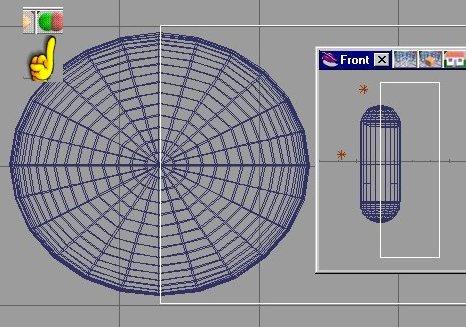 We are going to cut our shape inhalf.This new shape is the front of the Nacelle section.
We will again select the
object subtract tool(see hand)
It should look like the picture
on the right .

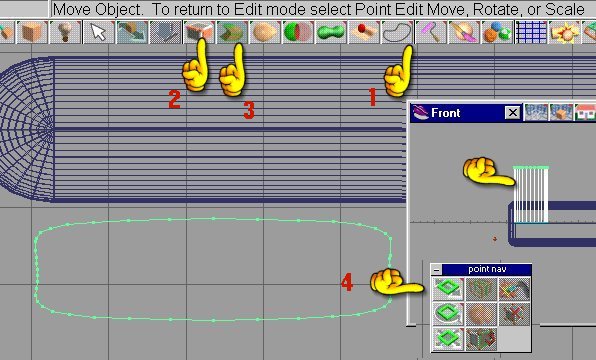
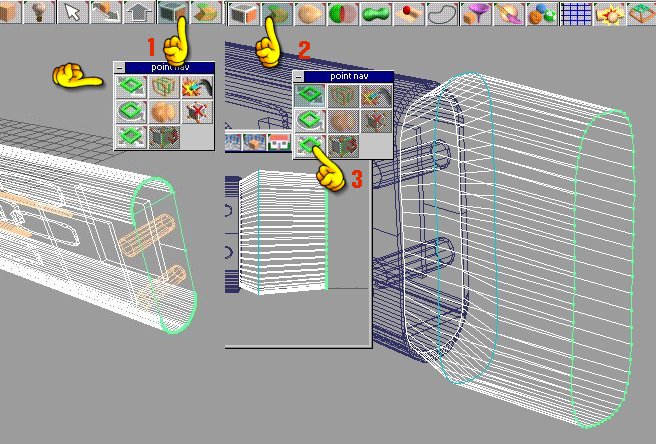
Next step , select the shape face modifing tool ( see hand 1) .
We will select the face which we cut off.
After selecting the face we will extend it horizontally using this tool(see hand 2)

The menu which hand 2 is selecting is available when ever the facing model tool is selected ,
But if it does not auto-matically pop down , then just right click it.
Just grap the face and stretch it out .
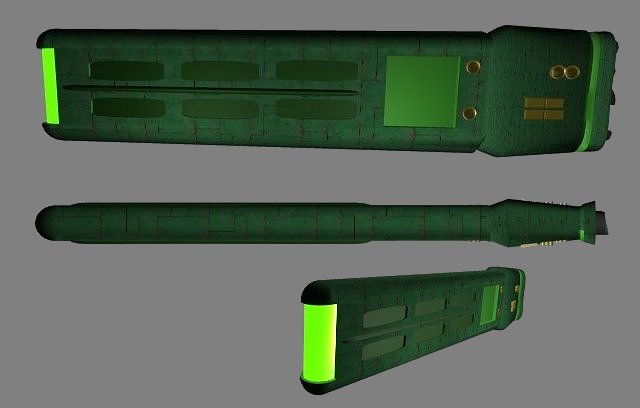
now switch to perspective view .
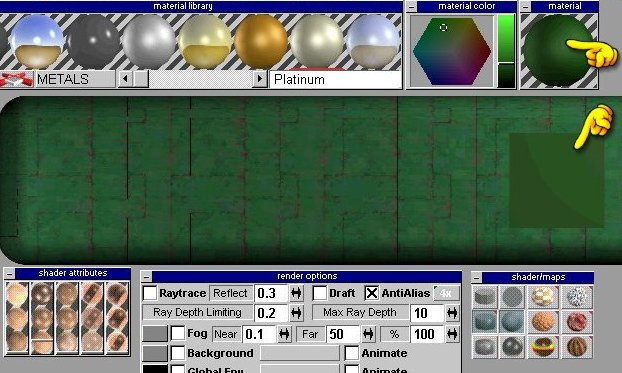
We are going to paint , just to see how it's going.
First , click on the paint brush and select roller.(hand 1)
Then right click it , a menu drops down , select (green panels) (hand 2)
Use the tool at (hand 3) to select repititions.
The tool at (hand 4) selects the atributes.
(ready , hold your breath )
touch the paint roller to the model and you should get a picture like the one below .

At any time , if you want to see any of these pictures a little more clearer.
Right click on the picture and select view image. The image will go to a new window and will be larger.
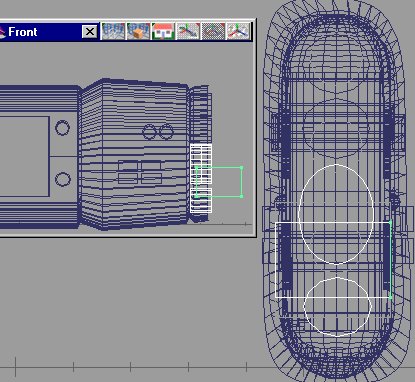
Now we are ready to do someCutting
We will be usind the square again .
Select a square and move it to near the end of our nacelle .
Select another wind open . I use top view and side view.
Shrink the square and move it where you want it .
Once it is where you want it , copy it and place it on the other side at the same place.
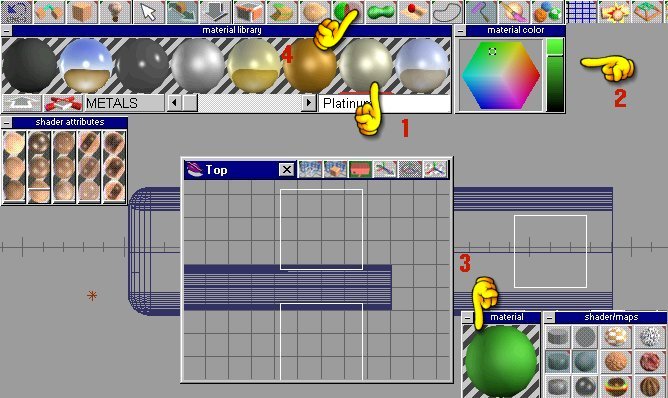
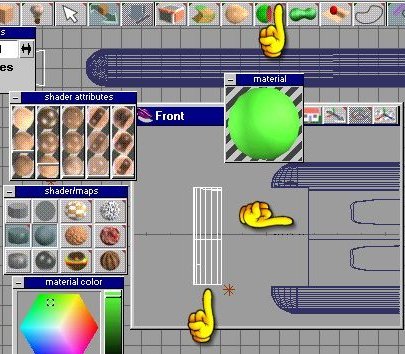
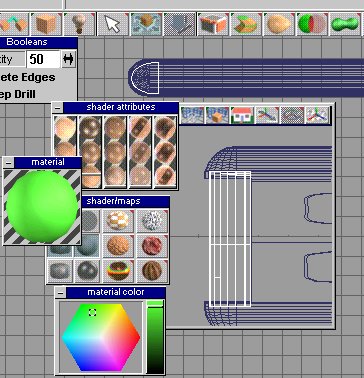
I am going to select any material (hand 1), but then adjust the color to what I want (hand 2)
You see the resuls at the window where (hand 3) is.
We are going to glue our 2 squares together using the glue tool and then Paint them with the green color.
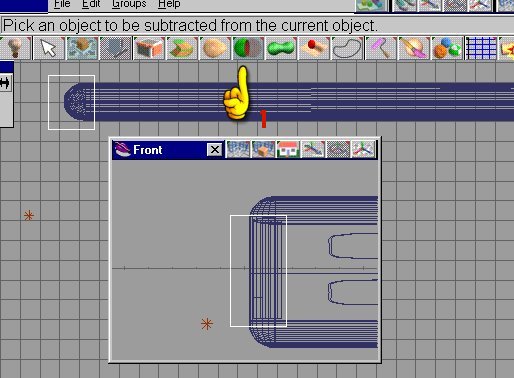
We will now cut out a section of the nacelle with the squares as our cutting tool.
Select the nacelle(it turns white) Select object subtraction tool(hand 4)
It should look like the picture on the right.
Look at the hands , see the color matches.
Time to cut some more .
But befor we do.....
SAVE !!!!!! That is right, save , and save often .
Time to make a new cut out tool , this time ,Select the spline polygone tool(hand 1). Right click it to bring up the change shape modifiers. Draw the shape you want , see pic below.
Now select with the face modifier tool (hand 2). And sweep with the sweep tool(hand 3).
Right click to get the modifier menu(hand 4)
While the shape is selected(green)you can adjust the shape with the shapemodifiers or the litle control handles for each point. Deselect the shape(turns white).
We now have the shape tool we want (deselect it ) it turns white.
Now rotate it and position it where we want.

Now copy this cutting tool six times
and possition them .
see picture to the right .Glue them together .
When you are happy with the position , copy the cutting tool again and move it to the other side.
Glue both sides together
Now select the object subtract tool (hand 1) and cut the nacelle again. Save
Now we are going to cut off the front of the necelle,
select a box(hand 1) again and move to the front . See picture.
We are going to cut, make sure you saved.
This time using the object intercet tool (hand 2)
This is what you have left .Save this little thing as Cutout 1 .
We shall put it back in just a minute.
See picture below.
Now get a new box and reload the necelle again. This time cut the box out of the necelle.
 We will be using the object subtract tool again(hand 1)
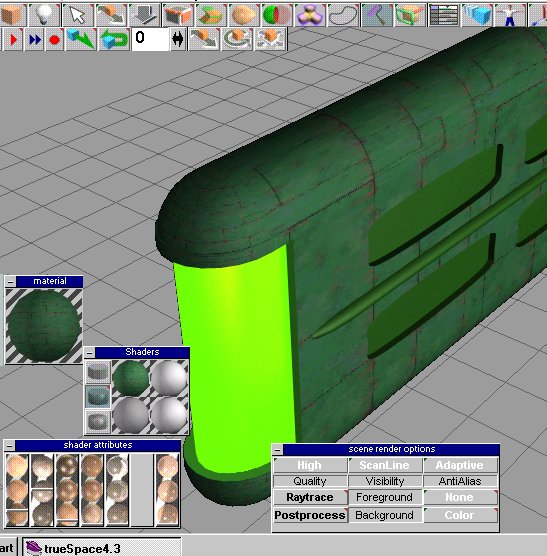
Load the cutout 1 again and select a green with high shine and bright internal glow.
Select it (the cut out) and shrink it and stretch it just a little till it has a small inset into the area which you just cut out .
place the cutout as shown in the picture just below.
Glue the cutout piece to the nacelle and save.
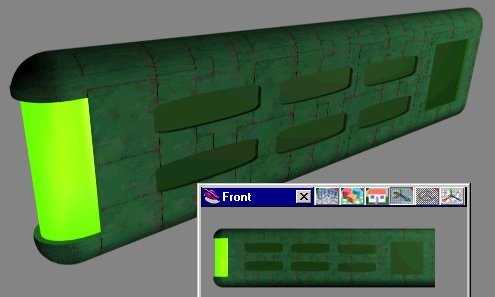
Painting is a little bit different in TS 4 ,take a look at the picture below and to the right
IF you want to see a larger image ,
just right click the image and select view image
By now you should be getting comfortable , so , remember how we made the front .
Ball on tube on ball then object combine .
Do it.
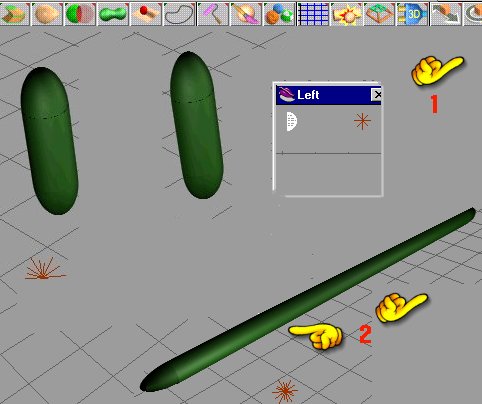
Now cut it in half just like we did be fore with a square.
Take whats let and stretch it out(using the shape nav tools(hand 1)).
Stretch long wise (hand 2)
Paint it dark green.

Copy this stretched piece and place on both sides of the nacelle.
See the hands for help. Glue them on .
Time to take a test render to see what we got.
On the side of the Nacelle are two Warp plasma vent housings .
say what ....
Take a tube , select the end of it and sweep. Then shrink. See picture below left.
Now do the same on the other side of the tube.
Paint it gold .
sample the color and make it darker , now paint the center only with
the darker color . Oh man , this is a trick of the trade here.
By doing this you get the illusion of depth and detail. Copy this tube and move it into position , see pic below right.

We are now ready to make the exhaust part of the naccelle.
Using the face modifing/point edit tool (hand 1 ) and sweep tool (hand 2 )
is the easiet way.
Select the face on the end of the Nacelle , Sweep a small bit , now sweep again and this time expand using the tool(hand 3).
Next make a little square and position it as shown below.

Then copy the square , so you have 4 of them .

Place 2 small gold tubes above the squares (hands 2 and 3 )
Make 4 small tubes and possition as shown in the right picture.
(hands 5 and 6)

The two lower tubes , we are going to cut . We shall select a square and move it to cut half of each of the lower tubes.
See image below left. Basic object subtract tool , which we have seen and used often.
I extended the two lower half circles and twisted them alittle .

Your model should look like this:
Now you have a nacelle , SAVE IT
next come the wings . That part will be on page two
Page Two