Using the Deform tool
page 1
This is a simple tutorial to show you how to use the deform tool using trueSpace 3 or 4.
In this tutorial we will make a section of the F-16 Falcon, but the steps will be similar for any model.
This is zip of the intermediate steps of the model.
Zip File
You will need 2 programs : trueSpace (any) and any paint program.
step 1 Get a Schematic of the ship you want to model , print it out for reference, I have included a side and a top in the zip file.
Now open your paint program and crop the image to have only the top view. Enlarge the image to 800 x 600
with the image centered covering about 2/3 of the screen . Save this image as topoutline.jpg.
I put a copy of this in the zip file above with several other reference pictures
Lets do a litte set up work.
 step 1a : TS 3
We shall start with the top view.
Select render options right click to pull the menu down . Then select Anti-alius x4
Next Select the background you want and x in the square
Now select File and select the Displays option, Texture options to 512 and white lights.
Select background again and x in the show background block.
You should have a image in the background
step 1b: TS 4
Again we start with the top view.
Select the render options control with a right click
.Select adaptive ant-alius
. Click the blank next to background(hand2)and a new menu appears.
Then select the image you want.
Next select File which gives you Display options .
Click it and another menu appears.Select white lights on and textures to 512 or more. Push in the window that looks like a valley with shy and clouds
Now your image should appear.
Now we are ready to model . Slow and easy and simple.
Page one will be devoted to the main body of the model
We will start off using the poly line tool (hand 1 in picture below).
 The selector is set at 8 segments per line , (see hand 2)(picture on the left). use this tool to draw the section as show on the left and indicated with hand 3.

Now select snap to grid and rotate this section 90 , then 90 again so it looks like the picture on the right.
This isn't hard at all.
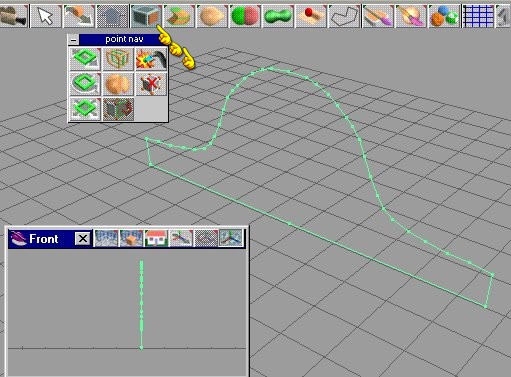 We select the face using the point/face nave tool (see hands in pic on the left.
You can either use the sweep tool or use the select face tool and drag a face manually, But I recommend that you do this in at least 3 sections so we have lots of room for the deform tool to work.
Your model should look like the picture on the right.

Next step ,
Go back to top view and open a second window showing the side view and then a third window showing the front view.
I like to set these up so I can see what the deformer is doing.
Now we are set up to use the DEFORM TOOL

Once you select the tool your model will turn orange with green lines on the 3 major axises. See picture on the left.
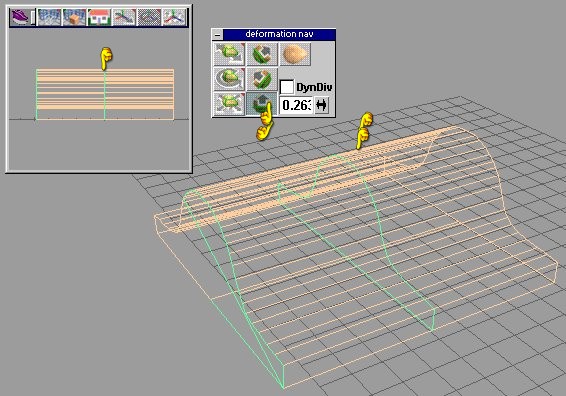
You will see a small pop up window , it will have controls on it. You can select which axis you want to deform by selecting it. Once selected the other axis lines will go away.
Axis lines are green.

At any time , if you want to see any of these pictures a little more clearer.
Right click on the picture and select view image. The image will go to a new window and will be larger.
Look at picture on the left. With the tool selected , click on the axis you want and then click on the modification you want. In our case , we select the shrink/inlarge tool (bottem one on the left) in the popup window.
Touch the screen , not the model and move the "finger" to the left. You should see more and more "green axis lines".
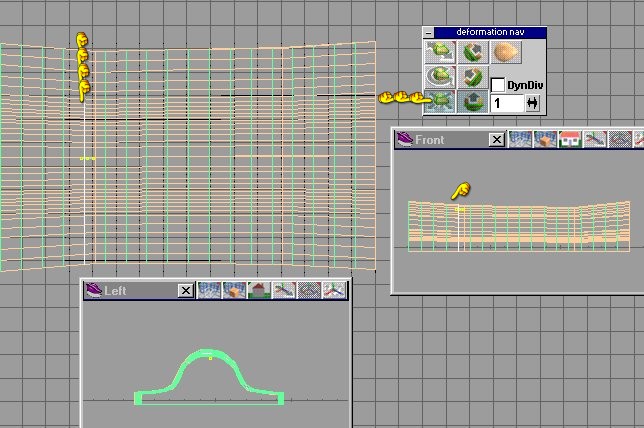
Here is where I use the top view to select where I wish to deform the object.
This shape of the F-16 is called the coke bottle.
We wish it to be narrow in the middle. So we select the end.
See picture on the right.We are going to "DEFORM" in 3 places as show with the 3 fingers. We select the end and stretch bigger, we select the middle and shrink. I like to watch all three views to make sure Im not deforming in the wrong place while molding what I want.

Take a good close look at the picture on the right.
Now look to see what it should look like, see picture below.

This may take some trial and error.
IF you render , right now it should look like this (see picture on the left below).It looks sorta like a saddle.
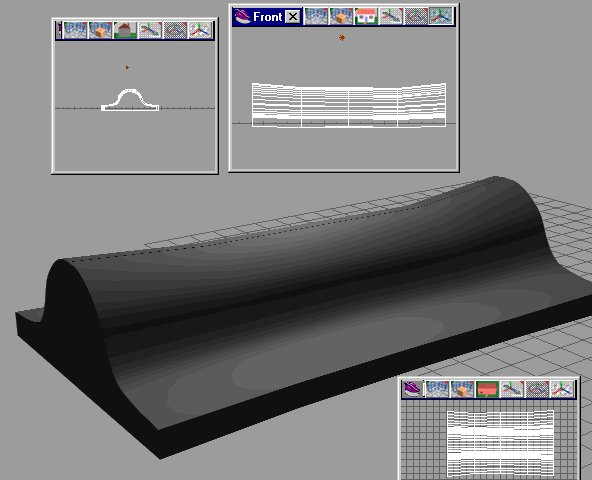
It should look like the picture on the right.
If it does hit the save button, if not , go to the top of this page.
Next comes the forward section . That part will be on page two
Page Two