
An Introduction to Combat Mission Mods
The Combat Mission series were designed so that the graphic and sound files could be easily altered but the programmes internal code that controlled the actual wargame remained sacrosanct. This meant that you could play email opponents with the confidence that you were both playing the same game although one player might have moded all his graphic files. (There are a few program mods - the Anti-Censorship mod that replaces the WG - is the only one that springs to mind.)
A whole new side to the computer wargaming hobby grew up with Combat Mission - Beyond Overlord as computer artists set to work to make the games scenery, uniforms and tanks look much better than the original. Many of these moders got jobs on the sequel Combat Mission Barbarossa to Berlin but this has not slowed the moding community.
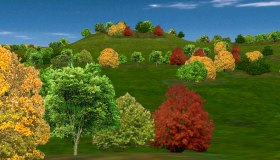
What is the point of using mods? Well see for yourself. These screen shots are the same view from CMBO - the top view shows the original game graphics, whilst the bottom view has mods installed mainly by mod maker Ed Kinney.

Installing and Using CM Mods
I know that some players have trouble applying mods to the game so this is a quick guide to using them. CM mods can either be graphic mods with the file extension .BMP that change what some aspect of the game looks like - a tank, uniform or tree for instance or a sound mod with the file extension .WAV, that changes a music file or the sound of a rifle.
If you are going to use mods it would be much safer to back up the BMP and WAV folders onto CDROM. Things may go wrong such as the mod maker missing a file or that you may decide that although your new Panzer looks great on its own, that shade of Panzer yellow just does not go with the rest of the CM tank fleet. (The mod makers have to work out exactly which graphic file numbers are used to make up a tank themselves.) Some mods are hi-res and whilst they look much better, it will slow your machine down and take up more room. If you have the files backed up you can copy these files back on without a full reinstall. The original CMBO allowed you to access the files directly on the CDROM.
For all the CM games inside the main folder, there is a graphic folder holding all the graphic files and a sound folder holding all the sound files. The graphic files are in a folder called BMP and the sound files are in a folder called Wav. To apply the mod you need to copy these mod files into one of these folders and copy over the existing files. CM mod makers cannot add anything to the game just change what is there already. The BMP and WAV files all have a number that allows the programme to identify the files and use them correctly in the game.
When you download a graphic mod file of a tank, for instance you will probably find that it has been zipped and you need a program like WinZip to open the file. You could simply point WinZip at the CM BMP folder and copy the files inside. The problem with this is that the mod maker may have added some variations such as the option of having turret numbers on the turret sides.
I suggest you create a test folder called something like C:/cmgame/modinstall and copy your mod to that. You can now examine each file, compare it with the original, and ask yourself is it better? The new trend on the CM Mod Database website is to have option files in a separate folder. In your test folder if you like the options cut them and past on top of the standard files then cut the files and copy them into the CM BMP folder.
The old option method was to have a letter added at the end of the number such as 11240A.bmp. (This number is for the icon bar that appears on the scenario choice menu.) The reason for the letter is that you cannot have two files the same name. The game will not recognize the file name with the letter, so you need to change its name to remove it. If you are using the Windows operating system, then Right click on the file and choose Rename and delete the added letter.
The final method of using CM mods is with a mod manager such as CM MOD Option Selector (CMMOS) or Martin's Combat Mission Mod Manager (McMMM) which is also referred to as the PC or Mac Mod Manager on CM MOD Database site. The advantage is that if the mod maker makes variations for summer and autumn use, which the game has only one variation for both, you can then swap the files in seconds before you start a game as needed. The disadvantage is the mod manager backs up the files and takes up a hefty amount of space on your hard-disk. As well as the mod you need a ruleset file to control the mods use by CMMOS. Read the programs instructions for exact use and direct enquiries to the makers of the mod manager. (I figured CMMOS out - so you can as well!) Mods have to be created especially for CMMOS and have an extra letters after the actual CM number for the program to use the files. CMMOS removes the extra identification when the program copies the file into the CM folder. You can use CMMOS mods without the program by removing this part of the files name so that only the CM number remains by renaming it and then copying the files into the BMP folder as normal. The newer McMMM does not require extra letters to work but mod alternatives have to be in seprate folders, which are zipped with the files rather than renamed with an extra letter. CM MOD Database site asks that all mods put up on the database are submitted in this way. For using such mods without the mod manager you should unzip to a temporary folder to see and use the alternatives and then move them into the nain CM BMP folder.
Remember to back up your files and mods in the BMP and WAV folder if you decide to move machine and to avoid computing accidents!
A Simple Mod - the Hungarian Hidden Unit Icon for CMBB or CM2
Level - total beginner
Assumed Knowledge - none
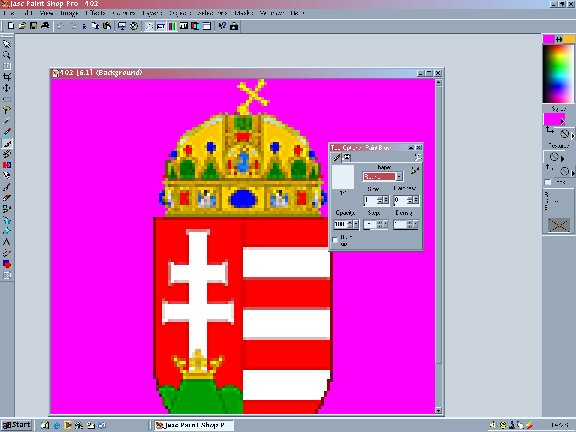
Program Used - Paint Shop Pro
To create any graphically mod you will need a paint program to do this mod
The obvious choice for beginners is Paint Shop Pro - there are fully working demos available for it on computer magazine CDs and you can of course download from many sites on the web. Although not as powerful as PhotoShop its retail price a mere fraction and it is much more intuitive to use as it was originally a shareware product that did not come with a 3-foot thick manual. It also supports a vast array of file formats, although the Combat Mission games use the common bmp format.
Step 1 Research
I was searching through Hungarian sites to find information for my Scenario icons and noticed that the Hungarian coat of arms was not the same as that depicted on the Hungarian Unit Icon, but that the shield on the Hungarian flag was correct. The game icon crowns detail was not very good and the cross on the top was straight up not bent to one side. The game icon crowns detail was not very good and the cross on the top was straight up not bent to one side. This file was begging for a mod!
Always research you're the subject of your mod well, because
Combat Mission is made for wargamers who know there subject well it will go
down like a lead balloon if you do an unreastlic mod even if you are the best
computer artist in the world.
 The
402.bmp game Hungarian hidden unit icon.
The
402.bmp game Hungarian hidden unit icon.
 A
graphic file of the Hungarian National Shield I found on the Internet.
A
graphic file of the Hungarian National Shield I found on the Internet.
It is always much easier to alter the game file - a true mod or replace it with a file you found elsewhere rather than create one from scratch.
Step 2 Shape to Fit
I now had an excellent jpeg, which I wanted to turn into the
Hungarian hidden unit icon.
However it was the wrong size - as it was much bigger than the game file.
It is a simple process to resize a file in a paint program, however the image quality of jpg files degraded when you do this so it is best convert it to a bmp before you do this. (In fact it was a gif, but is worth doing at this stage anyway.
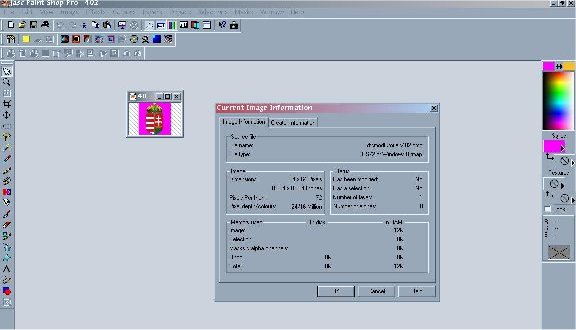
Next we need to find out how big the original hidden unit icon is - so we know what size to make the new replacement mod.
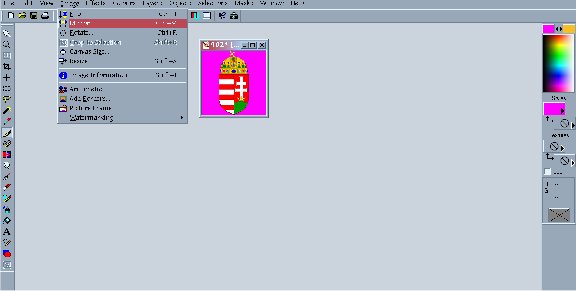
Paintshop Pro will give this information on the image pull-down menu then Image information - the bull circle icon with a yellow I in it. We are interested in the pixels - it is 64 wide by 64 high.
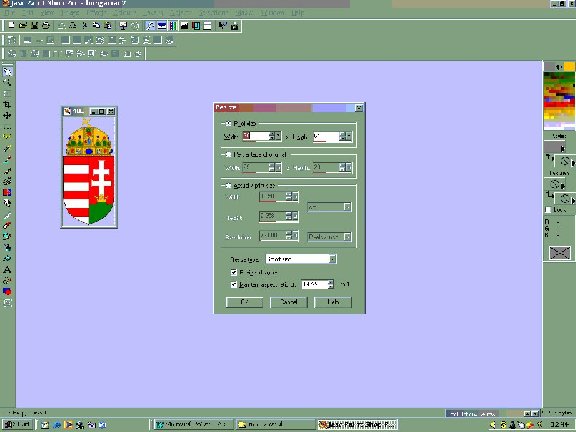
Next we resize the hungarian.bmp file - this is done on the Image pull down menu and the resize option which has the icon of a square with an arrow coming out to the right and bottom.
We can not simple put in 64 X 64 pixels as this will distort the shape - we need something that will fit in a 64 x 64 box. Make sure that the Maintain aspect ratio box is ticked to avoid distorting the shape. As the picture is very high put in 64 in the height box and you will find that the width will automatically keep its ratio and change to 30 in this case. The program has a number of mathematical methods to resize try a few to see which works best for the job.
I found that you could now barely see the cross on the top and the effort had been largely wasted, as the resulting file was little better than the original. If you find that re-sizing down to 64 X 64 losses a lot of the detail and is disappointing you have another option - hi-res.
The game will display an image in 128 X 128 at 64 x 64 but with more detail - this is what moders call a hires file. However, this technique has big problems is that the file size will be bigger and older machines will noticeably slow down with a lot of hires files start and the game will take up more space on the player's harddisk. In this case one hires file will not make a lot of difference.
We now have a file that is the right height but the wrong width. Create a box that is 64 X 64 or 128 x 128. On the menu go to the File pull-down menu and then New. In the dimensions put in the height and width you want in pixels. It does not matter what colour you make it - the default is transparent. Now select your Hungarian file and go to Edit and then Copy. Now click on the new box and click on Edit, then Paste and choose the New Layer option. It will copy the graphic automatically to the center of the box.

Stage 3 Make the Background Area Invisible
If we placed our newly created graphic in the game it would appear but so would the outline of the box around it. The game makes a certain colour of pink invisible in the game. We need to colour the surrounding area around the box this colour.
Open the original file and use the dropper tool from the tool palette to get the exact shade of pink.

Now use the Floodfill tool to pour paint into the surrounding box area of our image. You can adjust the sensitivity of this process in the tolerance options bar as we are doing a colour match the default RGB mode is probably the best choice of match mode.

The big mistake some beginners make is to assume they are finished and rush to put up their new file on to the Internet.
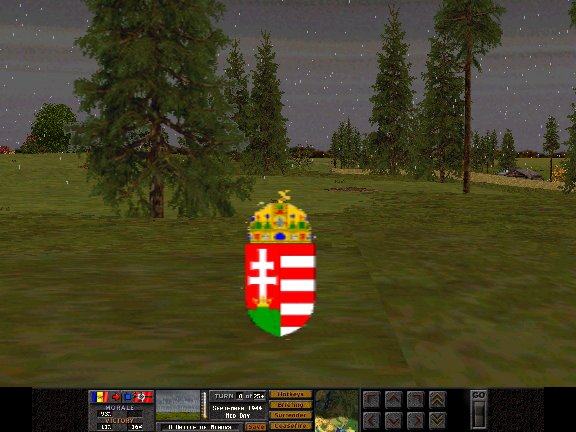
We now need to test the file in the game rename it as 402.bmp making sure to keep the original game file safe in another folder, and then put the file into your CMBB or CM2 BMP folder and replace the original.
Your file will probably have bits that are discoloured pink and are not invisible.
(In fact the floodfill in the example did a very good job and I had to add
some for you to see!)
To get rid of these discoloured pink or extra flash marks, I suggest you go into View and Zoom in by 5. You will now be able to individual pixels or blocks of colour. Adjust the paintbrush using tool options to Size 1 and paint away any of these offending squares that should be invisible. Again put it in the game and check what it looks like.
Stage 4 Mirror the File
The last problem is that the file appears the wrong way round in the game. Indeed even the CMBB original file is the wrong way round. For some reason all Hidden Unit files but no other graphic files in the CM games need to be mirrored to make them appear the right way round.
To do this go to Image then press the Mirror option. You just need to save the file and check it once more and you have finished your fist mod.
Alternative actions to get a better Hungarian Hidden unit icon would be to just mirror the stock file - having it the right way round would be a big improvement. You could also cut off the crown and resize it and place it over the stock graphic to improve it.
You should have learned how to:
- resize an object and place it on a background
- make the background invisible and avoid flash marks
- make a file hires

The Finished Mod File

The Original Game File
Submitting Your Mod
You will now want to put your mod up on the internet for others to download and enjoy your hard work. Unless your mod is extremely small then you will need to compress your mod for easier download. The standard compression file is zip as used in Winzip and other compression utilities.
The CM MOD Database has a standard for submitting mods zip ready
for download on their site.
The current preferred method is not to rename alternatives with a extra letter
or number or put a number of zip files in the main zip files but to use folder
options.
Each set of alternatives should be put in separate subdirectory, named with meaningful names and then zip with folder options on.
For example:- tiger.zip would have the main Tiger tank bmps and a subdirectory "markings" with a turret side alternative bmp graphic which shows a tank number. Other tank numbers that are coloured differently and would share the same bmp number would have their own subfolder such as "redmarkings".
tiger/markings.zip
tiger/redmarkings.zip
LINKS
Kingfisher (M Gilligan) has an excellent website going into detailed techniques for creating tank and vehicle mods using Paintshop Pro, with downloadable textures from the CM Mod database - Zimorodok Mission
You may want to submit your finished mods here: