
Level 11: In the Soup
This is one of the "big" ones; you've got a big crew, and a lot of ground to cover before you get back home. All of your commandos start together on a ridge at the westernmost part of the map. They're pretty much stuck there until the adjoining area -- which is littered with all kinds of guards -- is cleared.
Your first step should be to use the Spy (who is already in uniform) to distract guards while your Green Beret goes on a veritable killing spree. Because there are guards looking everywhere, your timing has to be perfect, but by now your skills with the Green Beret should be honed to a razor's edge. 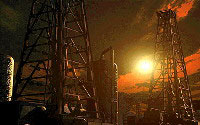 Don't worry too much about having your Spy distract the patrolling guards -- at least they end up turning around so you have brief periods when they can't see your actions. You want to concentrate on getting the stationary guards turned away from the killing. Your best bet -- although it does take some time -- is to have the Green Beret hide the bodies all the way back where the other commandos are; that way, if you need to use the noise maker to attract attention, there's no danger that a guard may accidentally see a body. I'm not going to lie to you -- this first part of the mission is pretty tough, and your timing really has to be solid if you're going to avoid the dreaded alarm. Just remember to let your Spy do the distracting while the Green Beret does the killing. If you take your time and use the multiple cameras to keep track of everyone, you'll come through without a scratch.
 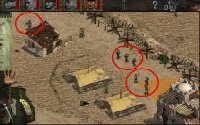 Also, don't forget that the Green Beret can hide in the buildings or bury himself in the sand to set up ambushes. Once the first area is clear, send the Spy down the road to the main gate of the complex, and have him distract the group of three patrolling guards, so that they're facing west away from the cliffside. While they're preoccupied, move the Green Beret down the road and have him climb up the side of the cliff. He can easily kill the two guards on that ridge without being seen. Once that's done, have him climb down the ladder to the east and hide behind the rock outcropping. As you can see, the idea is to clear out the edges of the compound and then work your way inward. Having your commandos just waltz in the front gate is suicide, so you'll need to take the scenic route to stay safe.
Clear out that area by the SDKFZ 231 (your escape vehicle) the same way you cleared out the first area -- 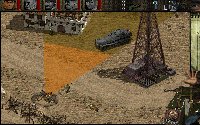 using the Spy to distract and the Green Beret to assassinate. However, there are two important things you need to remember: if the alarm is sounded in this particular area you won't actually hear it and see the red flashing light -- but the guards will pour out of the headquarters nonetheless; and the soldiers on the ridges and roofs have an excellent view below them, so you need to be careful to avoid their lines of sight. The whole plan is not to kill all of the guards. What you need to do is clear a pathway for the Driver to get to the armored vehicle. Once he does, you're sitting pretty -- the SDKFZ 231 can mow down all of the guards walking around in that central part of the complex, as well as all the reserves that pour out of the headquarters. Unfortunately, the vehicle's machine guns can't reach the guards on top of the roofs, you your best bet is to have the Spy climb up and inject everyone from behind (making sure it's safe that nobody else is looking).
Once the entire main area is cleared of guards -- everywhere up to the tunnel to the north -- it's time for the Sapper to go to work.  You've got three bombs and four oil rigs that need to be destroyed, so the plan is a bit complex. Before you even go near the oil rigs, have the Sapper run north to the tunnel and plant one of the bombs on the bottom right corner of the entrance. When the bomb is detonated, it will cave in the tunnel, preventing the troops from the other side from coming through. This is essential, because on the other side of that tunnel is an enemy-controlled SDKFZ 231, which is capable of destroying your own vehicle and making a general mess of things. Once the tunnel is blown, have the Sapper run back to the main camp. There he will find two of the the oil rigs. Plant a bomb at each oil rig and blow them sky high (when all of your commandos are clear). That's two down, two to go.
Unfortunately, the other two oil rigs are located in the middle of a quarry, and none of your commandos, not even the Green Beret, has the ability to get to them. But don't worry, that's the way it's supposed to be. 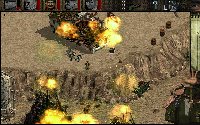 Those oil rigs can be destroyed... but not with explosives. Next to one of the rigs are several barrels; a gasoline truck will pass by the other. All you need to do is position a commando on the ridge to the south (preferably the Sniper, as his range is longest) and shoot the gasoline truck to destroy the first rig, and then shoot one of the barrels to destroy the second rig. It is critically important that you shoot the gasoline truck when it is up against the oil rig, otherwise it won't be close enough to blow it up. Screw up, and you'll have to reload a saved game. Once all the rigs are destroyed, pile all of the commandos into the armored vehicle, make for the exit point (the strip of dirt road to the west), and it's over.
![]()
![]()
![]()