
Level 17: Before Dawn
Mission 17 is a pretty challenging scenario, and really has to be completed a certain way in order for it to be a success. But as long as you stick to the plan, everything will go smoothly.
Your commandos start off to the left of a large outcropping of rock; the first thing you need to do is 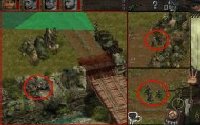 move them closer to the rocks for maximum cover. Use multiple cameras to keep track of both your commandos and the group of three patrolling guards to the east. When the guards are far to the eastern end of the map, headed east, have the Green Beret run north to the cliff and climb up, being careful to avoid the gaze of the guard on the righthand side of the road. As soon as you get up, pull out your pistol and kill the guard; even if he sees you and yells for you to halt, you can still pull out your gun and blow him away with no problem. At this point it may be a good idea to have the Spy run all the way east and distract those three patrolling guards, so they don't end up seeing the Green Beret and his dirty work.
From that position, the Green Beret can really cause some damage. Have him keep shooting his gun until the other guard runs over to investigate, and shoot him as he comes around the rock. 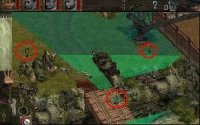 When the coast is clear, move the Green beret out and kill the other stationary guard from behind, using the knife, and then run back behind the rock. When the other stationary guard on the road turns back around, run up and kill him with the knife as well. After all the single guards are dead, there are two groups of three guards each that need to be dealt with. Chances are, both groups will end up seeing the dead bodies and come over to investigate. Your best bet is to avoid subtlety and go for the direct approach. With the guards (six in all) in the general vicinity, hide behind the rock and shoot the gun to attract them. If all goes according to plan, they will come to investigate, in a single-file line. With any luck, you can kill each guard as he comes around the corner. You may get hit a couple of times, but the Green Beret can take it; just make sure the Spy heals you up before the mission ends. When all the guards in that area are dead, have the Green Beret flick the switch to extend the bridge, allowing access for the Spy and Marine. Have the Marine crawl north to the river's edge, on the right side of the bridge, and get into the water. From there, he should swim north to the other end, and then all the way to the east. Position him just to the right of the mill, but don't get out of the water. Just leave him there for now; you'll come back to him later.
Move the Green Beret over to the wall of the prison camp and set down the noise maker. When he turns it on, a couple of guards in the camp may either run out to investigate, or just turn in your direction. 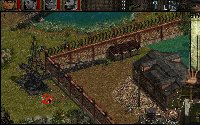 Play around with the placing of the noise maker -- you should be able to get a few to actually run out and investigate. With that northern gate closed, they'll have to run south and take the long way around, but that's exactly what you want. When they come over to investigate, kill them silently from behind. It's important not to use the gun anywhere near the walls of the prison camp, as it will sound the alarm and summon tons of guards. Your goal right now is to eliminate every guard in the northern end of the prison camp, where the holding pen is located; drawing a few out with the noise maker will just make that job easier. You can even crawl past the northern gate and place the noise maker over there, drawing out the stationary guard. Just be careful not to lose the noise maker behind the northern wall. The mission briefing kind of hints that the Green Beret can enter the prison camp by surrendering (to the group of three patrolling guards to the south of the prison), and that's true. But you'll find he's much too useful to sit wasting away in a holding pen. Instead, have the Spy open the northern gate of the prison camp so the Green Beret can enter, and help him kill the remaining guards (using the Spy to distract and the Marine to kill and hide the bodies). It's imperative that the bodies are hidden, or the alarm will be sounded.
Once all the guards in the northern section of the prison camp have been killed, you can go about the rescue operation. First, have the Spy run out the north gate, bang a left, and go all the way to the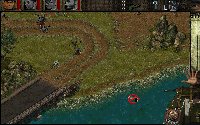 small bridge: flick the switch to draw back the bridge and prevent anyone from crossing. When that's done, have him go north across the big bridge to the other side of the river. The northern part of the prison camp may be clear, but unless you clear out the guards from the northern side of the river, there's no way they can escape. Starting all the way over to the east, use the Spy to attract the guards and the Marine to kill them silently, and hide their bodies behind the rock outcropping just to the north of the mill. Again, don't use the pistol, as it will raise the alarm and summon an untold number of guards. This part of the mission is extremely time consuming, but completely necessary; if this whole area isn't cleaned out, all of your work thus far will have been for nothing. While the Spy is on his little murder spree, don't forget to kill the soldier at the machine gun nest guarding the bridge: his death is especially important.
When all the guards on the northern end of the river are killed, it's time to rescue the hostages. Have the Green Beret open the gate to the holding pen, and use the head prisoner to herd all of them out. 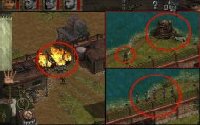 Bring them outside and to the left of the northern gate, ready to move. The Marine's raft isn't big enough to hold all of the prisoners, so you'll have to march them right across the river, in Bridge on the River Kwai style. All of the soldiers on the north side of the river are dead, so that much is taken care of. But there are still two possible threats: the guards from the southern part of the prison camp, and the bunker just to the right of the northern gate. Here's what you need to do. Have the Green Beret pick up the barrel in the camp, bring it outside the northern gate, and put it down right next to the bunker. Then, return to the camp, and go down to the gateway to the southern section. There's a platform with a couple of oil tanks right by the entrance. When the coast is clear (watch out for a single patrolling guard in the southern section), have the Green Beret climb the platform and flick the switch: oil will begin pouring from the tanks. Climb back down and position yourself just to the right of the oil slick, and fire at it. It will erupt into a ball of flame, preventing the guards on the other side from crossing. of course it will also raise the alarm, so about a dozen soldiers will come over to investigate. Most of them will actually get too close to the fire and burn to death. What a pity. Be careful while all of this is going on; the fire may be able to stop the guards, but they can still shoot through it and wound the Green Beret. Make sure you get him out of the way and out of the compound, positioned near the bunker. Stay a good distance away and shoot the barrel to destroy the bunker.
Once all this killing is done, you're home free. Just march all of the prisoners and your commandos to the northwest corner of the map and into the escape vehicle, and the mission will come to a successful end.