
Level 18: The Force of Circumstance
The Green Beret can crawl to the right of his position, and then up to the wall that is to the left of the guard facing away from you. 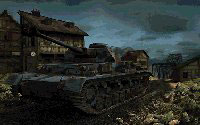 When the patrolling guard passes by headed south, run out and kill the standing guard that he passes and then kill the patrolling guard. Time this run with the patrol of the two guards around the HQ and the lone guard off to the left of your initial position. Hide both bodies in the corner behind the wall where you were, and stay there. Then have the Marine drop the guard who is patrolling to your left as he walks away. Try to drop him behind the wall so you won't have to move him. If you have problems with this guard spotting the bodies before he turns around and walks away, you can have the Marine crawl out to the small wall to your left right after the Green Beret kills both guards. He can slither around behind the guard and kill him before he spots the bodies. The Green Beret can then kill the guard in between the two walls and stash the body behind the wall on the right.
Killing the two guards in the middle is tricky. You have to watch the two guards patrolling on the other side of the road, the armored car, and the three-guard patrol to the right. 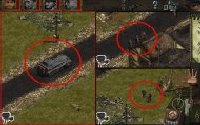 When the three guards are walking away, and the two guards have passed you by heading to the left and then up, have the Sapper place the trap where the first guard will get caught. Have the Marine stand up behind the left wall near where the guards pass. As they walk past, run out behind and kill the rear guard with the harpoon right before the front guard buys it with the trap. The timing is tricky, but you can do it. Immediately run out and move each body to the left side of the left wall, facing the bombed-out red tank or tractor or whatever it is. You have to be fast and lucky because this is where you can be spotted by the guys on the road or the other side. Try putting the line-of-sight eye on whichever guard catches you and see if you can sidestep their gaze by using the building as a shield.
The Green Beret can easily stab the single guard to the right as he walks away on his patrol, as long as the three guards are at a distance. Before you pick up his body, drop the decoy to the left of where he was patrolling, up against the building. Then carry his body behind 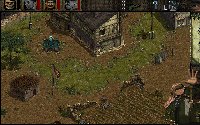 the right-hand wall with the other body. When the patrol has passed by and is heading north, turn on the decoy until they hear it and then turn it off. When they walk over to investigate, they'll eventually line up nicely in a single file. Use the harpoon to shoot the last guard and, once it reloads, the second guard and then stab the lead guard. Have the Green Beret retrieve his decoy. The Driver and Sapper (or any two commandos) should crawl to the left and find the small group of rocks that the three-man patrol passes by. Notice the area where you can safely hide as they pass. When they do, get up, run up behind, and have both men shoot all three guards. No alarms will sound. Try to have them get as far to the south on their patrol as you can before shooting them so they won't be seen by the other three-man patrol on the far left. Speaking of that patrol, with two or three guys crawl down to where the road leaves the map (below the big red arrow on the mini-map). When the armored vehicle is towards the other end of its patrol, the train is coming, and the three man patrol is moving away from you and towards the barrels, run out with your guys and shoot them from behind. Then run back to your spot. The truck should keep the bodies obscured from the view of the five-man patrol and the armored vehicle can't see that far. If you're feeling spunky, have the Sapper crawl over to the rocks by the corner of the road and stay on the opposite side of the armored car. Blow it up with a grenade when it gets close enough and then crawl to safety. Two nearby patrols will come to investigate, but they'll just walk away and go back about their business. If you killed the three-man patrol to the far left in the right place, the five-man patrol won't see the bodies as they go back about their business.
To take out the two guards patrolling on the other side of the road, have the Green Beret place his decoy on the left side of the rocks around which the two men patrol. Notice that they patrol around these rocks in alternate directions each time. Have the 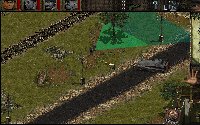 Marine hide behind the group of rocks just across the road. Use the decoy during one of their trips to get them to stand and face north, towards the train tracks. The Marine should run over, harpoon the guy in back, and stab the guy in front. Now, you can either try to hide the bodies using the Green Beret, or you can simply have the Marine hide on the south side of the rocks where you've stabbed them. The guard to the north, who's patrolling on the other side of the barbed wire, will run all the way around to come over and investigate (he won't sound an alarm and no one else will come). You can maneuver counterclockwise around the rocks as he approaches and stab him from behind when he goes to look at the bodies. I prefer this latter method because it quickly eliminates another guard. The Green Beret should grab his decoy and head to the southwest side of the house that is across the tracks from the train depot. Watch the two guards patrolling north so you can run out and stab the guard patrolling in front of the house when they are walking away. Put his body on the southwest side of the house. When you can, get inside the house through the door on the southeast side. Wait till the train is in place and both guards are heading away and stab the left guard (the one whose patrol takes him along the tracks) as soon as he turns. Carry his body and put it with the other one. Place the decoy in front of the door and get back on the SW side. Turn it on when the other patrolling guard gets close (if you put the decoy too far north the standing guard will come over too). Turn it off once he hears it and wait for him to investigate. When he does, run up behind him and stab him. You can try the same thing for the standing guard or just sneak up behind him, wait until the guard patrolling on the train platform moves away, and then stab him and carry his body south.
Now you need to move your Green Beret all the way to the right and as far north as you can without being seen by the guard standing on the platform. When a new train arrives and the guard's line-of-sight passes over you to the south, get up and sprint north and then drop down again before he sees you. 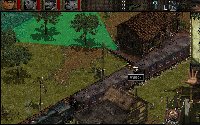 Crawl around the end of the train and go behind the rocks where the guard to the far right can't see you. Crawl around behind him as he heads right and stab him. You need to dispose of the next two guards (the one standing still and facing the river behind the train station and the one patrolling the platform) in the same manner. Wait until the guard patrolling along the tracks to the south turns and heads that way, sprint out, stab the guard from behind, and quickly carry him to the far side of the train station where he can't be seen. After disposing of both, do the same thing to the guard standing on the platform by first running over the the SW side of the house when the patrolling guard turns, and then sprinting in to stab him when his gaze shifts from your left to your right. You can kill the last two guards from behind in quick succession when the guard moves south again by first stabbing the standing guard and then the patrolling guard.
Getting the boat is pretty easy thanks to some fairly clueless guards. Have the Marine swim over to the lone guard patrolling to the top right side of the little peninsula. First wait until the two guards patrolling east-west head west and then stab the lone guard from behind (doesn't matter what direction he's heading). Everyone will run over to investigate, then return to their business. 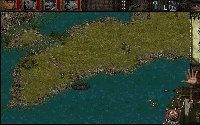 You can then get the lone standing guard from behind when the others are turned, then stab the single guard patrolling to the left when he resumes, and then the two guards using the harpoon and then the knife. Don't just hop in the raft and begin rowing back to shore, though. Fold it up and put it away, and swim back to the eastern coast. Have your Driver make his way north as stealthily as possible, avoiding any straggling guards. The Green Beret should have cleared a nice path for him, so it should be a pretty easy task. Once the Driver and Green Beret are together, move them west to the water's edge to meet up with the Marine. If there are any guards milling about by the water, have the Green Beret take them out silently. Your goal is to make sure the coastline and water are free from the prying eyes of any soldiers. Once the coast is clear, have the Marine inflate the raft, so that he, the Driver and the Green Beret can get into it. Row to the west, across the river and back to where you found the raft; squeeze between the two islands and come to a stop on the shoreline. Quickly get out of the raft, fold it up, and hit the dirt. Have the Marine jump back into the water and don the scuba gear for some added safety.
From there, pan the screen over to the upper lefthand corner and behold your salvation -- a beautiful, unstoppable Panzer II tank. To the southwest of your position are several guards, both stationary and patrolling. 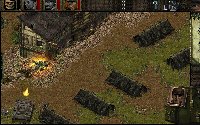 Using the tents as cover, have the Green Beret make his way down, killing soldiers as he goes. Take your time and do it right, always making sure the bodies are hidden behind a tent. Use the noise maker if necessary, but remember that your Driver to the north is in the open and vulnerable; make sure none of the guards see him. When the Green Beret's dirty work is done, it's time to move the Driver to the tank. Once he's inside, the fun really begins! That Panzer II is completely indestructible to everything else in this mission, so you have free reign to destroy everything on the western bank of the river. To the south is an SDKFZ 231 -- take it out with one shot. Then destroy the bunker by the bridge and the machinegun nest to to southwest of that. When every soldier, vehicle, and structure has been destroyed, make your way south to the water's edge, just below the bridge. From there, you'll even be able to shoot at the island in the middle of the river -- where the Sapper's explosives are located. Kill all of those soldiers, and then move back north to the mouth of the bridge. Although you won't be able to cross the bridge and get to the other side of the river, thanks to those metal barriers, you can destroy the first section of the bridge with the tank's gun. Just shoot at the first section (right where that leftover charge is sitting) and that part of the bridge will go kaboom. When all that is done, have the Driver leave the tank and rejoin the Green Beret and Marine all the way north. Use the raft to cross back over to the other side of the river; after you've landed, have the Green Beret and Driver make their way back to the south, where the Sapper is. Now it's time for the Sapper to go to work. The middle island is now clear of all soldiers, so the Sapper (who is the only commando who can actually pick up explosives) can go retrieve them. Have him travel north to the Marine and the raft, taking the same route as the Driver and Green Beret. The Marine can then ferry him safely to the island (travelling west and then south, to avoid any guards on the southern shore) where he can grab the bombs. Once that is done, return to the spot you left from, pack up the raft, and have the Marine and Sapper rejoin the others to the south.
The final phase of the plan is now at hand. Because you used the tank to destroy a section of bridge, the Sapper has an extra bomb in his inventory. Have him crawl southwest, far enough away from the escape vehicle so that it can't be damaged in the explosion to come. 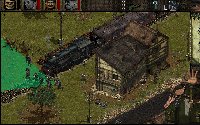 When the train goes by, plant a bomb right there on the ground. If you timed it right, the train will have just gone by and the group of five patrolling guards (or the single stationary guard in front of the bridge, if you haven't killed him yet) will yell for you to stop. You want to attract the attention of the five guards, and then hit the dirt so they can't see you. Crawl away as fast as you can to the east, with the guards in hot pursuit. When they pass over the spot where you planted the bomb, detonate that baby and send them all to hell.
From there, the rest of the mission is a piece of cake. Move south and then west, following the edge of the screen. Move your way up to the bunker and destroy it with a grenade. If that stationary guard is still there to the right, he may turn to look but he won't come over. Wait until he turns back to the east, approach unseen, and shoot him. Then, with all the guards out of the way, you can plant the other two bombs on the bridge (right where the leftover charges are) and blow it sky-high. When the deed is done, hop into the escape truck and it's mission accomplished.