 Mission 13
Destroy ChemicalSupply
Battle tactics

 Click here.

Mission
briefing
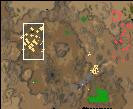
You start on the southern portion of the map, all the way at the
western edge. You have a pair of Disruptors, two Hover MLRSs, and an
MCV.
The initial problem is finding a suitable place to locate the
Construction Yard. While there is Tiberium in the area, you are
forced to move on a very narrow strip of beach as you enter the
mission. The area to the south is littered with Tiberium veins, which
are potentially fatal to your vehicles. Move east along the beach
until you find a large clearing that contains a NOD Laser guarding a
set of chemical tanks.
Destroy these, and put your base here: it's large enough to
accommodate several good structures. Set down the Construction Yard,
put your units around it and get the base up and running. Quickly
create Component Towers armed with RPGs: configure your building
efforts with this as your goal. NOD occasionally hits you with
chemical missiles, so keep your structures repaired and move your
units when you hear a launch has occurred.
When you can, send a few units farther east along the beach.
Running your Hover MLRS out into the water pays dividends, too: if
you fully explore the water and beach area, you discover some
important facts about the terrain. First the NOD base is located on
much higher ground across the river from you. There's no suitable
place on the north side of the river for an amphibious assault.
Second, the only ground route to the NOD base goes through a huge
Tiberium vein field. You must concentrate on using infantry, or
accept that damaged units will lead your attack. You can get rid of
the Tiberium Veins by using Hover MLRSs on the little 'mouth' in the
middle of the Vein field. Target it and wait a while, it will blow
out green Tiberium clouds with every hit, but eventually it should
die and the Veins will recede. The MLRSs scouting through the water
should target and destroy any SAM sites they spot on the cliff
walls.
Fortunately, the terrain works against NOD, too. The vehicles they
send to attack your base (except for Devil's Tongue tanks and APCs)
arrive seriously damaged by the Tiberium Veins: this lets you get by
with slightly lighter-than-normal base defenses. Putting Pavement
down at every opportunity helps prevent subterranean attacks from
erupting inside your base.
Now it's time to execute a two-pronged attack on the NOD base. One
prong consists of sending aerial units behind NOD lines to attack
their power supply. At the same time, the second prong performs a
frontal assault to breach NOD defenses and gain access into the
base.
Because you destroyed the SAM sites guarding the cliffs earlier,
you can sneak a few aerial units around to the side and into the back
of the NOD base. Build a handful of jump jet infantry (rather than
Orcas, which are more expensive and must return to base to be
rearmed), and send them across the river and all the way up the map's
western edge. Hug the edge as much as possible to avoid the NOD SAM
sites located in the center of the map. In the northwest corner, a
small island provides a perfect staging area for the attack.
While the jump jet infantry are moving into position, send a large
group of vehicles across the Tiberium veins in the southeastern
sector of the map. If you mass them together and send them all across
at once, only a few take damage - many come through completely
unscathed. Run these units up the eastern edge of the map to the
north side of the river, then follow the road west to the front of
the NOD base. Use Titans or MLRSs to pound the base defenses, but be
careful to stay out of the Obelisk of Light's range. Make sure you
have a sizable force at the front of the NOD base. NOD harvesters
leave through this front gate periodically and your units are
perfectly positioned to destroy them. A good-sized force will have no
trouble eliminating every harvester that wanders by.
Now return to the jump jet infantry. From their staging area, move
them southeast to a huge area filled with Advanced Power Plants just
asking to be destroyed. These are lightly guarded by rocket infantry
and the occasional Stealth Tank, but your units should have little
trouble taking out two or three of them, which is what your main
force is waiting for.
With the power down, attack and destroy the Obelisks of Light
guarding the main entrance to the NOD base. Setup up an internal
perimeter and move in with engineers to grab whatever you can. The
Hand of NOD is a prime target, as is the War Factory, because it
allows you to produce vehicles in the heart of the NOD base. You may
want to set up a Service Depot here to repair damaged units already
here.
NOD does have a few artillery pieces guarding the area. Move the
remaining jump jet infantry or new ones from your main base, through
the front entrance. Direct them to deal with the artillery you
encounter while your main force handles any other NOD units. Taking
down the Obelisks will probably be enough to turn the power back on,
so hit the Power Plants again when you have replaced any losses in
your jump jet infantry force.
With an established foothold in the NOD base, it's just a matter
of time before resistance is squashed. Destroy every NOD unit and
structure remaining, including any Laser Fence emitters, to complete
the mission.
Nod forces
statistics
