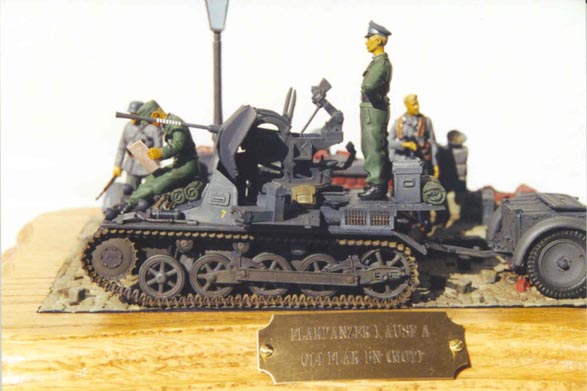
Flakpanzer I Ausf A by Brian Bocchino
Reference:
· The Military Machine, Volume #1
· Panzer I, Horst Scheibert, Schiffer Military History
· Badges & Insignia of the Third Reich, by Brian Davis
Kits:
· Italeria Panzer I Ausf B
· ADV/AZIMUTH Flak Panzer Conversion
· Tamiya Flak Gun
· ModelKasten Tracks
· Verlinden Figures
· Verlinden Street Corner
· Miscellaneous accessories from Warriors, Armand Bayardi, Verlinden, Royal Model
Modifications:
· Shorten Italeria hull.
· Scratch built raised armor section in front.
· Scratch new floor.
· Added Interior Visors.
· Added miscellaneous internal details.
· Scratch new mount support for the Flak Gun (not the Flak ring, but what supports it).
· Scratch the 3 armor sides (Left, Right, Rear) to included rivets and support arms.
· Modified shield on Flak Guns per reference.
· Modified rear with plastic strips to achieve proper height.
· Drilled out Lights and filled with clear glue.
· Added wiring to horn.
· Scratch muffler covers.
· Replaced tools.
· Rebuilt some the suspension that was not salvageable.
· Drilled out machine gun barrel.
· Filled/Removed various sink holes.
· Added ModelKasten Tracks.
· Scratch new toolbox on side of trailer.
· Scratch trailer hitch pin.
Flakpanzer I
Hull: Started by removing the rear section as shown in the ADV/Azimuth instructions. The instructions were very vague. Constant test fitting of the major assemblies on top is required to insure the proper amount is removed and at the correct angle. Next I removed the last outside guide wheel attachment with a detail remover. This area was sanded down, once finished; steel wool was lightly burnished to remove all sanding marks. After having removed the bulk of the inside wheel marking locators with a clipper, a Dremel tool was then used to grind flush. Testors white putty was used to fill all holes and ejector marks. After examining the inside, I still was not satisfied, so I took the thinnest plastic card that I could find and cut out a new floor. The upper structure requires modification of the Italeria hull by removing everything from the crew access door to the rear. Then some very thin plasticard was cut to make the front structure higher.
The new resin rear is not high enough, so a piece of plastic strip was added to the both the top and bottom to achieve the correct fit.
Suspension: After spending the better part of 45 minutes cleaning up the metal suspension pieces, I then spent 20 minutes trying to figure out how to assemble them. Comparing the Italeria's kit parts to the metal parts, the Italeria parts are of far better quality than the metal ones. ADV/Azimuth provides resin 2 wheels, but no instructions as to their placement. Since the wheels are more oval than round, I figured I was way ahead by not knowing which plastic wheel they were suppose to replaced. Now having said all this, I still had to use the metal parts because the suspension on the "A" model is very different than a "B" model. The oval wheels presented a challenge. I could not find suitable replacements nor was I going to attempt to make my own. I had to use them, put the flattest part on the ground/top for the tracks to hide. These are idler wheels and because they rested on the ground, the tracks were very susceptible to being thrown.