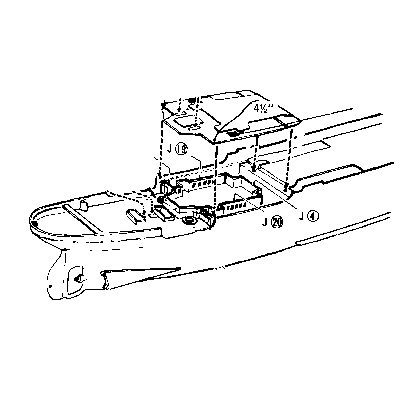
The next step we'll do Promenade, Restaurant and SmokingRoom walls.

Drill 4 holes where the yellow dots are. You'll need these later ! These holes are drilled HORIZONTALLY parallel to the deck. These holes should be directly behind parts G23.
Step 8
Lets start with the library walls. Holes should be drilled
inside the library to allow light to come up from the hull. Paint the inside
of the library walls Aluminum Gloss Enamel and the outside Flat White.
Using your pinvise, drill the lamp locations. You can also drill a lamp
on both parts G36. Pass the fibers and cement in place. The roof of the
library should be painted Aluminum on the inside as well.
The next step we'll do Promenade, Restaurant and SmokingRoom
walls.
Drill 4 holes where the yellow dots are. You'll need
these later ! These holes are drilled HORIZONTALLY parallel to the deck.
These holes should be directly behind parts G23.
The walls should be painted Aluminum Gloss Enamel on the
inside and Flate White on the
outside. The Aluminum is so that light doesn't shine
through the walls. These particular parts are fairly
thin and the Aluminum makes them opaque.
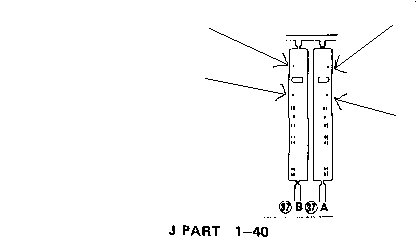
In the image below you see parts J37A and J37B the arrows
are pointing to two lights that are just outside
of two doorways. Typically the lamps are close to doorways
or hatches.
The fibers basically go anywhere where there would be
a lamp or fixture on the real Titanic.
 This comes from diagrams in
the manual for Part Sheet J
This comes from diagrams in
the manual for Part Sheet J
Once your walls are painted, drill the holes for the fibers using a pinvise.
If you look closely at the walls you'll see where the
lamps are. Using an Xacto knife
cut away the pre-marked lamp detail . This will avoid
your drill bit jumping around and
allow you to drill a neat hole.
The fiber I used is approx. 1mm thick
so that gives you an idea of how big the drill bit is.
Don't glue your fibers in place yet. You should first
glue down your walls and then pass the fibers and secure in place.I used
instant CA glue to secure the fiber in the hole. This not only holds the
fiber well, but also fills in any gap between the
hole and the fiber not to mention it dries really quick.
I didn't use actual glass Fiber Optic but this new PMMA
plastic fiber I found. Great stuff !
Cuts much easier than glass fiber and is a pleasure to
work with.
Always dry fit each deck as you progress before commiting
to actually gluing down the deck.
Step 9
Promenade deck
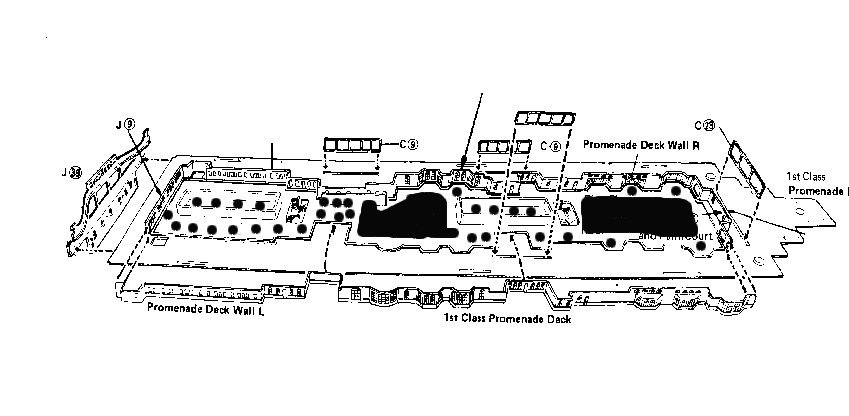
Drill your holes progressively
on the promenade. Drill and then dry fit to see where the light is going
.
Drill more holes as required. Keep
in mind the position of the tubes we installed earlier and make sure
you have an opening on the Promenade
deck for them.
Paint Promenade walls, pass fibers
and cement them to the walls. Always test the lighting of each fiber
before actually cementing it to
the wall.

![]()
Where
to get the Fiber Optics ?
Back to Titanic
Fiber Optics