 .
. 
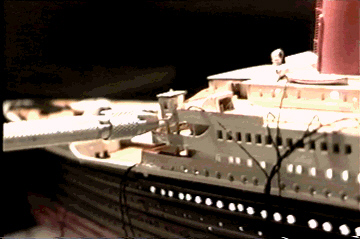
Step 13
Port and Starboard lights
Let's put in the two nav lights now. This step can probably
be addressed much earlier in construction
but I only did it now. It's not that difficult if you
take your time.
Using a pinvise with a tiny drill bit drill both Port
and Starboard lights making sure your bit goes under
the boat deck and doesn't damage the deck. If you take
it real slow, you can see your drill bit peeping through the deck and avoid
further damage. Ideally you want to drill at an angle so the bit passes
under the boat deck and into the first class room area right under the
bridge. The fiber will get it's light from the ambient light inside this
room.
.
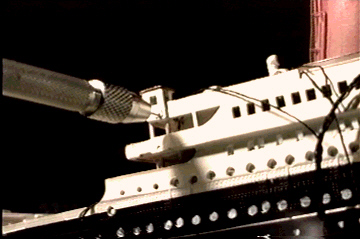
Experiment with different lengths of fiber in order to obtain your desired lighting effect.
 .
. 
Paint the surrounding area around your fiber tip Red on the Port side and Green on the Starboard side.
Push a fiber through the hole and make sure it goes into the 1st class room section. Push it in so that it's almost flush with the plastic.
Using a pin or a needle, place a small drop of CA Glue
over the tip of the fiber and let dry. Make sure the model is lying on
it's side so the glue doesn't drip down. Once dry, paint the tip of the
fiber green or red.
This will create a kind of lense for the fiber a make
a nice lighting effect.
![]()
Where
to get the Fiber Optics ?
Back to Titanic
Fiber Optics