The
MPLAB PIC-simulation tool
An introduction
Introduction
On this page you will be introducced to the MPLAB simulation tool using a
simple example program & application for the PIC16F84: LEDSRUN.
MPLAB is a powerful tool to assemble and simulate your PIC program before
you burn it into your PIC.
« Download MPLAB (10 Mbyte) from
www.microchip.com or
HERE & install by running the "mpLAB520ful.exe"
file.
Newer versions of MPLAB are available, but they do not fully match this
tutorial.
The tool is especially suitable to debug your programs because you can check
all registers flags and so on
as you step through your program. The "animate" feature enables you to run your
program is slow motion
at a few Hz so you can follow its steps.
"LEDSRUN": An example:
This page will get you started with MPLAB by means of an example "LEDSRUN".
LEDSRUN is a running light built with a PIC16F84 ÁController as in the
schematic below.

First Build the circuit below (use an 18-pin IC socket for the PIC)
Then follow the manual step by step to get started with MPLAB.
Getting started with MPLAB
- Create a project folder
Use the windows explorer to create a project folder e.g. c:\work
Then download the PIC assembler program file ledsrun.asm into this project
folder.
(You can examine the assembler program ledrun.asm using notepad.)
- Start MPLAB
Start MPLAB with : start, programs,
Microchip MPLAB, MPLAB.
Use the leftmost button of the toolbar to choose the toolbar you see
below:

- Create a project
First open the example file "ledsrun.asm" with: file,
open, <browse to c:\work\ledsrun.asm>
«You will see the program "ledsrun.asm" in a text editor window.
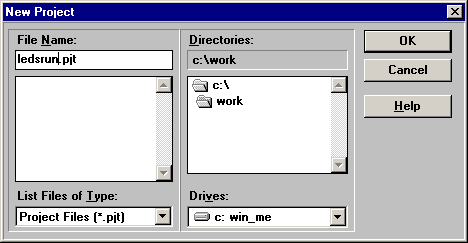
Then create a project named "ledsrun" with: project, new project, <browse
to c:\work\>, type ledsrun.pjt:
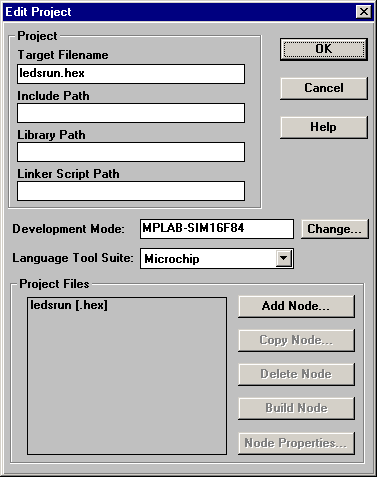
Then click on add node in the window that pops up:
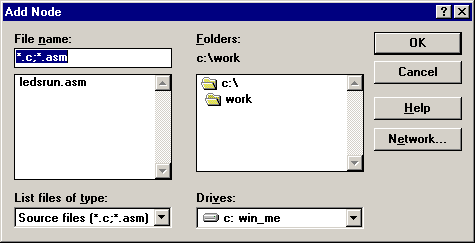
Select "ledsrun.asm" and click on OK for the "add node window" and OK for
the "edit project window".
Now save the project with: project, save project
- Assemble the program (build all)
Assemble the program using: project, build all.
The build result window will show that the program is assembled
succesfully:

«The following files are created in the project folder c:\work:
-ledsrun.hex = the hex file that can be
burned into your PIC
-ledsrun.err = txt file with
description of all program errors and warnings (empty if all is ok)
-ledsrun.lst = Absolute listing file
generated by assembler/compiler
-ledsrun.pjt = Project data file linking
the files for MPLAB
-ledsrun.cod = Contains symbolic
information and object code
-ledsrun.bkx = Backup hex-file generated
if you build more than once
- Create a watch window
With a watch window you can check the contents of registers
while stepping through your program.
Create a watch window using: window, watch windows, new watch window
(if this option is not available make sure to enable the MPLABSIM-simulator
in menu: <options, development mode>)
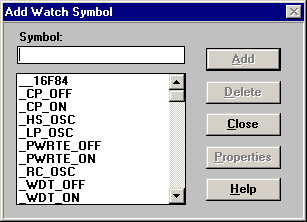
Select the following registers for the watch window by selecting them and
clicking the add button::
-count1: counter used for delay
-count2: another counter for delay
-leds: portB outputs
which drives the leds
-STATUS: status register which shows the set up of the PIC
-w :
accumulator
- Start the simulation
Start the simulation using : <debug, run, animate>
The program will be executed at e few Hertz, the values of the registers in the watch window
are updated continuously.
You can also step through the program, use power on reset and so on.
- Other options
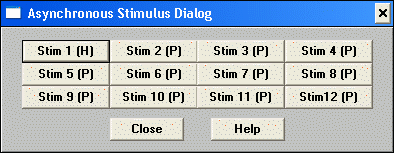
-Add input signals: use: <debug, simulator stimulus, asynchronous
stimulus>
Use your right mouse button to change the input of the pin (low, high,
toggle):
-Set the clock frequency using <options, development mode, clock>
-Switch on/off the watchdog timer in <options, development mode,
configuration>
BACK TO MAIN
PAGE


