How to DO it
Instead of a long "How To" expose', I thought I'd make this section sort of like a "Show and Tell". As each step is explained, I will try to accompany it with as many photos as possible. I think that the visual approach gets the point across much better. It may take a lot longer to view the page, especially if you're using a modem, but I think it's worth it. Please remember, this is only MY way of flake over grinding. I'm sure Dale Cannon, Scott Van Arsdale, and other pros do it differently. In fact, my style is sort of a conglomeration of what I've seen other people do. Also, since I'm not quite a millionaire yet, and those grinding wheels ain't cheap, I do everything I can to save on the life of that precious wheel.
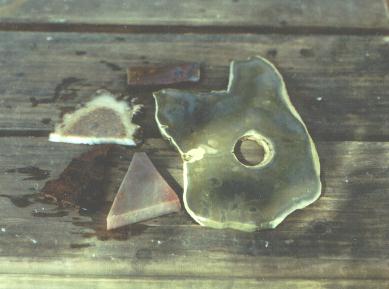
The first step in making a lap knapped point is to select the slab or preform for your project. It should be slightly wider and longer than the intended finished piece.
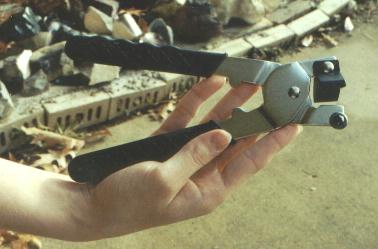
You may need to score and snap the slab into approximate size. This can be done easily with a pair of tile cutting pliers. I then take a pair of regular pliers and further shape the piece by crushing the edge into shape. This saves on my grinding wheel because this is just that much less shaping that I have to do on the grinder.
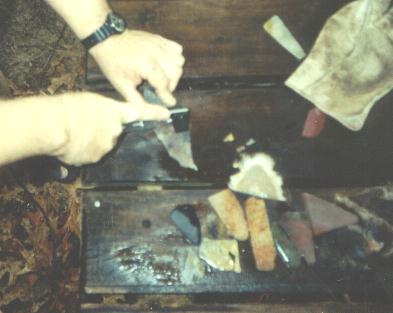
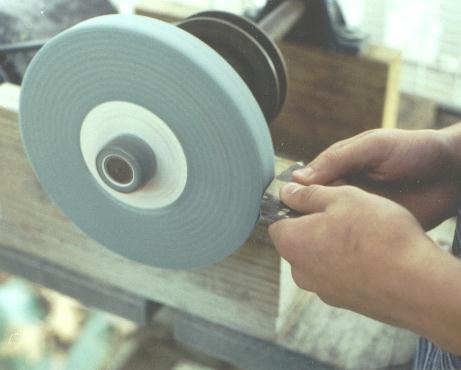
The next step is to grind a rough edge on the slab (preform). This is done to allow the pressure flaker to get a good grip. I also slightly shape the piece more at this stage.
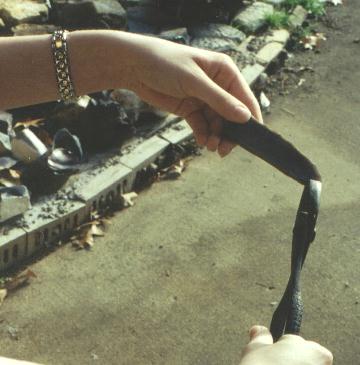
We are now ready to remove the first row of thinning flakes. I use a rubber pad and work from one end to the base, and then from the base to the end on the other side. The basal area itself is done last. Remember, the side that is facing up when grinding is the side that must be placed face Down on the pad. This will be the side that the flakes come off of.
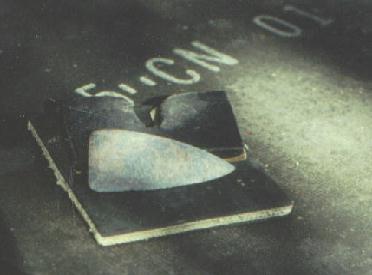
Do the same thing for the other side. Additional shaping to the piece is also done at this time. At this point, the preform should be noticably thinner and have a bit of lenticularity.
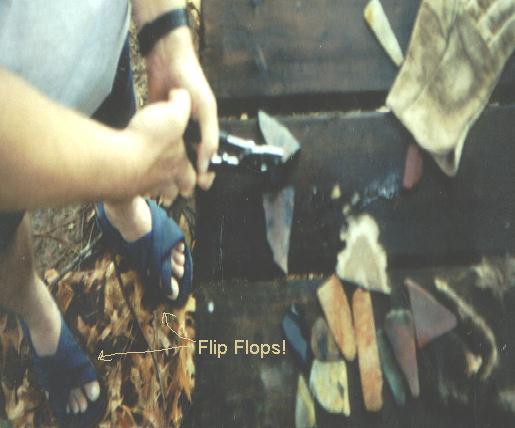
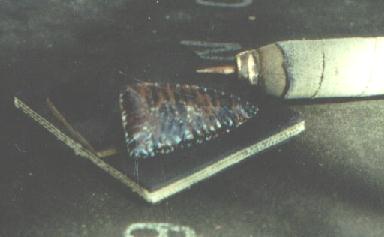
At this point we are ready to grind the preform into shape and cross section in preparation for the final set of flakes. Begin by grinding the edges from both sides to get good lenticularity. At the same time, try to establish the intended shape of the point. Be sure to keep checking that the edges are even and that the shape has the proper contour. When finished, the entire surface of the preform should be ground smooth. Try not to leave any nicks, dips, or obvious flat areas because these will have a tendency to stop your flakes from traveling.
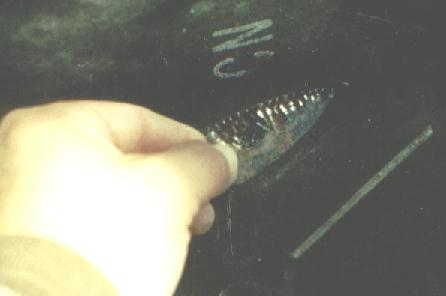
We are now ready for the final pass. Make sure you have an adequate platform by passing the preform on the wheel lightly with the side you want the flakes to come off of facing up. Just as before, this side will be placed face Down on the pad. Always start from the end farthest away from you and work toward your body. I personally like to start from the pointed end. As you work, move your flaker back about 1/8 inch after each flake. Check every couple of flakes to make sure you are going at least halfway across the preform. If not, you may have to apply more pressure to get the flakes to meet in the middle.
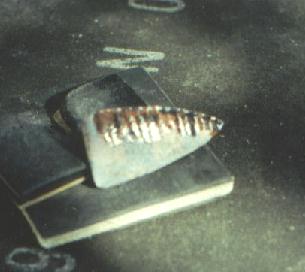
Once the first series is removed, the other side of the same face is done, then the basal area is flaked to catch those areas that were not reached from the sides. At this point, on smaller preforms it is probably better to shear off the deltas and straighten the edge before establishing the platform for the other side. The deltas are the little V's left in between flake removals. On larger preforms, grinding the platform back in usually is sufficient because a larger, stouter platform is used.
The platform for the second side is prepared just as for the first side, and flake removal is the same. You may need to be a little more careful, however, because flaking the first side has made the preform thinner. Once this side is completed, you need to shear or re-touch the deltas in order to get a nice, clean edge.
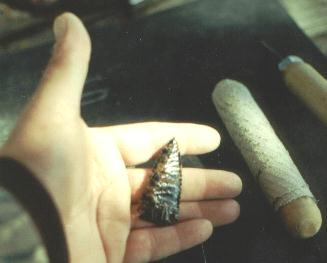
You now have what is basically a finished point. All that is needed is a little touch up, edge straightening, notching, or whatever to complete the point. Keep in mind that if you are replicating a particular point type, that not all types were oblique or parallel flaked. Many were randomly flaked with no discernable pattern. This can be done using this technique by varying the spacing of the flakes and the amount of pressure applied.