SuperCharger 1.6L Pulley Upgrade & Crank Pulley Mod
This page outlines the steps I took to replace the stock 1.6 Sebring
pulley with the pulley I have had made and is identical to the pulley used
by the 1.8 Sebring kit. Adding this 1.8 pulley should net the owner another
2 psi of boost. By modifying the crank pulley, another 4 lbs of boost can be found. Using this pulley should not harm your Sebring SC. After all,
you are spinning the SC the same speed that the 1.8 kit spins it with the Moss 1.8L boost upgrade. At the upper limit of the published design specs.
This page does not address the fuel delivery issues that arise from
raising boost. You must compensate for the inevitable
lean conditions that will occur when you raise the boost of your SC or serious
engine damage will result. If you add both pulley mods, you must also add an intercooler. You've been warned!
SuperCharger 1.8L Pulley Installation
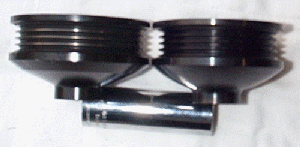
First lets look at the pulleys. The left in each picture is the orginal
from the 1.6. The right is the new 1.8 pulley. The pulley diameter for the
1.6 is 3 1/8" and for the 1.8 it is 2 15/16". The measurements
were taken edge to edge. All other specs are identical.

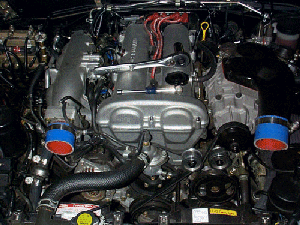
Now a few pictures of the pulley removal and replacement process. First
I removed the crossover tube. Next I placed a thick double sided rubber
gasket material around the pulley and tightened a large C clamp over the
pulley. I then held the C clamp while loosening the SC pulley nut. The nut
was secured with locktite so there was a steady pressure until the nut was
removed. I left the belt on for added protection to the pulley.
Note: I left the paper on the material so that it could be seen.
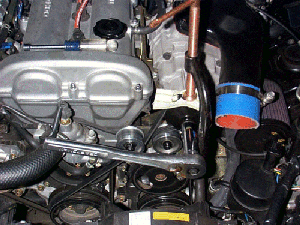
Now remove the belt. I cut mine as it was the easiest and I figured
I would need a different size. Once I put the new pulley on I tried my spare
and it fit like a champ. So if you can, save that belt. It can be reused.
This next step is critical. If you do not have a suitable puller go
out and buy one. Using the right tool here will make the difference between
an easy and successful experience and a long unsuccessful day.
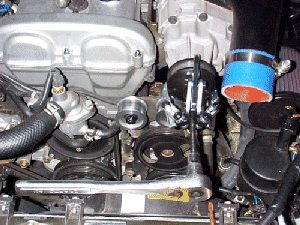
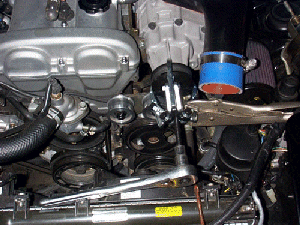
Once the nut is off you'll need a three jawed adjustable pulley puller.
They can be found at Autozone or Pep Boys for about $20. Mine is manufactured
by Cal-Van and is part # 134. Simply install the puller and gradually tighten
up the slack until the pulley starts moving off the shaft. DO
NOT STRIKE OR HIT THE PULLER OR SC SHAFT TO BREAK THE PULLEY LOOSE. Once
the puller is in place I used a large pair of visegrips to hold the pulley
in place while I removed the pulley with the ratchet. I didn't tighten the
visegrips on the puller. I simply used them to give me leverage as the pulley
wanted to spin when I applied pressure with the ratchet.
To install the pulley, simply lube the SC shaft and the inside of the
new pulley with a light oil. Then line up the key on the shaft with the
key in the pulley and push it on. It's a tight fit and requires a little
rocking motion. When it hits the key it will tighten up significantly. I
could not push mine on far enough to use the nut to tighten it down soooo...
I <> tapped the pulley
on with a SMALL rubber mallet. I want to repeat this step again. I <> tapped it on until
I could thread the nut on. I then used a small strap type oil filter removal
tool with the rubber gasket material placed around the new pulley to hold
the pulley in place while I bottomed the nut. An old inner tube will work
just as well. I reinstalled the belt and test drove the car. Sorry for lack
of pictures on the install but my hands were full... the oil filter tool
required constant pressure while I tightened the nut.
1.6L Crank Pulley Modification
Thanks to Ross Neder, Nigel Soult, Chris Erber, and others on the SSCOR List. They blazed the trail over a year ago. I am just now catching up and documenting my experiences with this upgrade.
OK, Lets see what we need to make this happen. Take a trip to your friendly Auto Salvage yard and ask for an 87-89 Cavalier 2.0L 4 cylinder engine Harmonic Balancer. There are several variations out there. They are interchangable on the GM motor, but we want the old fashioned harmonic balancer.
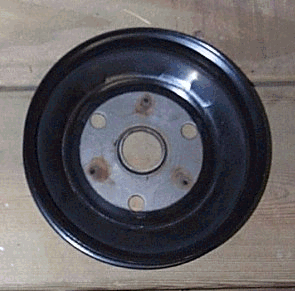
Be sure and get the right one. Below are two that I found. The one on the left is the correct one. It can be seperated rather easily. The one on the right is a pulley of the same dimensions but is of no use for our purposes. It is of one piece welded construction and won't work. Both came off GM 2.0L 4 cylinder engines.
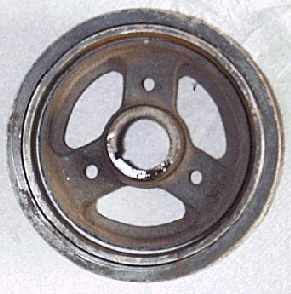
Once you have secured the correct balancer, it's time to disassemble it. I secured the balancer in a vise and heated up the rubber compound that holds the outer ring to the inner hub. As I applied heat, I forced a thin blade through the rubber and pushed it out. Once I had it heated up sufficiently, removal was pretty easy. The picture below shows the ring removed from the hub. All we want is the ring.

Now that you have the ring off and cleaned up it is time to remove your miata's harmonic balancer. On my 93 1.6L engine all that was required was removal of the belts and 4 10mm bolts and the balancer was in my hand. I pulled the water pump pulley instead of loosening/adjusting my alternator to remove the water pump/altenator belt.
At this point you'll need to either remove a few hundredths of an inch from the ring or your balancer. It is easier to remove the material from your balancer and it won't suffer from the slight loss of material. Once you have a good fit, simply slip the ring over your balancer insuring the raised ridge on the ring faces to the front....
...or you can do as I did, and press fit the ring over your balancer. I lightly oiled the ring, put the two parts together and used my large vise to press the ring over my harmonic balancer. It popped over the outer ring, then again over the inner ring as it seated.... I rotated the assembly several times during the process. Stop applying pressure when the ring has seated against the alternator V pully.
>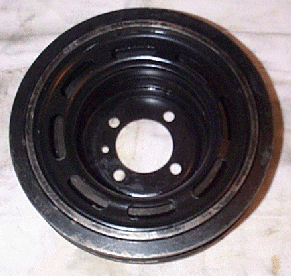
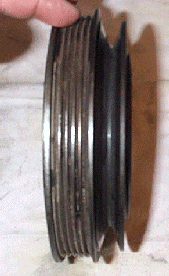
Now that you have the ring in place simply have it tack welded. I tacked mine in 4 places with a Mig welder at a local muffler shop.
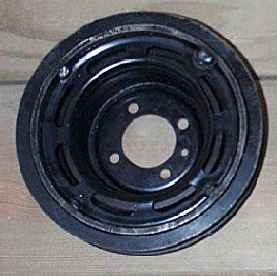
This completes the mod to the pulley. Put it all back together. A few notes, I replaced the 10mm water pump pulley bolts with allen head bolts to minimize belt to bolt contact. The tolerances are very close here. New 4 rib SC belt is part # K040535.
The new ring is a 5 ribbed pulley. I used the outer 4 ribs and find that the belt now centers perfectly on the idler pulleys.
SC speeds are calculated as follows:
The new crank pulley is 155mm measured at the top of the ribs.
1.8 crank pulley is 69mm, some say 67mm...anyway lets go with both sets of numbers.
67mm SC pulley data
155mm / 67mm equals a 2.31 to 1 crank to sc ratio
7000 engine rpms x 2.31 equals 16,170 SC rpms
69mm SC pulley data
155mm / 69mm equals a 2.25 to 1 crank to sc ratio
7000 engine rpms x 2.25 equals 15,750 SC rpms
7200 engine rpms x 2.25 equals 16,200 SC rpms
I have my rev limiter set at 7K right now and I'm seeing 10.5-11.5PSI before 5K.
Well that's it - have fun and feel the need for speed!


