=================================================================================================
mIRC dialog's, How To By Tym
=================================================================================================

To open a dialog with the bare minimum command: /dialog -m dialogname dialogname
In my demo (temp being the dialog name) you would open the dialog like this: /dialog -m temp temp


Learning the X Y W H:

X = Horisontal (side to side)
Y = Vertical (top to bottem)
W = Width
H = height

All are mesured in pixles, every item in a dialog (except menus) require XYWH.


dialog temp {
title "this is a test"
size -1 -1 300 200
button "ok", 100, 125 175 50 20, ok
}

As you can tell dialog temp { names the dialog temp you may name the dialog whatever you wish.

title "this is a test" as you can also see this sets the title of the dialog, You may change this to whatever you want the title to be.

size -1 -1 300 200 : This sets the position and size of the dialog
-1 -1 meens centered in the screen you mayy specify a position on the screnn if you wish
I.E: 300 200 (these are mesured in pixels) 300 200 would equal 300 pixles in and 200 pixels down.

As for the other 300 200 These specify the size of the dialog, also mesured in pixels.

button "ok", 100, 125 175 50 20, ok : 100 is the button ID, XYWH, ok is the type of button it is.
in any dialog you must have atleast 1 ok or cancel button, An ok button closes the dialog
unless edited. A cancel button does the same but the ID of the cancel button will be triggerd
if the X in the top right corner is pressed. you may hide the ok or cancel button by making the
XY larger than the dialog (Off the dialog).


Learning ID numbers:

All items in a dialog require an ID number, this is how mIRC can tell what is what. this
number will help you control and use the item.

dialog temp {
title "this is a test"
size -1 -1 300 200
text "My dialog", 2, 5 5 290 15, center
button "ok", 100, 125 175 50 20, ok
}

Text "My dialog", 2, 5 5 290 15, center : As you can see anything within the ""ĺs is what will be
displayed. u may replace this with a %var, If you donĺt know about ID numbers or XYWH goto the
first section, the center command just tells mIRC to center the text within the W you gave it. You
can also use right wich will align the text to the right.
dialog temp {
title "this is a test"
size -1 -1 300 200
text "My dialog", 2, 5 5 290 15, center
Edit "", 5, 5 20 290 60, multi, return, vsbar
button "ok", 100, 125 175 50 20, ok
}

"" is the starting text, if you would like your edit box o start with text in it, this is where you
would place it, you may also replace it with a %var.
right Aligns text to the right of the editbox
center Centers text within the editbox
multi Tells the dialog to treat the edit box as a multiline box, not just one big line.
pass This is used for password boxes, it changes text entered to *** for passwords
read Makes the box read only, so users canĺt edit the text in the editbox
return tells the dialog that if you hit enter, it goes to the next line, otherwise your ok/cancel button is triggered
hsbar This gives the editbox a horisontle scroll bar (Bottem scroll bar)
vsbar This gives the edit box a vertical scroll bar (Side scroll bar)
autohs Tells the editbox to Auto scroll with the text if your text passes the boundry of the editbox
autovs Tells the editbox to auto scroll verticaly with any text that you enter
limit N Tells the editbox that N is the max amout of chrĺs allowed in the editbox. I.E: , limit 10
dialog temp {
title "this is a test"
size -1 -1 300 200
text "My dialog", 2, 5 5 290 15, center
Edit "", 5, 5 20 290 60, multi, return, vsbar
Check "Option A",10, 5 80 60 20
button "ok", 100, 125 175 50 20, ok
}

"Option A" is the lable (Text beside the box) for the check box.
You may also specify Left to switch the text placement from right to left.
I.E: Check "Option A",10, 5 80 60 20, left


dialog temp {
title "this is a test"
size -1 -1 300 200
text "My dialog", 2, 5 5 290 15, center
Edit "", 5, 5 20 290 60, multi, return, vsbar
Check "Option A",10, 5 80 60 20
radio "Option 1", 15, 75 80 60 20
radio "Option 2", 20, 145 80 60 20
button "ok", 100, 125 175 50 20, ok
}

"Option 1" and "Option 2" are the lables for the raido buttons, Radio buttons unlike check
boxes allow you to choose only 1 option, notice how you can only choose ither option 1 or
option 2, not both.
You can also use the left optiom for radio buttons, just like the check boxes..
Hint:
Make an alias to open your dialog so you donĺt have to type /dialog -m temp temp every time.
In your aliases (ALT + A) place the following:
/F5 { dialog -m temp temp }
this will allow you to quickly open your dialog by pressing the F5 key.
list 25, 5 100 80 60, vsbar

By now you should know whatĺs going on. The diffrence between list boxes and edit boxes is,
list boxes is used to list and select items, you cannot type in them and they are single lines,
list form. Options are:
Sort Sort sorts the entrys in the list box 0-9 A-Z
VSbar Vertical Scroll bar
HSbar Horizontal Scroll bar
combo 30, 5 145r 80 60, drop

A combo box is much like a list box but with diffrent options and operations. Drop down style
is the most used option of the combo box. Options are:

sort	Sorts the combo box 0-9 A-Z
edit 	Allows you to edit text in the combo box
drop 	Drop style, Click on the arrow and other selections come into view
vsbar 	Adds a Vertical scroll bar
hsbar 	Adds a Horizontal scroll bar


scroll "", 35, 85 100 210 20, horizontal

A scroll bar is good for progress display an changing, I mostly use them for my MP3 players.
The options for a scroll bar are:

Horizontal 	This tells mIRC that your scroll bar is horizontal (side to side)
Range 		N This lets you set a range for the scroll bar if N was 100 then The sroll bar reading
would go from 1 to 100.

The default scroll bar is vertical (Top to bottem)


icon 40, 260 160 32 32, mirc32.exe

The Icon Item is prolly my favorite item in a mIRC dialog, it can make even the simplest of
dialogs look awsome, Here in this one I used mIRCĺs default icon from the mirc32.exe.
You may use BMPĺs JPGĺs iconĺs and EXEĺs with icons built in.
If your going to use a BMP or JPG remember to make the W,H in ratio of the BMP or JPG.
I.E: if your JPG or BMP is 300 x 200 pixles, set the icons W,H to 300 200 or 150 100, you get
the idea. The option for Icon is:
noborder This will take off the default Border that apears around the picture.
dialog Temp2 {
title "Tabs by Tym"
size -1 -1 300 200
tab "Main", 5, 0 2 300 200
tab "Options", 10
tab "Help", 15
button "ok", 100, 500 600 50 50, ok
}

As you can see tabs are relitivly easy, once you set your XYWH itĺs all down hill
The only diffrence between normal dialog items and tab Items is you must specify a tab
number for the item to be displayed in.
dialog Temp2 {
title "Tabs by Tym"
size -1 -1 300 200
tab "Main", 5, 0 2 300 200
tab "Options", 10
tab "Help", 15
Edit "This is in the Main tab #5", 20, 5 30 290 20, tab5
Text "This is in the Options tab #10", 25, 5 30 290 20, center, tab10
button "ok", 100, 500 600 50 50, ok
}
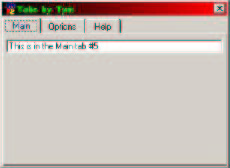
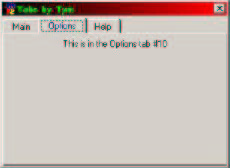
As you can see each item must have the tab number on it so mIRC knows what tab it
belongs to. If you do not place a tab# id on the item it will span across all tabs.
All dialog Items work with tabs and they all work the exact same as with normal dialogs.
This is a real nice touch for dialogs that have many controls, keeps everything in order.


dialog temp3 {
title "Menus by Tym"
size -1 -1 300 200
menu "&File", 5
item "&Open", 10
item "&Save", 15
item "E&xit", 20
menu "&Help", 25
item "&About", 30
button "ok", 100, 500 600 50 50, ok
}
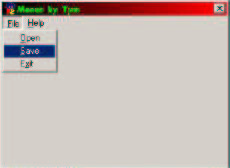

As you can see The & puts a line under the letter beside it, this is used in tandem with the
ALT key, I.E: Alt + F would open the File menu then pressing S would select Save ect...
The menu command starts a new menu, the item command places an option under the
menu. You can even have sub options like so.

menu "&Help", 25
item "&About", 30
item break, 35
menu "&Help", 40, 25
item "&Opening files", 45
item "&Saving files", 50

As you see we use the Menu command again for the Help option in the help menu, but we
gave it an extra number, this is the number of the menu it belongs to. 25 is the ID of the main
menu, so when we create a new sub menu we must tell it that itĺs part of the main menu,
otherwise it will becom itĺs own menu.
Again this is a nice way to keep the "clutter" of an active dialog to a minimum.
The /Dialog Command
The /dialog command it a command that allows you to open dialogs, change titles of dialogs,
close them, and many other options. They will be listed here..
/dialog -mdtsonkcvie name [table] [x y w h] [text]
-m create a modeless dialog using 'table'.. This is Required to start any dialog.
-a Used with -m, uses currently active winndow as the parent
-x Closes a dialog without triggering any events
-d opens the dialog on the desktop, used wwith -m
-t changes the dialogs title I.E: /dialog -t temp This is my new title
-s sets the dialogs size/pos I.E: /dialog -s name x y w h
-r centers the dialog
-o set dialog ontop of all windows
-n unset ontop setting
-k clicks the ok button
-c clicks the cancel button
-v makes the dialog the active window
-ie minimize/restore the dialog if createdd on the desktop
The minimum requirement for the /dialog command is -m I.E: /dialog -m name table
Name is the name of your dialog, in my first example it was temp
Table is for when you use the dialog, this tells mIRC that all your events with the table name
will be used. This is usaly the same name as your dialog I.E: /dialog -m temp temp
Dialog Events
Events for dialogs are like onjonĺs and such, they are triggerd by what you do in a dialog.
Just like any other event, the standard dialog event would look like:
On *:dialog:name:sclick:20: { your code here }
In this case name is your dialog name is name, Sclick is the event that is triggerd when the user
single clicks the item, 20 is the ID number we talked about earlyer that every item must have.
So We will use the first dialog (temp) as an example. Add this in your remotes.
on *:dialog:temp:sclick:40: { beep }
This is a simple script that makes a BEEP whne you click on the icon in the dialog, open it up
and try it out..
The diffrent types of events and how they are triggerd are:
init just before a dialog is displayed, controls can be initialized in this event. id is zero.
edit text in editbox or combo box changed
sclick single click in list/combo box, or check/uncheck of radio/check buttons, or click of a button
dclick double click in list/combo box
menu a menu item was selected
scroll scroll control position has changed You can also detect mouse events that aren't associated with a specific control:
mouse mouse moved
sclick left button down
uclick left button up
dclick double click
rclick right button click
drop drop click
You can use $mouse to retrieve the current mouse position.
Just like any other events you create your own code, so as you know the possibilitys are
endless. The best part of dialogs is next, itĺs $did
The $did Command
$did is how you exstract info from your dialog.
your gonna love it.
$did is prolly the best part of dialogs, this allows you to take and process what the user
enters in any edit box, text box, list box, combo box and lots more. This is how you can tell if
a check box is checked or unchecked, what line of a list box is selected and much more.
This is how it works:
$did(name,20).option
name Is the name of the dialog, as you could prolly tell from the privious pages.
20 Is the ID number of the dialog item, of course.
.option Is the info your requesting from the dialog.
Example:
Open the first dialog we made, /dialog -m temp temp
In the edit box type in something.
Then in a channel or a private chat, type:
//say $did(temp,5).text
This will cause you to say whatever text is in the edit box. Thus $did(temp,5).text is the text in
our edit box.
Also $did(name,20,n).option is used when there is more than one line or selection in your
dialog item, n would be the number of the line. For example, open the first dialog we made,
type in stuff on 2 lines of the dialog, then in a channel or chat window type:
//say $did(temp,5,2).text
This will make you say the seccond line in the edit box.
Other options are:
text returns line or Nth line $did(id) is same as $did(id).text
len returns length of line or length of Nth line
lines returns number of lines
sel returns Line Number of Nth selected line, 0 returns number of selected lines
seltext returns selected text in an editbox or first selected item in a listbox
selstart returns select start character in editbox line
selend returns select end character in editbox line
edited returns $true if text in editbox was changed
state returns 0 = off, 1 = on, and 2 = indeterminate
next returns id of next control in tab key order
prev returns id of previous control in tab key order
visible returns $true if the control is visible, otherwise $false
enabled returns $true if the control is enabled, otherwise $false
The /did Command
/did is what we use to control items in a dialog, Any Item at all in a dialog can be controled by
/did -a name 20 n string
-a is our option
name is the name of our dialog
20 is the id number of out dialog item
n is used for items that have multiple lines, editboxes, list boxes, ect... n would be the line #
An example of this:
open up the first dialog using /dialog -m temp temp
in any mirc window type:
/did -a temp 5 Hey there dialog!
Notice how the words "hey there dialog!" turn up in out editbox.
You can use $commands and %vars aswell..
Other options are:
-f set focus on id
-t set id as default button
-e enable id
-b disable id
-v make id visible
-h hide id
-n enables editbox
-m disables editbox
-c check checkbox/radiobutton list/combo line
-u uncheck checkbox/radiobutton list/combbo line
-k works with -cu, keeps other selectionss in a listbox
-r clear all text in id
-a add line of text to end
-dn delete nth line
-in insert text at Nth line
-on overwrite Nth line with text
-g set a new icon/bmp to an icon control /did -g name id [n] filename
-z resets the width of horizontal scrollbbar in listbox
-j resets the edited setting in an editboox
Contact Me
You can contact me a few ways:
IRC : server: us.undernet.org or eu.undernet.org nick: Tym channel: #mircscripts
Email : harleycordoni@hotmail.com
A.I.M : Mytellybuddon
In #mIRCScripts we are always willing to help scripters with any scripting questions you
might have, Someone is almost always there to answer your questions.
Visit my webpage: www.oocities.org/mirc_script_help/