
| Making your first UT2003 Map |
|
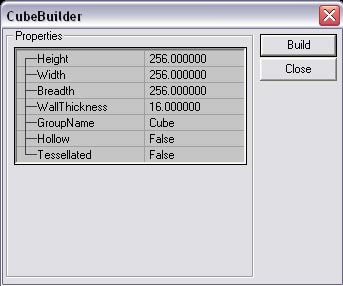
Welcome to my first Unreal Editor tutorial. I will try to introduce the Unreal Editor to people who never used it by explaining how to make a simple map. My English is not perfect, but I think it is understandable for everyone. You start with opening the Unreal Editor, which you can find in your "C:\UT2003\System" folder. The file is called "UnrealED.exe". If you manage to open it, you will get something like this:  I assume you already know something about the Unreal Editor interface, if you don't, just check this site: http://udn.epicgames.com/pub/Content/UnrealEdInterface/ which explains each button. It takes a lot of time to explain each button and we don't need most of them anyway. Please don't panic by seeing so much buttons. When I first opened Unreal Editor I was scared off seeing so much buttons and thought that this work is only meant for pros. But now I'm a medium/advanced Unreal Editor mapper, so even I can learn editing :). If you just take your time and do some tutorials you will see that mapping is not as difficult as you think. Actually, the most important thing in making maps is your imagination (this is my personal problem, I have a lack of imagination). But I will explain the buttons we use in this tutorial of course. First of all, close or minimize the texture window which blocks your view, we don't need it for now. Now you see the four view ports: The top, front, side and perspective view. If you're thinking: "What the hell is that eye staring at me in the 2D viewports?" Just relax it's the camera, the red arrow points at the direction the camera is looking at (in the 3D viewport). One thing you also have to know is that keyboard-mouse combinations are also very important in editing. For example a simple one: selection of multiple objects/surfaces occurs by holding ctrl and clicking the desired objects/surfaces. If we need such a combination I will mention that. If you practiced a little bit the navigation part, we can start building the first room! Rightclick the cube button We want a room with height: 256 width: 1024 breadth: 1024. That's enough space to move around.
Try to keep your sizes even (4, 8, 16, 32,64, 128, 256 and so on), it just makes it easier to align to the grid.
A height of 256 units is the normal height for a room so keep that in mind.
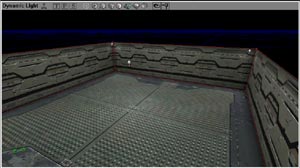
Fill in the values in the appropriate field and click "Build". Now you will see in each view port a red wire frame of the room you just built. This red wire frame is called a brush. You have to think that the initial "empty" world you begin with is SOLID, so you can subtract things from it. In the subtracted areas you can then ADD other things. You have to know this to make it easier for you to know when you have to subtract and when to add a brush. Let's go on with the room: To subtract it from the world click on the "subtract" button: To make the room visible in the perspective view just click once in the perspective view. Maybe you need to move around a little bit to find it. Saving your work regularly is important because the editor is not completely bug free, it can crash for no reason. The textures you see now are the default textures, so we need to change them to have a nice textured room.
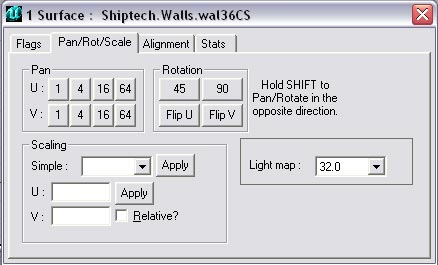
Try to move inside the room in the perspective view (if you forgot how to move in the perspective view just scroll back in this tutorial to see how to do it). The textures for UT2003 are stored in "UTX" files which are in the "C:\UT2003\Textures" directory. Each package has an own texture style. You choose a package depending on what style your map will be (Industrial? Alien style?). To get the texture browser back just click on the texture button Click File on the Texture Browser and click on Open, or simply click on the Open icon to browse the texture packages. It will be easy for you to choose the same textures as I to compare your results with mine when you're finished. Let's start texturing the floor. Go to the "floors" section and choose the texture called "Texture floor2b [DXT1]" You can see that the texture is 1024x 1024 pixels so it will fit exactly on our floor which is 1024x1024 units. You can adjust the size of each texture, but I will discuss that later on. For now we just keep it simple. To apply the texture to the floor just leftclick the floor surface and it will become blue, which indicates that the surface is selected (keep that in mind). When you have selected a surface just go back to the texture browser and click on the "Texture floor2b [DXT1]".Now the texture is applied to the floor surface. Here you can adjust various surface properties, but for now we just need to scale down a texture. You do this by first clicking the "Pan/rot/scale" tab. Under this tab you can pan a texture, rotate and scale it. We will do a simple scaling by choosing one of the scaling numbers in the dropdown menu. We wanted to scale it 4 times down, so that means we choose "0,25". If we choose "0,5" we would scale it down a half time, that's not what we want.
You can also adjust the size in the U and V directions (horizontal and vertical). But it is not necessary for now. When you did this click on "apply" and you can see in the perspective view that the scaling is applied. What do we need more to make a map playable? Indeed: Lights, otherwise you will play in a dark box.
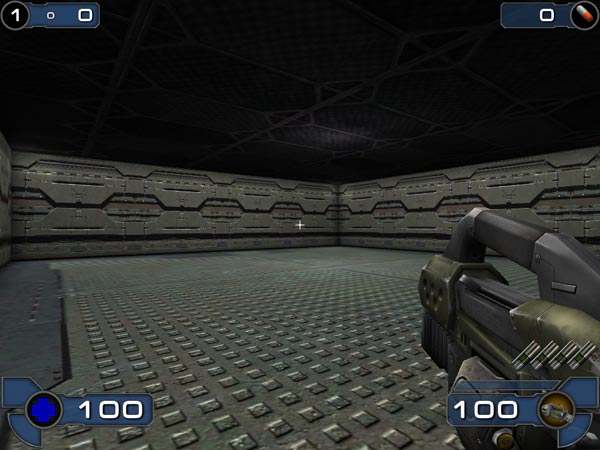
And of course a place where a player can start playing, this is called a player start (spawnpoint). Adding a light is simple: just rightclick on the place you want the light to be and choose "add light here" from the menu that appears. When you added the light you can see an icon that represents the light. You can move the light by selecting it (like all other objects) and move it to the place you wanted it to be. If you select a light it will turn green which indicates it's selected. We could adjust the properties of each light by right clicking it and choose "light properties" but this will cover a whole tutorial, because there are many things you can adjust. I will write a separate tutorial on this subject later on. Now let's add a player start. Right click on the place you want the player start to be and choose "add player start here". I suggest placing a player start in one of the corners (close to the floor of course). You can add more if you want to let other players spawn at these points. It is now time to finish up your room, with a very important step called "rebuilding". If you do this, the engine calculates various things like light intensity, shadows and many other geometrical things. You have to do this to see a map the way you meant it to be. So when you make a map never forget to rebuild (and then save). You can rebuild by selecting "build all" from the "build" menu or by pressing F8 and then click "build". If you save a map it will be saved by default in the "C:\UT2003\Maps" folder. If you want to play your level press CTRL+P and UT2003 will load your map. You can also do this by selecting "play level" in the build menu. If you want your level to appear in the menu inside UT2003 then you have to call it "DM-something" so that UT2003 recognizes it as a deatchmatch level. That's it for now. I know it's a pretty simple map, but that's how everyone begins editing. I will cover in next tutorials how to place weapons, pickups, adjust light properties, make lifts/doors move and how to make a more complicated map than just one room.
This is my first tutorial ever. So I certainly know it is not perfect. |
Unreal® II© Unreal® 2003 2001 Epic Games Inc. Raleigh, N.C. USA Unreal and the Unreal logo are registered trademarks of Epic Games, Inc. ALL RIGHTS RESERVED