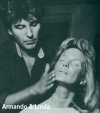

Armando Cosio has been a professional makeup artist for fifteen years. We have been working together steadily for just over two years now. I first bevame aware of Armando because I make it a habit to look up the names of makeup artists responsible for the work I admire in magazines. I`m by no means the only face Armando makes up. Elizabeth Taylor, Raquel Welch, Olivia Newton-John, Brooke Shields, Beverly Sassoon and Victoria Principal are only a handful of the famous faces that Armando works with.
He is in the process of writing his own proffesional beauty book. However, he has consented to share the makup tips and methods that he has taught me. Obviously, makeup for still-and motion picture photography is different from our beauty salon in Los Angeles, where he makes up woman for both show business and everyday use, not following section on makeup is for day and evening use, not proffesional photography. It includes what I feel is the most important information. I`ve ever learned about makeup. It works for me.
It`s all in the eyes...
One of the most flattering looks for the eyes I`ve ever seen is a trick that models, on the covers
of high-fashion magazines around the world, have used for years. I`ve seen it done time and time
again, but I could never figure out how they did it. I read all the magazine articles but they
always kept that particlar part of a secret. Then one day, Armando did it to my eyes. After years
of frustration, the secret was finally mine. Now it`s yours, too.
For this secret look, you will need only black cake eyeliner, and a very thin (small) sable brush. Lift your eyelid slightly to expose the thin rim of skin under lash base. Take the sable brush, dip it into water, and blend a small amount of the black cake eyeliner on it. Carefully draw a dark line with the brush on the exposed rim close to the lashes. Then immediately put down the brush, still holding your eyes open, and carefully fan the wet rim of the eye until the liner is dry. Then lower the lid.
The cake liner keeps the color from smearing down to the bottom rim as most pencils would. This gives you a thicker looking lash, without a line, for summer at the beach or daytime. It even looks great in the evening with eye shadows and the pencils Armando recommends using around the eyes (found in the following eye section). When applying certain eye makeup you vision has to be very good, or as Armando pointed out to me, there are special magnifying eye glasses (in which the lenses actually lift up on either side so that you can both see and put on you makeup), and of course there are many powerful magnifying mirrors. To do your eyes you will need: an eyelash curler, black mascara, three eye pencils (thin ones) brown, gray, and black-gray brown powder shadow, gray powder shadow taupe powder shadow, black cake eyeliner, and an eyebrown brush. These shadow colors are fairly neutral and will enhance any eye colors.
Line over and under entire eyes with brown pencil very close to the lashes, and blend with fingertips, Q-tip, or a small sable brush. Your eyes should be surrounded with a haze of color, not a heaavy dark line. Now take your taupe powder eyeshadow and brush it over the pencil line to set and to further soften the blended effect. Then take a little taupe shadow and brush it on the eyelids from the lash line to just slightly above the eye crease and blend carefully. Curl the lashes and apply two coats of black mascara (for recommended mascara application see below). To further define the eyes you can line the upper and lower inside rim of the eye with gray or brown pencil.
Curl the lashes, apply one light coat of mascara and wait a few minutes. Then lift the eyelid slightly to expose the thin rim of shin at the lash base. Now take the tip of the mascara wand and wand and dot mascara carefully at the base of the lashes. Remember, the greates amount of color and thickness should be at the base of the lashes and not on the tips. Now brush on more mascara in the normal manner to distribute it to the tups of the lashes. Applying mascara this way will create the effect of a thicker, darkner lash base that beautyfully frames the eyes and tapers to a fine featery tip or end.
Your eyebrows frame your eyes and also give them expression. To preperly tweeze eyebros: Soften the brows by saturating two cotton balls or a washcloth in hot water. Place the saturated material over the brows. Allow it to remain long enough to relax and soften the eyebrown tissue. To remove the hair from under the brow line: brush hair upward and shape the lower section. Make sure you tweeze all the stray hairs and alternate between both brows to obtain proper balance. After you have tweezed the brows, carefully wipte the area with an astringent to contract the skin. Then brush the hair, placing it in its normal position. Pencil where necessary. The high point of the arch should be just above where the iris (the colored part of the eye) meets the white on the outer corner. A soft lead drawing pencil is best for brown shades. Silverized beige is best for blondes. A little hair spray on your eyebrown brush will help control unruly browns and keep them in place.
Another suggestion Armando has given me concers moisturizing. It`s important to treat you nec with the same special care you give to your face. Whenever you cleanse, scrub, or moisturizer your face, you should always remember to do the same to your neck. The skin on your neck is very delicate and and wrinkles as easily as the face. Whenever possible, also moisturize the skin just behind the ear (unfortunately, it tends to make the hair oily, but it`s still part of the face). Personally, I like to use tinted moisturizers instead of makeup, especially during the summer when I have a slight suntan. Many women think that the older they get the more makup they need. Armando has shown me that that`s not always the case. As we get older the colors we use are more crucial than when we were younger, but the less makup applied the younger the face will usually look. Caking on the makup only accentuates the lines in the face.
After your skin has been propertly cleansed, toned, and moisturized, wait five to ten minutes for your skin to normalize. Be sure to select a color that will match your neck color so that you won`t have to apply it all the way down your neck (and ruin your expensive clothes). Remember you are trying to match your skin tone, not change it. Dot your foundation on lightly, and concentrate that appllication in the center of your face.
Now blend with a slightly damp natural silkk sponge; from the bridge of your nose upward toward your hairline, then downward over the tip of the nosem upper lip, lips, chin, and jaw. Then across the bridge of the nose to the inner eye corner, under the eyes and eyelids, and out toward the hairline. Finally, from the nose again, to the cheeks, ear, and jawline. "Use long, smooth strokes and blend carefully" Think of a starburst as you blend quickly and evenly. The effect should be like a drop of watercolor on a wet piece of paper - the most intensity in the center, fading to almost nothing as it reached the outer perimeter. Some women often make the mistake of applying their foundation so heavily that they end up with the makeup collecting at the hairline, on the ears, and at an unsightly demarcation line showing around the jawline.
A light application of cream rouge before powderin is by far the best way to get a lovely natural glow that seems almost as though it`s coming from within. It gives the skin a moist, dewey, fresh young look unlike powder blushes that somethimes seem to just sit there on the surface like a coating. (But Armando has a great trick for powder on page 66.) A special tip: If you don`t have cream rouge just use a few dabs of your lipstick. It works beautyfully and gives you a lovely glow.
Application of cream rouge. Apply cream rouge with fingertips or a dry latex sponge. Place a dot of rouge on each cheek. Then use what`s left on your sponge or fingers and blend on your eyelids, forehead, and then on your chin. Application of powder blush. If you must wear powder rouge or blush because of skin breakouts from the cream ones, here`s a trick that works very well with powder blushes. After powdering with translucent loose powder, apply the powder blush layer by layer instead of all at once. After you`ve applied the desired amount, take a natural silk sponge that`s been dampened with cool water and press lightly over the powdered rouge until all the excess powder has been absorbed by the sponge. Somehow, you get a more translucent, natural look.
Use a loose, translucent powder, brushed on with a large powder brush. This will set your makeup, help it last longer, and reduce any shiny areas. Begin with your forehead, then your nose, eyelids, chin, and finally your neck. After you`ve applied the desired amount of powder, take a natural silk sponge that`s been dampened with cool water and press gently over the powdered areas until all the excess powder has been absorbed by the sponge. It will give you a more natural look. This is something I always do after powdering my face. At this point you may just want to add a little mascara to your already curled lashes. Then a bit of gloss to your lips and you`ll have a wonderfull clean, healthy, natural look.
To achieve very natural looking, beautiful lips, applu your lipstick in the usual manner, and then simply blot until there`s only a strain or hint of color left. Then add just a bit of gloss for shine. If your lips are "too" full just line them slightly within your own natural lipe line. If your lips are "too" thin, line them slightly outside your natural lip line. Always match your lipliner to your lipstick so that your never have an obvious outline. If you`re the type of woman who doesn`t look well in a lot of lip color, use tinted lip gloss or make your own by using your favorite lipstick and mixing it with clear lip gloss. If your lip color doen`t last: Apply lipstick, and blot powder slightly over lips, and then reapply lipstcik.
Armando usually waits until he`s done all the makeup before using any concealer, because once you`ve emphasized all your features, the imperfections are less noticeable and therefore need minimal attention. This way you avoid that overly concealed look, like white rings around the eyes, heavy deposist of light pigment around the nostrils, mouth, and eyes. You don`t want your coverups competing with your eyes, lips, or cheeks, thereby defeating your prime purpose.


