Connecting to MetroFi Free Wi-Fi using a Buffalo WLI-TX4-G54HP
Resources
Metrofi Support Click here
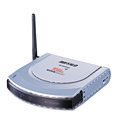
Buffalo Tech AIRSTATION TURBO G HIGH-POWER ( WLI-TX4-G54HP ) Click here
Buy at Amazon Click here
Instructions
NOTE:
these instructions are provided on an "at your own risk" basis. I did ultimately did not have a good experience and was only able to sporadically achieve connectivity. This information is provided in the hopes of helping you avoid some of the quirks I encountered. Ultimately I returned this device as I wasn't able get satisfactory service.
CAUTIONS
disable all other network connections
do not disable the connection to the Ethernet Controller at any time during this operation
Remove the antenna from the Ethernet Converter
connnect Ethernet Converter to your PC
Plug in the Ethernet Converter
Reset the configuration of the Ethernet Converter by pressing the
INIT button on the bottom of the unit for 7 seconds.
Set your IP address to 1.1.1.2
Insert the installation CD
Run the AirStation - Ethernet Converter Manager
Select Edit > Search for an Ethernet Converter
It should show only one row
Click on the Configure button, it can take 30 seconds for the
browser window to open.
Set Admin Password
Click on Advanced
Click on Management
Click on Name and Password
Enter a password. It must be no more than 8 characters or you
will not be able to log in again and you'll have to reset
the Ethernet Converter to it's factory settings. Despite what
the help says, you cannot use the dash, only the underscore.
Note that the userid to login is always "root".
Disallow adminstration from wireless clients
To further improve security, you should disallow management
of the Ethernet Converter by WiFi clients. This means the only
way to change the settings of the Ethernet Converter is by
plugging directly into the back of it using a wired connection.
Click on Advanced
Click on Management
Click on Name and Password
Check the box "Prohibit Configuration from Wireless Clients" and
then click [Set].
Set the Ethernet Converter Name
Once connected to the wifi ISP, The Ethernet Converter Manager
will see lots of Ethernet Converters on the network. You should
change the name of yours to something you will recognize.
Click on [Advanced]
Click on [Management]
Click on [Name and Password]
Enter an Ethernet Converter Name
Click on [Set]
Upgrade Firmware
Click on [Advanced]
Click on [Management]
Click on [Firmware Update]
Current version is 2.5, there are no updates available (www.buffalotech.com)
Set the wireless network
Screw the antenna onto the Ethernet Converter
Click on Advanced
Under Wireless Settings, click the [Search] button under SSID.
Select the SSID MetroFi-Free and click [Select]. If you do not see it
click [Retry]. If it still does not appear, you may need to reposition
the unit closer to a wall/window, or add an external WiFi Antenna.
Click [Set].
Set the Ethernet Converter IP mode to DHCP
In order to work with the WiFi ISP, the Ethernet Converter must
obtain it's IP address via DHCP from the ISP. By default it is
set to a static IP of 1.1.1.1.
Click on [Advanced]
Click on [Network Settings]
Select "Automatic Assignment (DHCP Server)"
Click [Apply]
Once you do this you will be unable to communicate with the
Ethernet Converter. You must now also allow your PC to obtain
it's IP address from the WiFi ISP.
Start > Settings > Network Connections > Local Area Connection
Click Properties, scroll down, and double click on
"Internet Protocol (TCP/IP)".
Select "Obtain an IP address automatically", then click [OK]
Click [OK], Click [Close]
Verify your IP address
Start > Run > cmd.exe
Type ipconfig
Inspect the value of "IP Address". It should be an IP address
assigned by your WiFi ISP.
If this did not work the chances are the Ethernet Converter
does not have a strong enough signal to send or receive from
the WiFi transmitter.
Determine the IP of your Ethernet Converter
To further manage your Ethernet Converter settings, you need to
get it's new IP address (the one assigned via DHCP from your
WiFi ISP).
Run the Ethernet Converter Manater program, note that if you
set an admin password, it will prompt you for it.
Edit > Search for an Ethernet Controller
Note that it will probably find several of them now, because it
is also finding the Ethernet Controllers used by your neighbors
who are also connected via the WiFi ISP. Locate your unit
by the name, and you will see the IP address currently assigned
to it. Click on the [Configure] button to change any settings.
Note that this address can change over time and so
each time you wish to manage the Ethernet Converter you will
need to repeat these steps.
Test your Connection
At this point you should be connected. Start a browser and
try going to http://www.yahoo.com. Also, things such as your
IM clients (Yahoo, AOL, Microsoft) should have automatically
connected.
Testing your Connection Speed
You can test your connection speed using the sites:
http://reviews.cnet.com/Bandwidth_meter/7004-7254_7-0.html
http://support.sbcglobal.net/dsl/speedtest/
http://www.dslreports.com/speedtest
If your connection is slow, it probably means that the
Ethernet Converter is not getting a strong enough signal.
Try an external Wifi antenna.
Back to Home