Before You Start
Materials: For the launcher itself I
used some gray PVC pipe I found in my local DIY store. The pipe needs to
be a fraction less than 21.5mm outside diameter, for the bottle neck to
slide smoothly during launch but still a good fit. To find the right pipe
it's probably a good idea to cut the end off a PET bottle and test the
pipe you find for a good fit in the shop before purchase. I tried B&Q,
in fact all the major hardware chains in my local area and none of
them sold pipe of just the right diameter. B&Q did sell some 21.5mm
waste pipe, however the diameter was just a fraction too wide. In the end
I found the perfect diameter pipe in a local independent hardware store
for the princely sum of 80p.

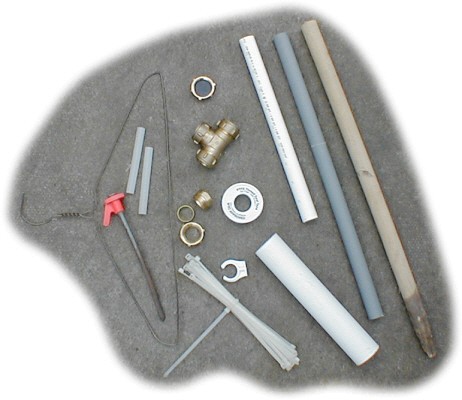
As well as PVC pipe you will also
need:
a 22mm tee piece compression joint
a 22mm end cap for the
above compression joint
another 22mm end cap, this time to seal the end
of a 22mm pipe (Not the same as the item above)
A spare 22mm
compression fitting nut.
Some 40mm waste pipe (this is sold at B&Q
for about £2 for 2metres)
PTFE tape
a wire coat hanger
Cable
ties
A car type valve. These can be bought for pence at a care tyre
replacement shop, if you ask nicely they sometimes give you them for
free.
Getting Started
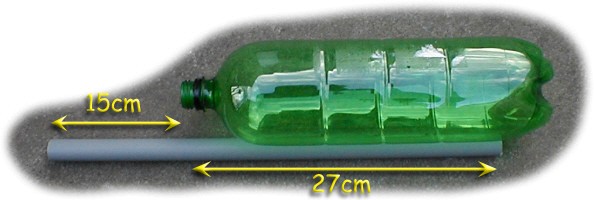
Insert the pipe you are going to use
as the launch tube into a PET bottle. Mark the point at which the bottle
will launch from on the pipe. Measure 15cm from the neck of the bottle,
down the pipe and cut.
For my 2L pop bottle launcher the pipe
length was 27cm into the bottle
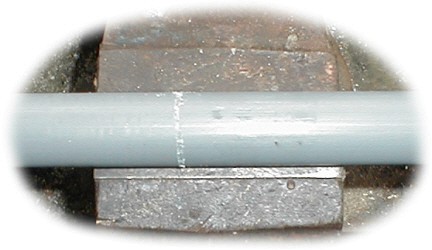
Make a small groove around
the launch pipe using a hacksaw at the point you want the rocket to sit
prior to launch, i.e.. 16cm from the bottom end of the pipe The groove
should be no more than 0.5mm deep.
The groove is designed to hold the
PTFE tape in place, which will act as a gasket to seal the
bottle while it is being pressurised for launch.
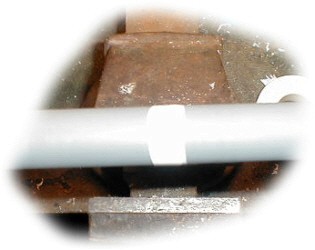
Now wrap PTFE tape
around the groove for a few turns.
Check by sliding the bottle into place, that you have just enough PTFE tape to ensure that the neck of the bottle will seal when it is pushed fully over the tape.

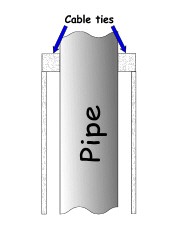
This is the slightly tricky part. a little below the point where the bottle mouth will sit (on the PTFE tape) hold several cable ties around the pipe. The cable tie heads should be facing towards the pipe (see diagram). Use enough ties, so that the heads of the cable ties are against the pipe and touch each other at the sides. Loosely cable tie these ties to the pipe. I have used three cable ties to secure the launcher ties.
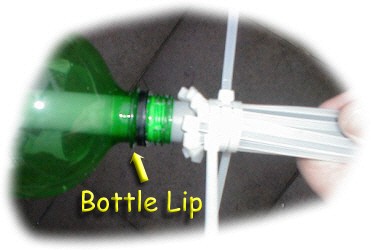
Now push the bottle into place over the PTFE tape, to the point on the tube where the bottle will launch from.
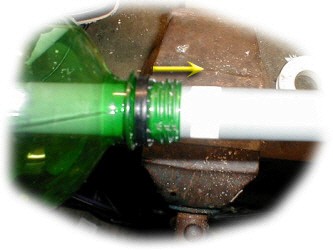
Pull each of the cable ties up one at a time so that the tie heads sit over the lip on the neck of the bottle (arrowed).
With all the launcher cable ties in place, tighten the cable ties that are around the tube, in order to hold everything in place.
This will be the clamp mechanism to hold the rocket in place whilst it is being pressurised for launch.

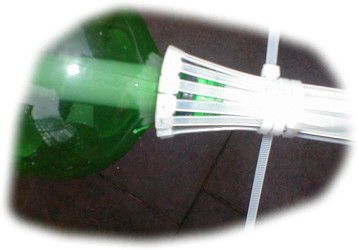
Trim the ends off the
cable ties around the pipe and if necessary add some extra cable ties
around the tube. I used three more. One is underneath. These all help to
clamp the launcher ties in place.
Then use hot melt glue to
further hold the launcher ties in place.

Trim the launcher ties.
It will probably be necessary to file down the heads of the clamping cable ties (arrowed), ready for the next step in the construction of the launcher.
This will allow the locking collar to easily slide over these Cable tie heads.
Making the Locking collar
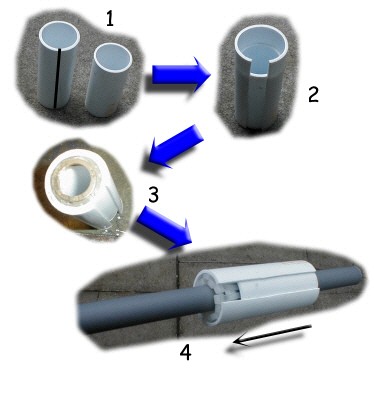
To make the locking collar
I used 40mm waste pipe from B&Q. I cut two pieces, one about 7cm long
and the other about 9cm long .
(1) Cut a slit down the full length
of the longer, 9cm piece of pipe.
(2) Spread the slit in the
longer pipe so that it pushes over the shorter one. The top part
of the longer split tube (seen in the picture) is the right diameter to
lock the cable ties in place around the bottle neck, while the rocket is
being pressurised.
(3) Turn the locking collar over and glue a nut from
a 22mm pipe fitting into the bottom section. I used plenty of hot
melt glue.
(4) Slide the collar up over the pipe to make sure it fits
OK. You may have to file the cable tie heads down some more as arrowed in
the previous step (above).
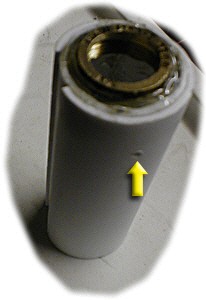
Once the collar slides on the pipe reasonably loosely (some friction is OK), remove it again and drill two holes about 0.5cm above the 22mm pipe fitting nut you glued in earlier. One of the holes is shown in the picture (arrowed), the other is on the opposite side.
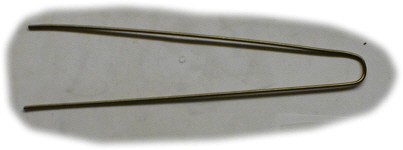
Take a wire coat hanger and cut it to size using a pair of wire cutters. Straighten it out using a pair of pliers. I used the whole of one side of a coat hanger.
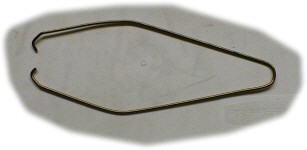
Bend the wire coat hanger into the shape in the picture.

Now carefully push the hooked ends of the wire into the holes in the collar.

This is the spring mechanism. It is designed to hold the locking collar in place before launch, whilst the rocket is being pressurized.
I cut it from the middle of a small half litre coke bottle. I then cut two holes, just large enough (22mm) for the launch pipe to go through.

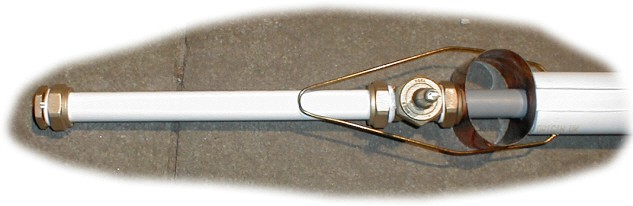
Slide the locking collar back onto the launch pipe and slide the retaining spring behind it.
Finishing off...

Slide the 22mm compression pipe fitting behind it and using PTFE tape make the joint.
Click here for instructions on making the 22mm compression pipe fitting joint.
The pressure valve is shown already attached to the 22mm pipe tee joint. See below for how this pressure valve is attached to the launcher.
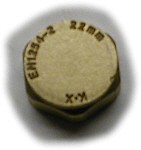
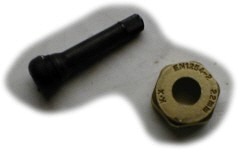

The pressure valve (Car tyre valve) is attached to a 22mm end stop. The end stop comes with a rubber seal/washer inside, you will need to remove this seal. Now drill a small pilot hole in the center of the cap. This hole will need to be successively increased to 14mm in diameter. I didn't have a 14mm drill so I drilled to 13mm and did the rest with a dremel type grinding tool. Put plenty of hot melt glue inside the end cap and firmly push the valve through. Once cool screw the cap onto the tee joint. Use extra hot glue and/or PTFE tape to ensure the integrity of the joint is maintained under pressure.
Now attach another 22mm pipe to the bottom of the 22mm tee joint and attach a 22mm end stop to the other end of this pipe.
In this example I had some 22mm pressure pipe, so I used this for the lower part of the launcher. It is about 25cm long.
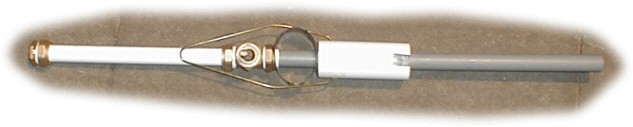
This is the completed launcher.
Standing the launcher upright
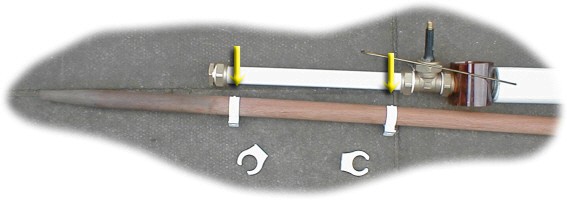
To save getting a soaking every launch, I made a simple stand which is driven into the ground. The launcher is then clipped to it prior to pressurisation. This also means you can fill the bottle with water, place the launcher into position in the bottle, then clip it to the stand... much less messy.
You will need a
wooden stake (about 22mm diameter), four 22mm plastic pipe clips and
a couple of wood screws.
Place two plastic clips on the wooden stake
just far enough apart to allow you to clip the launcher to the stake
(yellow arrows).
Drill two small pilot holes into the wood, through the
attached clips fixing hole.
Screw the remaining clips onto the stake
through these fixing holes.
Voila, you have a freestanding
launcher.

