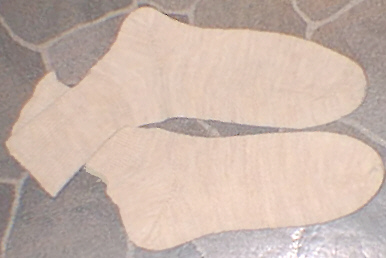
Lightweight anklet
by Leila Simonsen
Using 2/24 yarn, double-bed cast-on 80 stitches EON. Hang cast-on comb
and weights,
T-1.5; knit 3 rows circular, change to T-2 and rib, knit 37 rows.
T-2.5, knit 1 row; T-3, knit 1 row.
Transfer all ribber stitches to main bed, with double-eye needle, or use
transfer carriage if you have it.
Knit 1 row, increase 5 stitches (more-or-less evenly).
Drop front bed one notch, raise 21 needles each side of 0 to working position.
(You will probably have to remove the cast-on comb and insert a knitting-needle
in the back half of stitches to hang weights on.)
Using 20-prong transfer tool (I hope you have one) put 20 stitches from
left side onto front bed needles starting from zero-20 left.
Transfer stitch on needle 22 back to needle 21 front using double-eye needle.
Do the same with the right end stitches, putting the end stitch on the
left-of-zero needle which already has a stitch. (This will take care of
the seam stitch.)
You should have 2 stitches at the end to transfer to the front bed. At
any rate, you should have 21 stitches each side of zero on both beds. Hang
long bar weights on the front bed stitches. Set both keys for circular
knitting, and knit 20 rounds. (40 on RC)
Now we will turn the heel. Set back bed for non-knitting, set front
bed regular knitting.
*Pull up first needle on carriage-side (we are going to do automatic-wrap
short-rowing.)
Knit across, repeat from * until 14 stitches remain in working position
in the center.
(Don't forget to keep moving the weights up and in every few rows, pull
down with your left hand if necessary to keep all stitches knitting off
correctly.
** Now push 2 needles from hold opposite carriage into upper working position,
while continuing to push one needle on carriage side into hold each row
(I know this sounds strange, if you have never done it before; take my
word for it - it works! Remember to keep moving the weights up and out)
When all needles are back in working position, reset carriages for circular
knitting.
Reset RC to 0. Knit 75 rounds, 150 on RC.
This is about right for a size 10-1/2 sock. If you need larger or smaller
just do a few more or less rounds.
I like to make the cuff about 1/3 shorter, & after seaming, turn it to the inside and tack the rib st. together, for a sort of a golf sock. (Not that I am a golfer!)
Now we will decrease for the toe.
*Using double transfer tool, move end stitches in on both beds.
Knit across 4 times (2 rounds) repeat from * until those 14 stitches remain
in the middle again.
Set back carriage for non-knitting; front carriage for regular knitting,
using waste yarn, knit 6 rows. Now set back carriage for regular knitting,
front carriage for non-knitting, and knit 6 rows.
Remove weights, hold sock with left hand, pulling down, remove yarn from
carriage and knit off. Now you can Kitchener the toe stitches together
neatly
(if you don't know how to do this, check any knitting instruction book)
and sew the back seam in the ribbing.