 |
|
|
|
|
|
|
|
|
|
|
|
|
|
|
|
|
|
|
|
|
|
|
|
|
|
|
|
|
|
|
|
|
|
|
|
|
|
|
|
|
|
|
Page 2 |
|
|
|
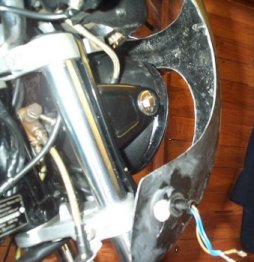
The next step was to line up the fairing and dash to establish the best place to fit the fixing screws. The fitting kit that came with the pattern faring needed a hole to be drilled into the fairing body where the brackets were secured using a nut and bolt ........ I don't think so!! I had been in contact with John Stride who had fixed bolts on the inside of his fairing using body filler. This is the method I chose (thanks John). I glued two stainless M8 bolts to two stainless washers and, after trimming the dashboard to fit around the R65's cowling I lined everything up by eye and marked accordingly. |
|
|
|
 |
|
|
|
Trimming with the Dremmel -what a tool! |
|
|
|
|
|
 |
|
|
Lining up by eye. |
|
|
|
|
|
|
|
|
|
|
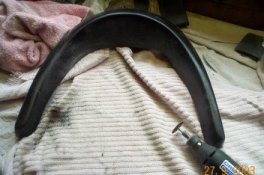
I decided to use the metal struts that came in the kit to mount the fairing. I bought a couple of cheap right angle shelf brackets and drilled/enlarged the holes in them. These two brackets I attached to the upper mounting bolts on the R65 headlight bracket. I then bent and shaped the mounting struts to fit. The struts had to have slots ground in the edges to give them clearance for the existing R65 cowl. It was all a bit of trial and error as it was almost impossible to measure anything accurately in situ. I temporarily fitted the struts, dash and screen to check for alignment. It all looked O.K. so I had the brackets galvanised. |
|
|
|
 |
|
|
|
 |
|
|
|
|
 |
|
|
|
|
|
|
 |
|
|
|
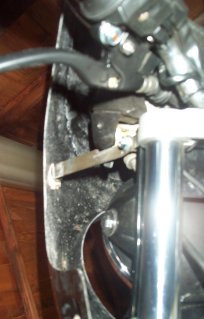
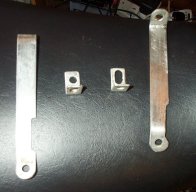
Galvbanised brackets |
|
|
|
|
|
|
|
|
|
I propose to remanufacture new brackets closer to the original design using stainless steel in the near future. I also need to replace the embedded bolts as I didn't use ones that were long enough! |
|
|
|
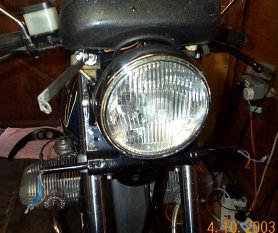
I decided to fit a voltmeter (sourced from www.speeding.co.uk) and relocate my Sigma Targa speedo thingy where the clock should be. I took the voltmeter feed from the spare wire off the ignition switch and plumbed the instrument light into the existing speedo lighting ciruit using scotchlock connectors. I used a 6 way connector block so the fairing caould be easily removed. |
|
|
|
 |
|
|
|
The instrument holes had to be cut. I marked them out with a compass after looking at many R90S pictures. I then cut and shaped the 50mm holes using the Dremmel until the voltmeter fitted both holes. I mounted the Targa on the body of an old, broken voltmeter. I did this by replacing the glass with a plastic disc and screwing it onto this. Not one for the purists but it's got a clock on it! |
|
|
|
|
|
 |
|
|
|
 |
|
|
|
|
Click to go forward |
|
|

|
|
Click to go back |
|
|
|
|
|
|
|
|
|
|
|
|
|
|
|
|
|
|


