Step by step tutorial
1. Configure (only first time you run)
Press "Configure..." and confirm that the path to Windows Media 8 encoding
utility is correct. If not, press "Browse..." and locate it.
2. Select source
Press "Browse..." button right to the source edit box and select the file
to encode. This file must be an avi file with 16-bits PCM sound (ie. uncompressed),
you can check this by pressing the "Source info..." button.
Then press "Parse source info" and hope that all works ok =). This
executes the encoding program to get info of the source and then parses
the output and fills in the correct fields in the program (width, height,
framerate and time segment). Check all values to see if the look correct.
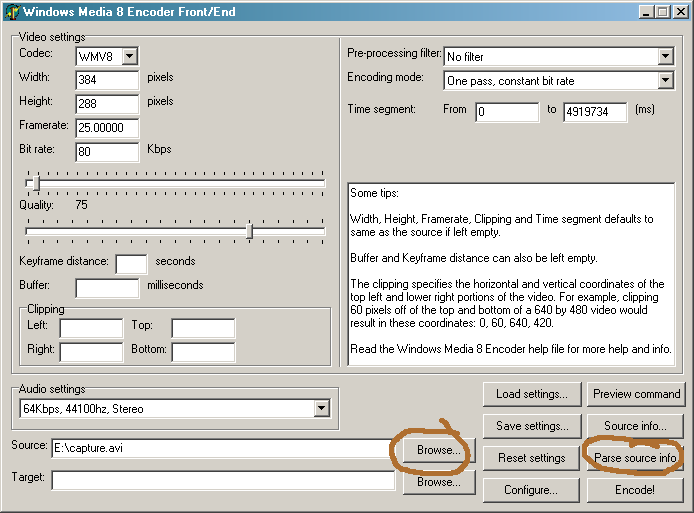
3. Select target
Press the "Browse..." button right to the target edit box and select where
you want to save the WMV movie.
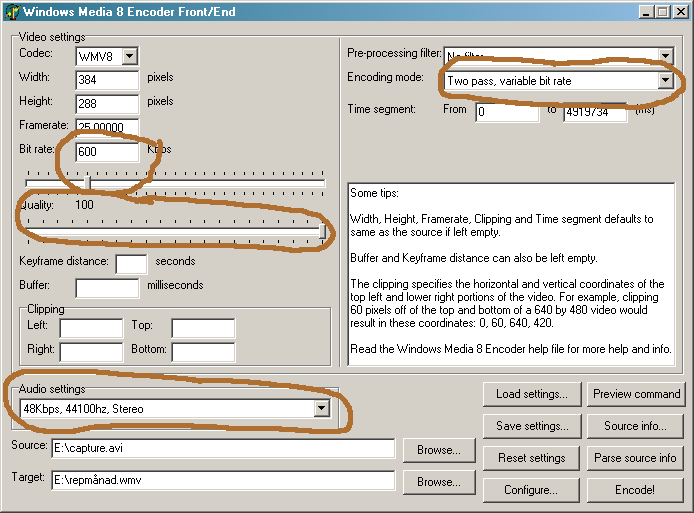
4. Basic settings
-
Select bitrate, this can be calculated with a ordinary DivX bitrate calculator.
Somewhere between 500 - 750 should be used for good quality, even though
Microsoft claims 250Kbps should be enough for VHS quality.
-
Set quality, I refer to the encoding utility help how this affects the
encoding. Use quality 100 if nothing special.
-
Choose encoding mode. Basic rules: If you're in a hurry, use one pass.
If you plan on streaming, use constant bit rate. Most commom is two pass,
variable bit rate which gives the best quality and compression. This can
take quite some time though, since the film has to be processed two times.
-
Select audio settings. The default, 64Kbps - 44100hz - Stereo, should work
just fine.
5. Advance settings
These settings can usually be skipped, but anyway...
-
Codec should always be WMV8. No reason to encode to the old WMV7 format,
it sucks.
-
Set width and height for the encoded movie, if you want to scale the movie.
-
Select keyframe distance, this is the time between each keyframe. If keyframes
are close to each other, seeking becomes faster but the filesize increases
somewhat. 10 seconds is the encoders default value, between 2 and 10 are
good values.
-
Buffer specifies how much video the encoder should keep in it's memory,
this doesn't affect the resulting video, only the speed and memory usage
when encoding. The default is 5000 miliseconds.
-
Clipping is great for removing black borders and artifacts on the edge
of the video. The coordinates specifies the upper left and lower right
corner of the croping rectangle.
If you want to clip 20 pixels on the right and 40 pixels on the bottom
on a 320x240 movie the coordinates would be:
Left: 20, Top: 0, Right: 320, Bottom: 200.
(Right and bottom coordinate are specified +1)
-
Pre-processing can be used to do a simple manipulation of the source before
compressing. Read the encoding utitlity help for more info about the filters.
-
Time segment can be used if you want to compress a segment of the video,
not the whole thing.