BACK
HOME
A Brief Class in Rendering
1. A Brief Class in Rendering
Elise Moss
Rendering is a skill that many AutoCAD users find difficult to acquire. But if you follow the 7 steps outlined below, you will be rendering your models successfully in less than an hour.
1. Create your solid model.
- You will need to "tweak" your model. It is important to note that a rendered model is different than a mechanical model. Accuracy is not as important for a rendering. When creating a model for rendering, you need to keep how light and shadow affects the rendering. Fillet all sharp edges to get a better look. Fillets will create smoother form and provide better shadowing.
- Add small radius fillets on edges to create edge .
- Add chamfers to parallel edges of similar materials
.
- Use slice to reveal internal features
.
2. Set up your viewpoint.
Be sure to save and name it as you will be changing your view when you place lighting. The best viewpoint is isometric & not head-on.
- Switch to an iso view
- Use "DVIEW" to refine your viewpoint
- Use the distance option to introduce perspective
- Use your zoom option of "DVIEW" to control your distance.
- Save your perspective view once you get the view you want.
3. Add lighting.
Switch to plan view to add lights.
Open render & pick lights icon.
Use point filters to place your lights.
Choose 'none' in attenuation option.
Enable shadows in two dialog boxes for them to take effect (render & lights).
Use fill lights to prevent dark shadowy areas.
4. Add landscape objects.
- Insert objects at appropriate scales.
- Do not choose "crossing faces - this will insert a proxy shape.
5. Add Materials.
- Switch back to your saved viewpoint
- Pick your materials.
- Choose materials & add to material list.
- Be sure to "attach" materials to make them stick.
- Steps are Select Material, Import, then Attach.
- You can convert a BMP file to a TGA file to use it as a material.
6. Set-Up for Rendering.
- FACETRES should be set to a minimum of 5 otherwise your edges will look jagged. The default is 0.5.
- Select "Photo-Real".
- Set anti-alias to high.
- Shadows should be on.
- Sub sampling should be set to 5:1
- Render Cache should be set to on to reduce your wait times. First time will be slow, but
- follow-on renders will be faster.
- You can select specific parts to render only, so you don't have to render the entire assembly. That way you can try out different materials on different parts without having to render the entire assembly.
- Use SETUV to get clean spheres.
7. Save the image.

For best results, save to a TIFF file, 4096 x 3092.
Once you get your model rendered, save it to a file and finishing your editing inside a graphics program (image or bitmap editor), like Adobe Photoshop or Paintshop Pro.
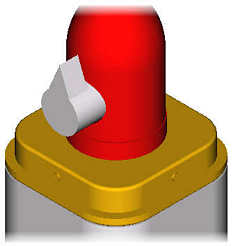
The image to the left is a novelty item designed and rendered by the author for a gift merchandiser.