| This simple
tutorial will guide you though the steps of creating metal text
in Photoshop |
|
| Step 1 | Creating Text | |
|
First,
create a new image, 400x400 pixels and fill the
background with the color that you like.
Use Type
Tool [T] to create text that you want to make look like
metal. For the best result use large text, e.g. size
75+.
The
color of the text does not matter so fill it with any
random color. |
|
|
| Step 2 | Inner Bevel | |
 |
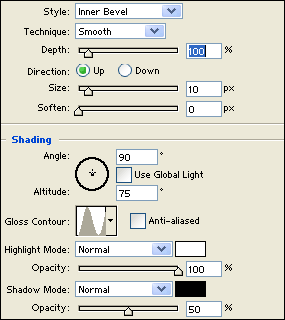
Now is the time to add
Inner Bevel to your shape. Right click on the text layer
and select Blending Options...
Layer Style window will
open, select the settings that you see on the
screenshot. |
|
|
| Step 3 | Contour | |
 |
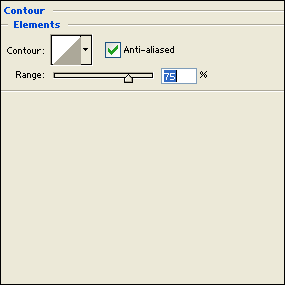
In the Layer Style window
select Contour on the left and use settings that you see
on the screenshot. |
|
|
| Step 4 | Satin | |
 |
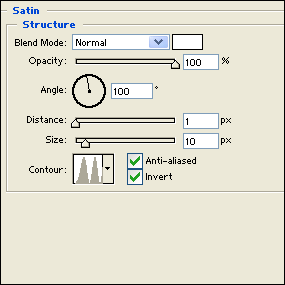
In the Layer Style window
select Satin on the left and use settings that you see
on the screenshot. |
|
|
| Step 5 | Gradient Overlay | |
 |
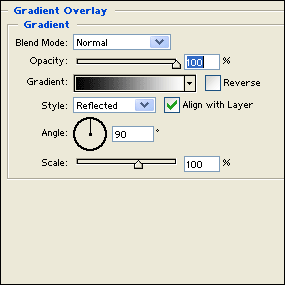
In the Layer Style window
select Gradient Overlay on the left and use settings
that you see on the screenshot. |
|
|
| Step 6 | Final Image | |
 |
Press ok when you done and
your image should look like mine.
Congratulations, you now know how
to create metal text |
|
