|
Resin cast, latex molds |
Poliurethane resin is mostly available at fine hobby shops. Skilled modellers use it all the time to replicate pieces they need for the model kits or figures.
Poliurethane resin, has the same density than oil. Usually you get two bottles of it. You have to mix them up in a proportion of 50% of each and it will react and get cured in about 5/10 minutes.
Although working with poliurethane resin is not that dangerous, you are handling chemical products. Get all the information you can from your supplier before start working with.
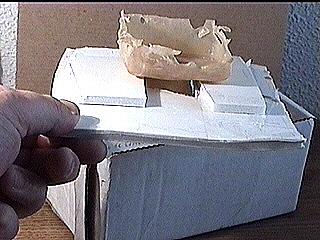
The mold we so patiently made is ready for rock&roll |
|
Now you need to cut a couple of cardboard pieces in U shapeThe inside part of the U, should be a bit wider than the neck part of your mold. |
|
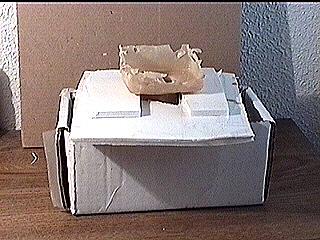
Use both U shaped carboard pieces to 'sandwich' the head this way |
|
an empty cardboard box is great as base for your mold. |
|
Now you pour the resinresin preparation.mix it in using a couple of disposable cups (I use disposable plastic cups, but this method is a bit risky as resin use to corrupt the plastic and all the operation should be made fastly so... make your own tests before messing it up)Pour about 50% of the resin and softly massage the mold to allow the resin get into the smaller and deepest details of the moldpour the rest of the resin and make the same 'massage' operationNow just let it dry for about 20/30 minutes.be careful! When resin reacts it gets quite hot!Remove the mold carefully just like the first time when you removed it from the original head |
|
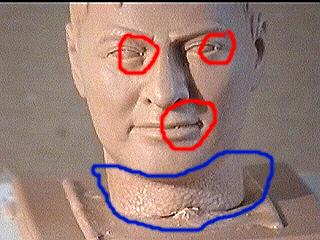
Here we got the first cast copyred marked are the results of air bubbles not removed when making the latex moldfortunately for me I can remove them easily using a sharp X-acto knifeblue marked is the typical result (sometimes) of the first copy of a new mold, as probably some baby powder still remained inside the mold, this reacted with resin this way, on the next copies you make with the same mold, you should have this kind of problem any moreAlthough you can use it inmediately if you are going to modify it: cut the extra resin, making the neck post hole, we better let it 24 hrs to cure completely. |
|
Notice that the copy we got had a flesh tone. That was because I added resin dyes when preparing it using specifical resin dyes. You can get them in the same place where you get the resinPoliurethane natural color use to be a tan pale color (like the head on the left) or grey. |
*intro--**main--**--customizing--**--action man archives--**--geyperman guide--**--madelman guide--**--let's trade--**--reviews&news--**--links* |